Screen recording
A ‘Screen recording’ is simply a video capture of your screen. The following guide provides a step-by-step tutorial on how to set up the recorder to be able to create a screen recording.
Please, note that examples are created on macOS. On Windows and Linux, screens might look slightly different.
Microphone and screen selection
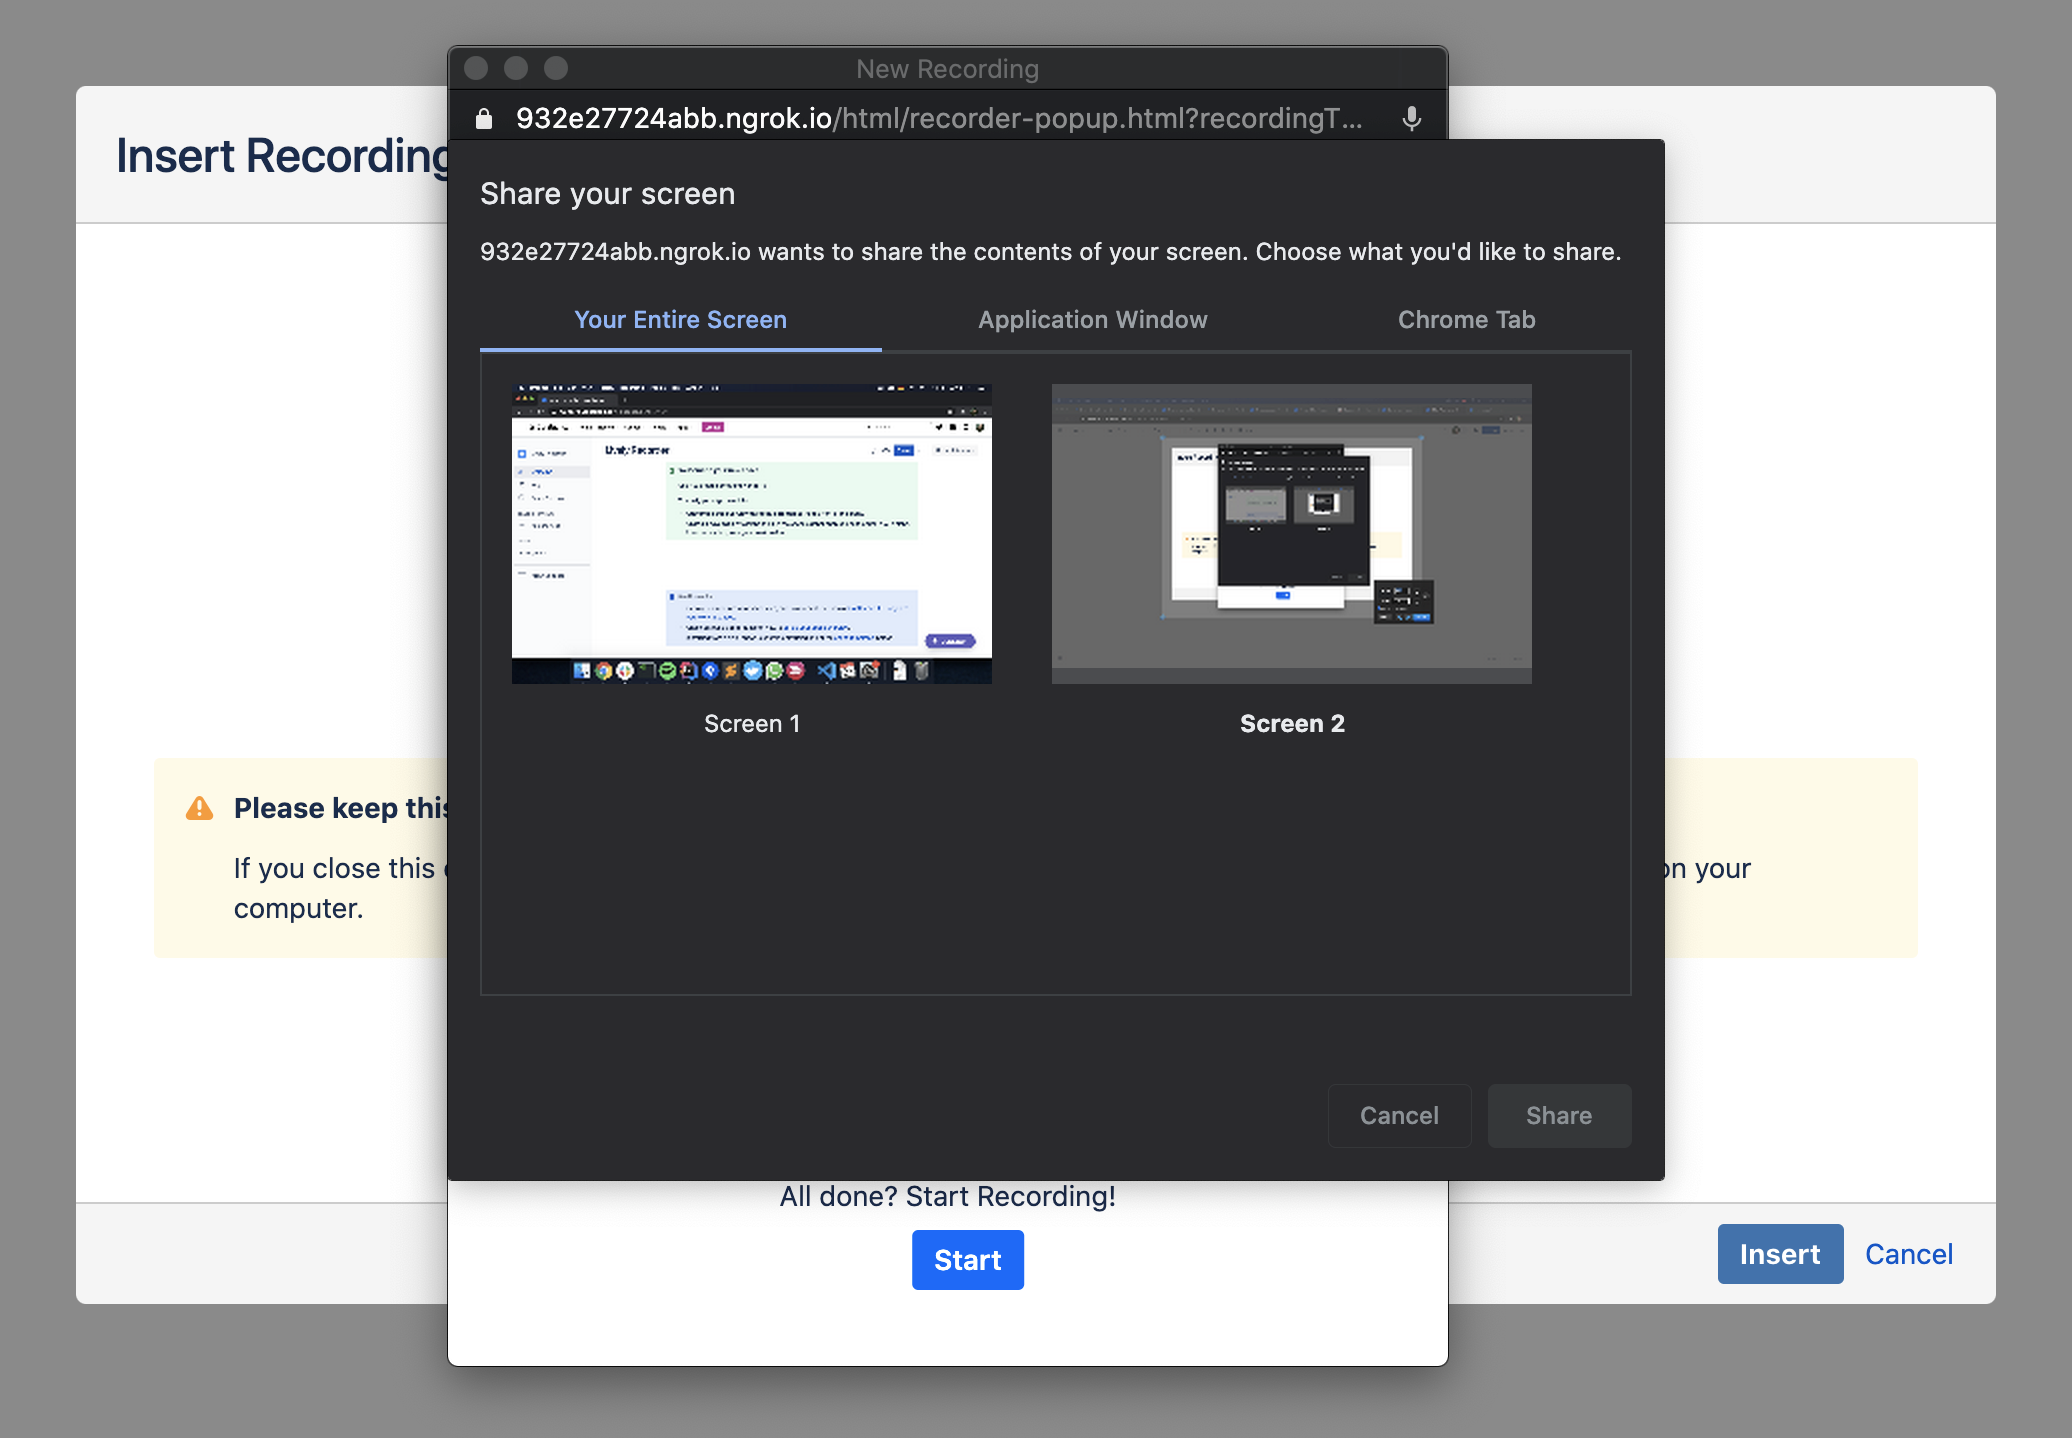
If you want to create a screen recording, at first, you need to select which screen or window you want to record. This depends on your browser, some browsers allow you to capture the whole screen, others let you select a window only. The screen recorder also captures your voice. Thus, it needs both microphone and window/screen access permissions. In the following subsections, you can find a tutorial on how to provide these permissions on Firefox or Chrome. If you cannot access recording devices from your browser at all, refer Microphone and camera usage permissions.
Chrome
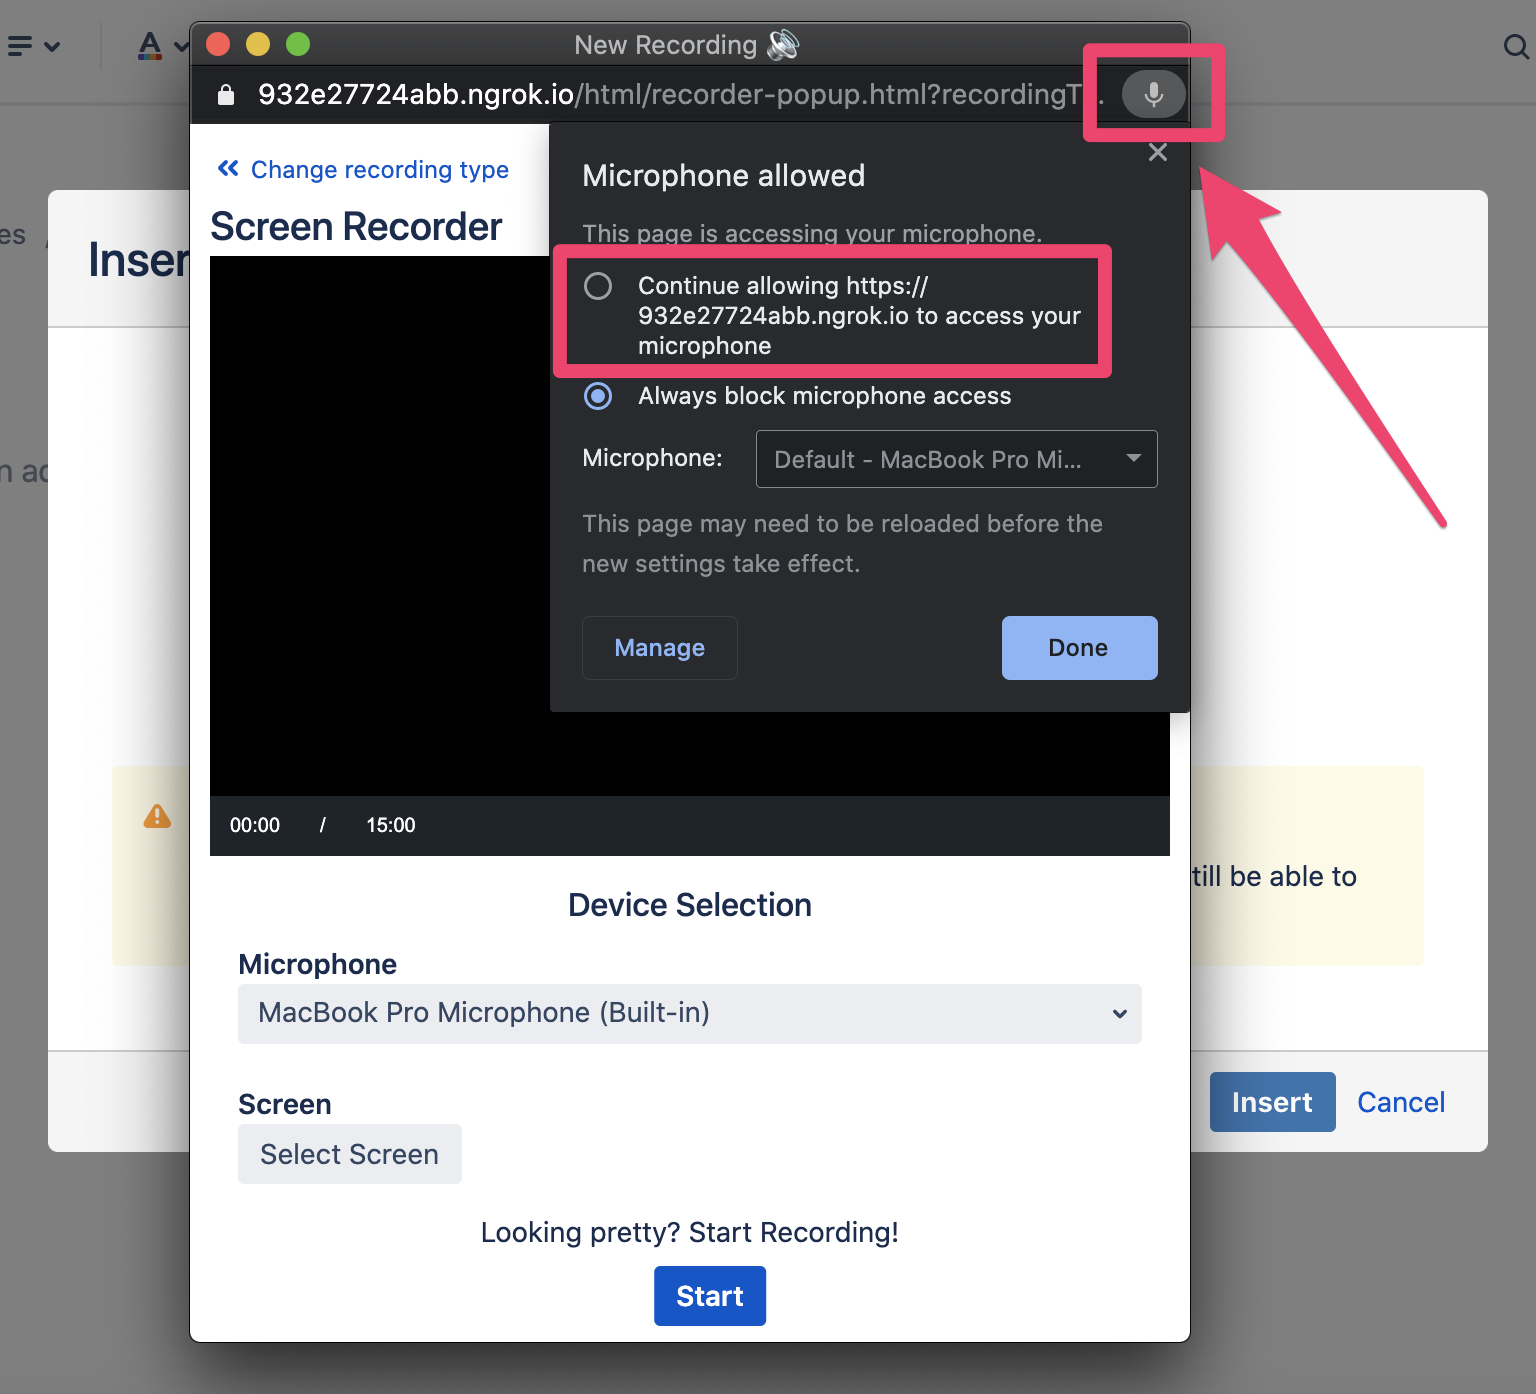
In Chrome, you will see the following popup:
If your browser disallows microphone access, you might see a “permission denied” error. In this case, you need to allow the access manually using the microphone icon in the top right corner of the window:
Firefox
In Firefox, you might be asked to provide microphone access at first. In this case, you can see the following popup:
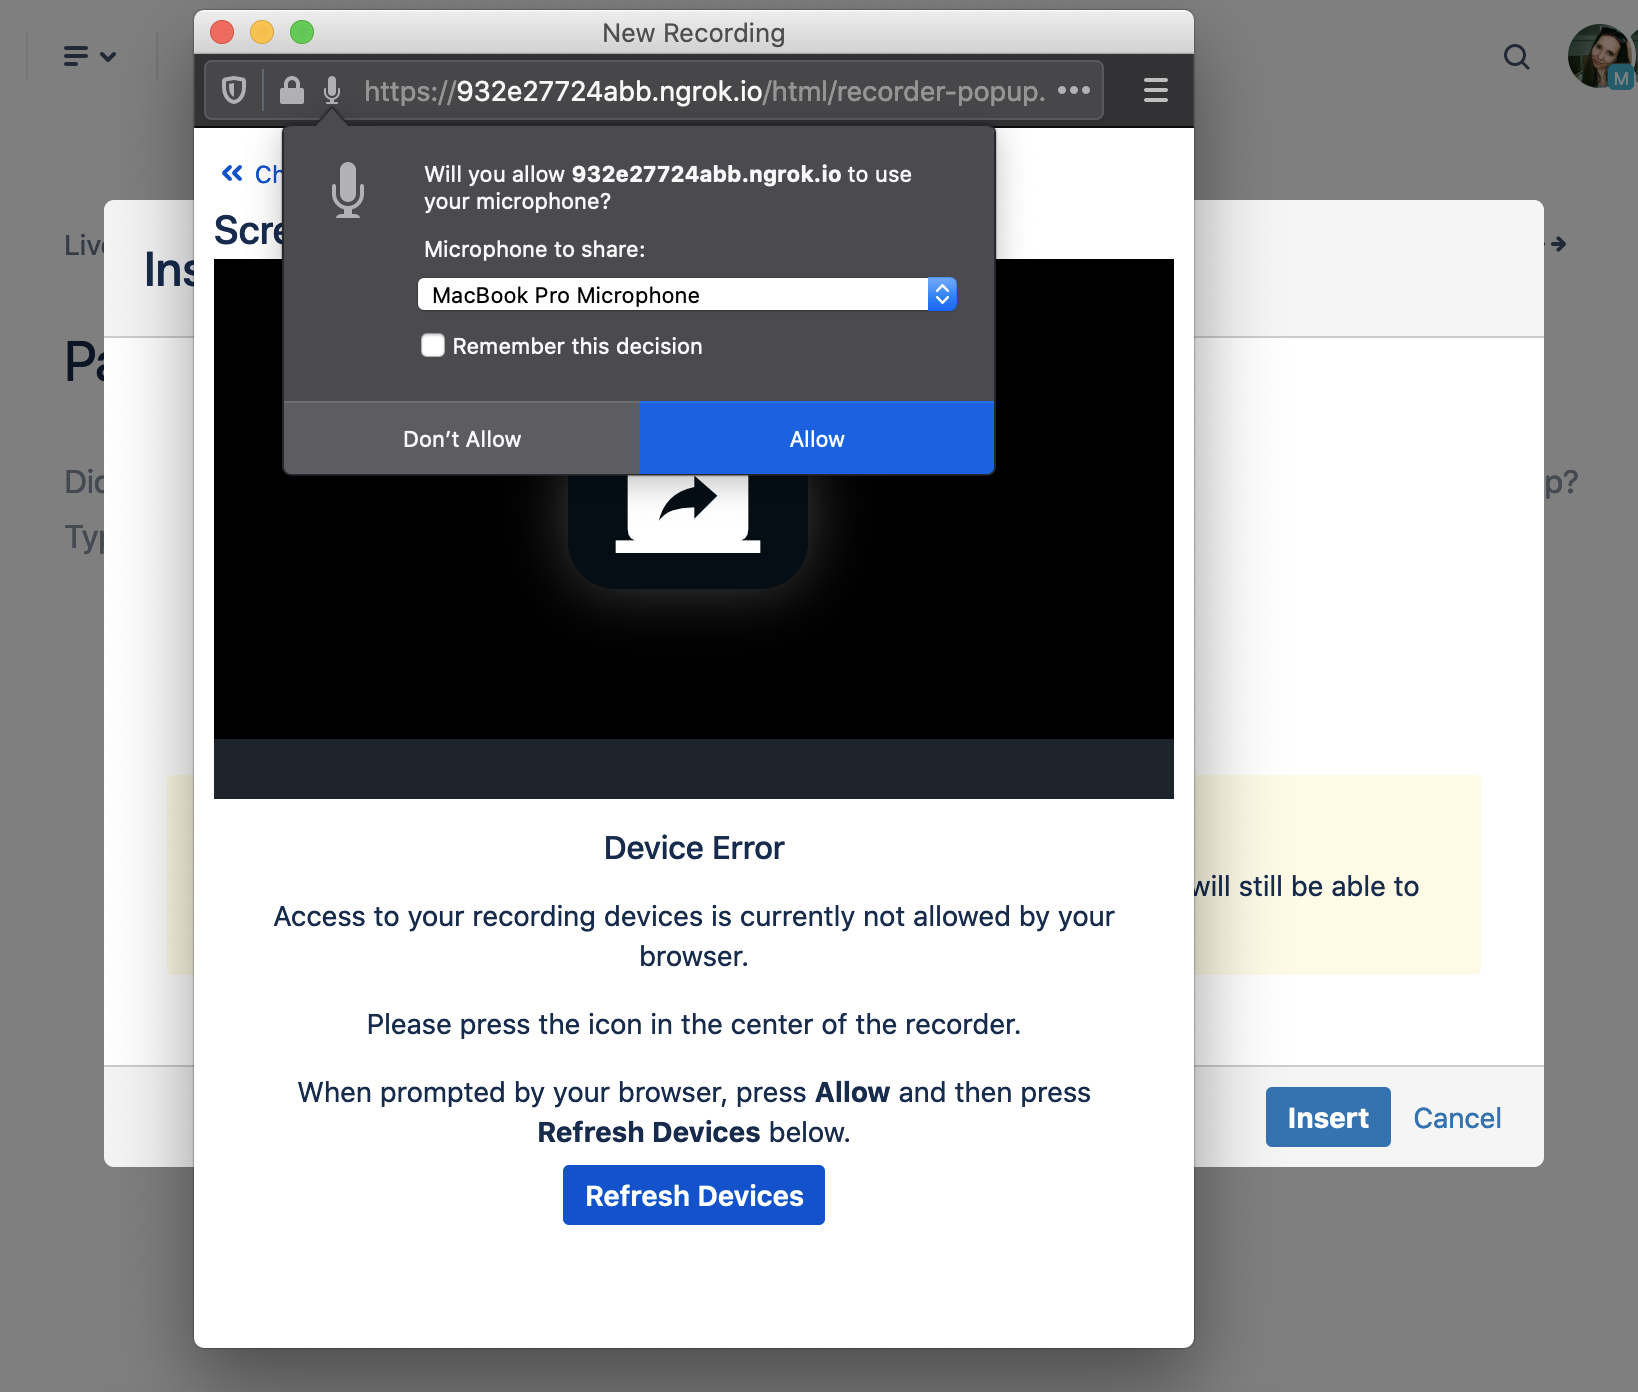
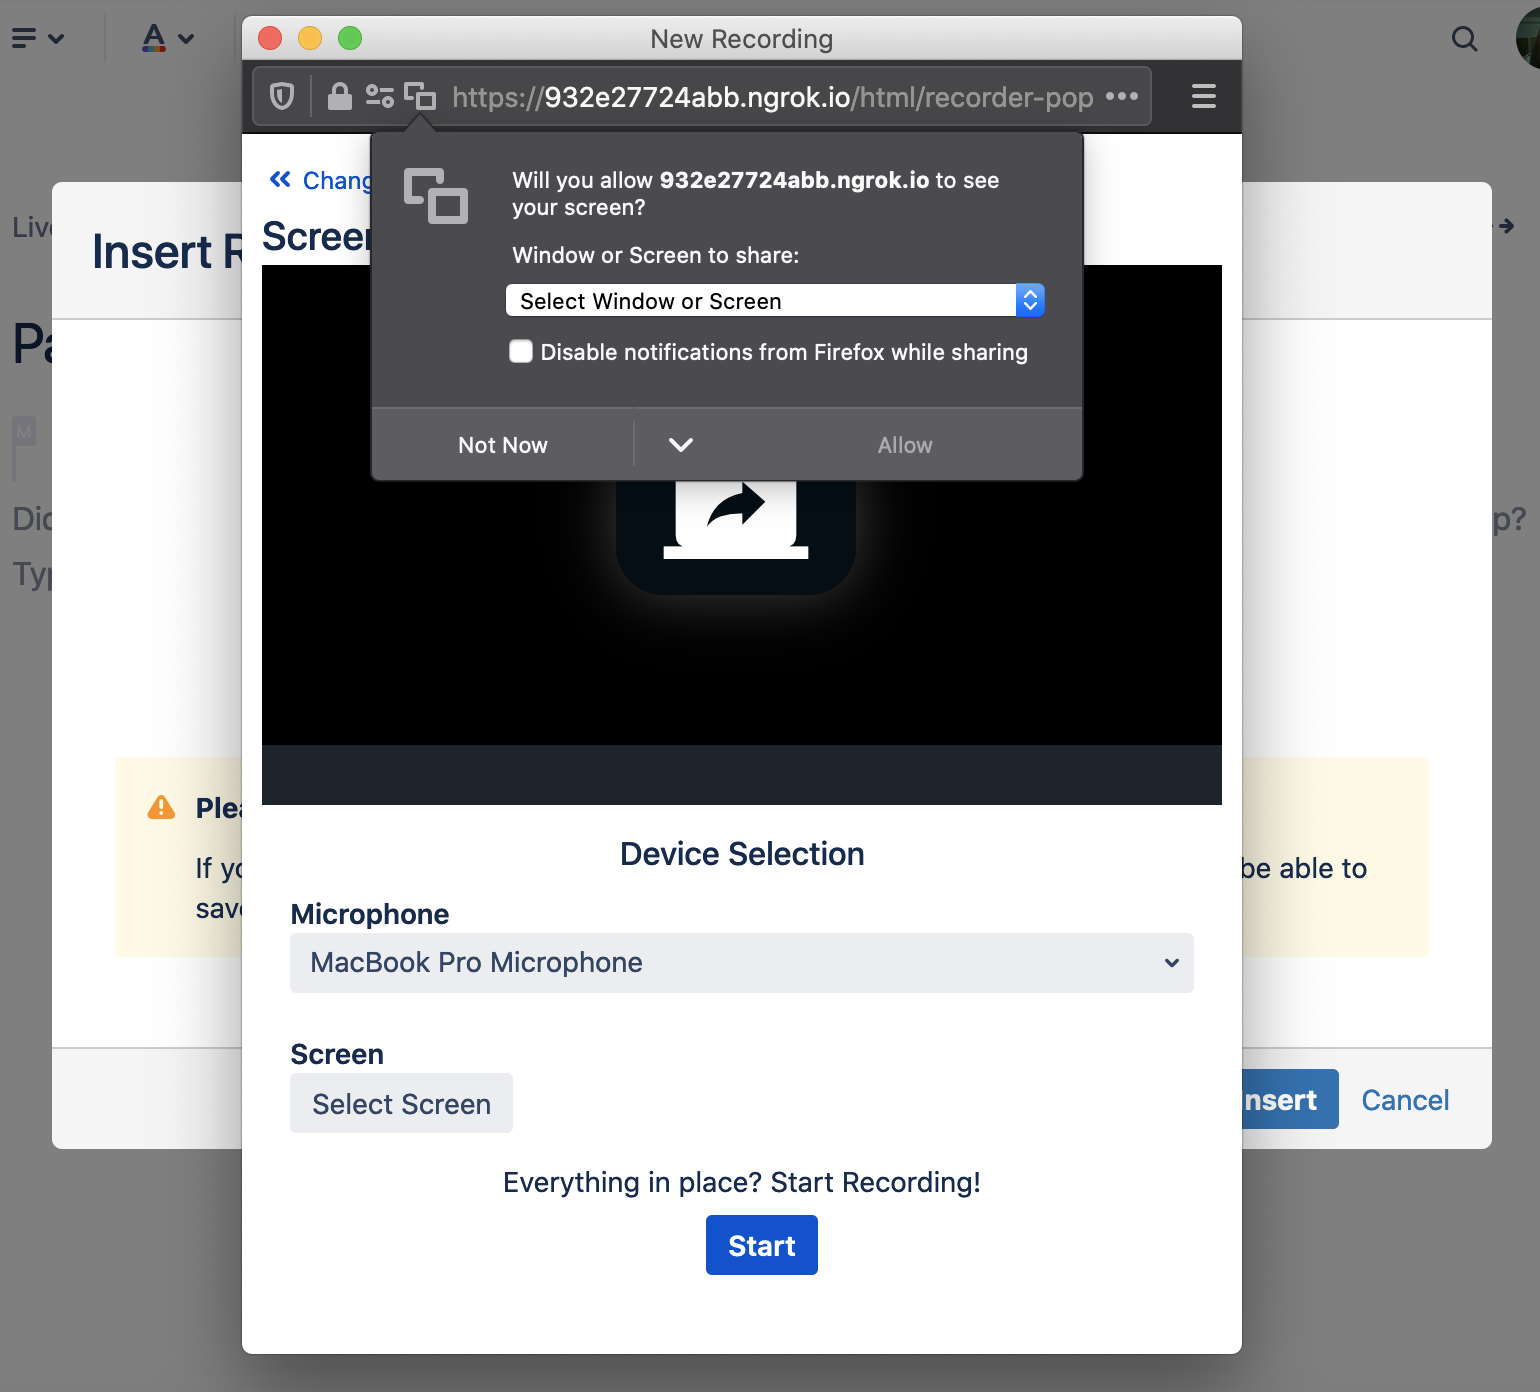
If the permission change is not detected automatically, click on the ‘Refresh Devices’ button. After your microphone access is successfully validated, you are redirected to the window selection. Then you can select the window you want to record:
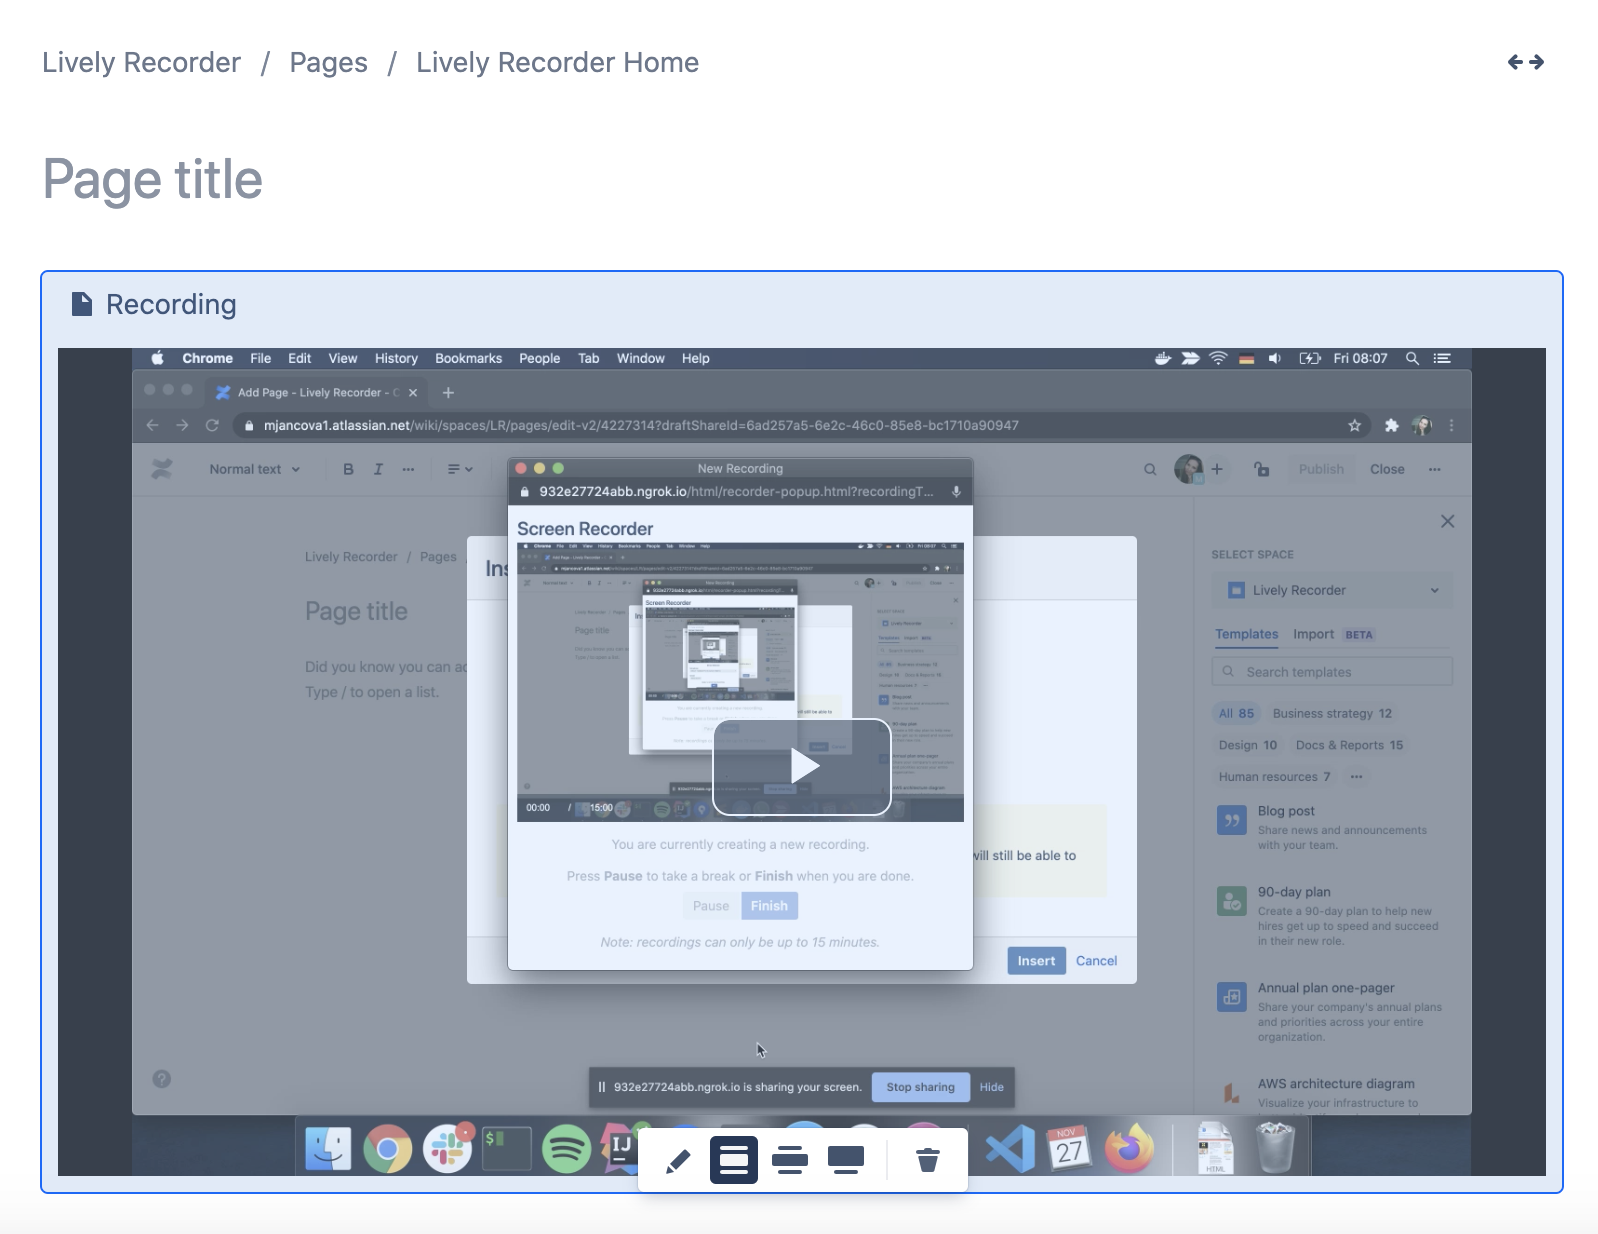
Starting recording
When the Recorder is correctly set up, you are ready to start the recording. You can do so by clicking on the ‘Start’ button.

In this state, your screen/window is being captured. Please, keep in mind that the ‘Screen sharing’ bar needs to be active during the whole recording process. You can hide it (by clicking on the ‘Hide’ label) or move it anywhere on your screen. However, you should never click on the ‘Stop sharing’. If you do so, the Recorder loses access to your devices.
You can pause your recording any time by clicking on the ‘Pause’ button and resume it again later.
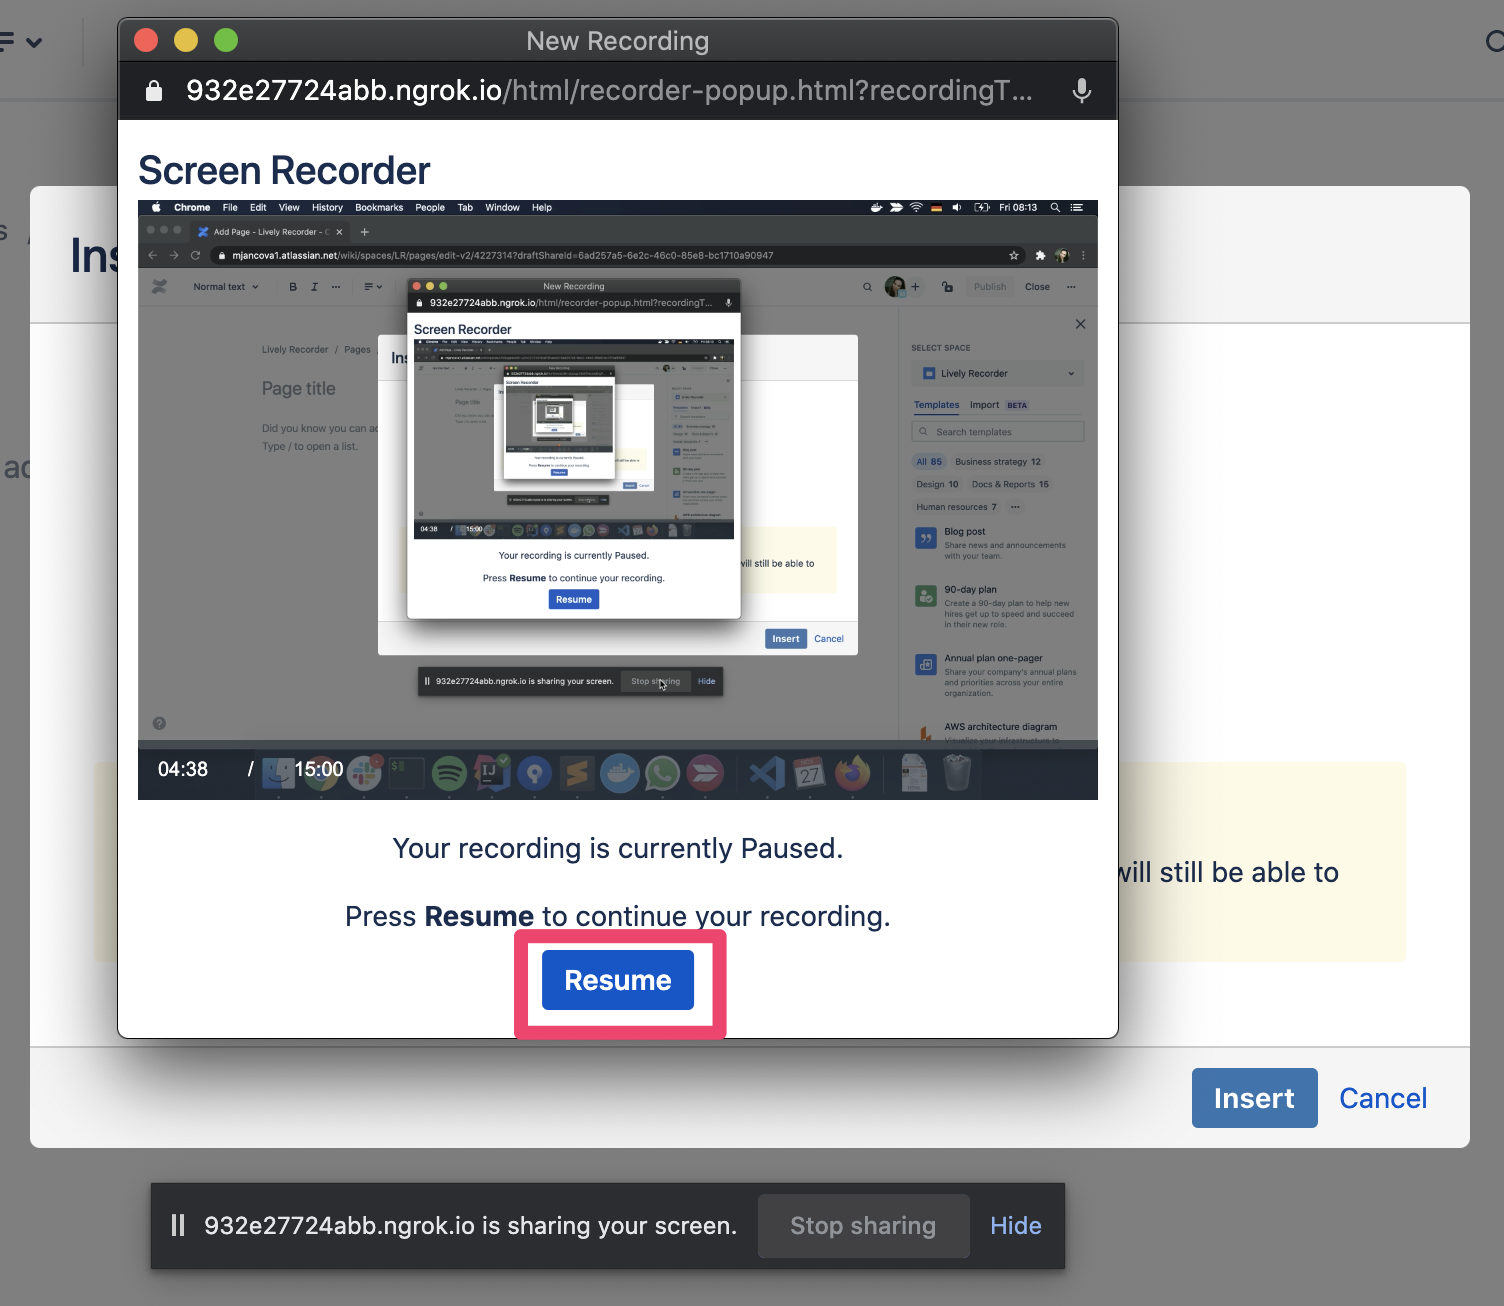
While your recording is paused, please, keep all dialogs open. After clicking on the ‘Resume’, the recording starts again.
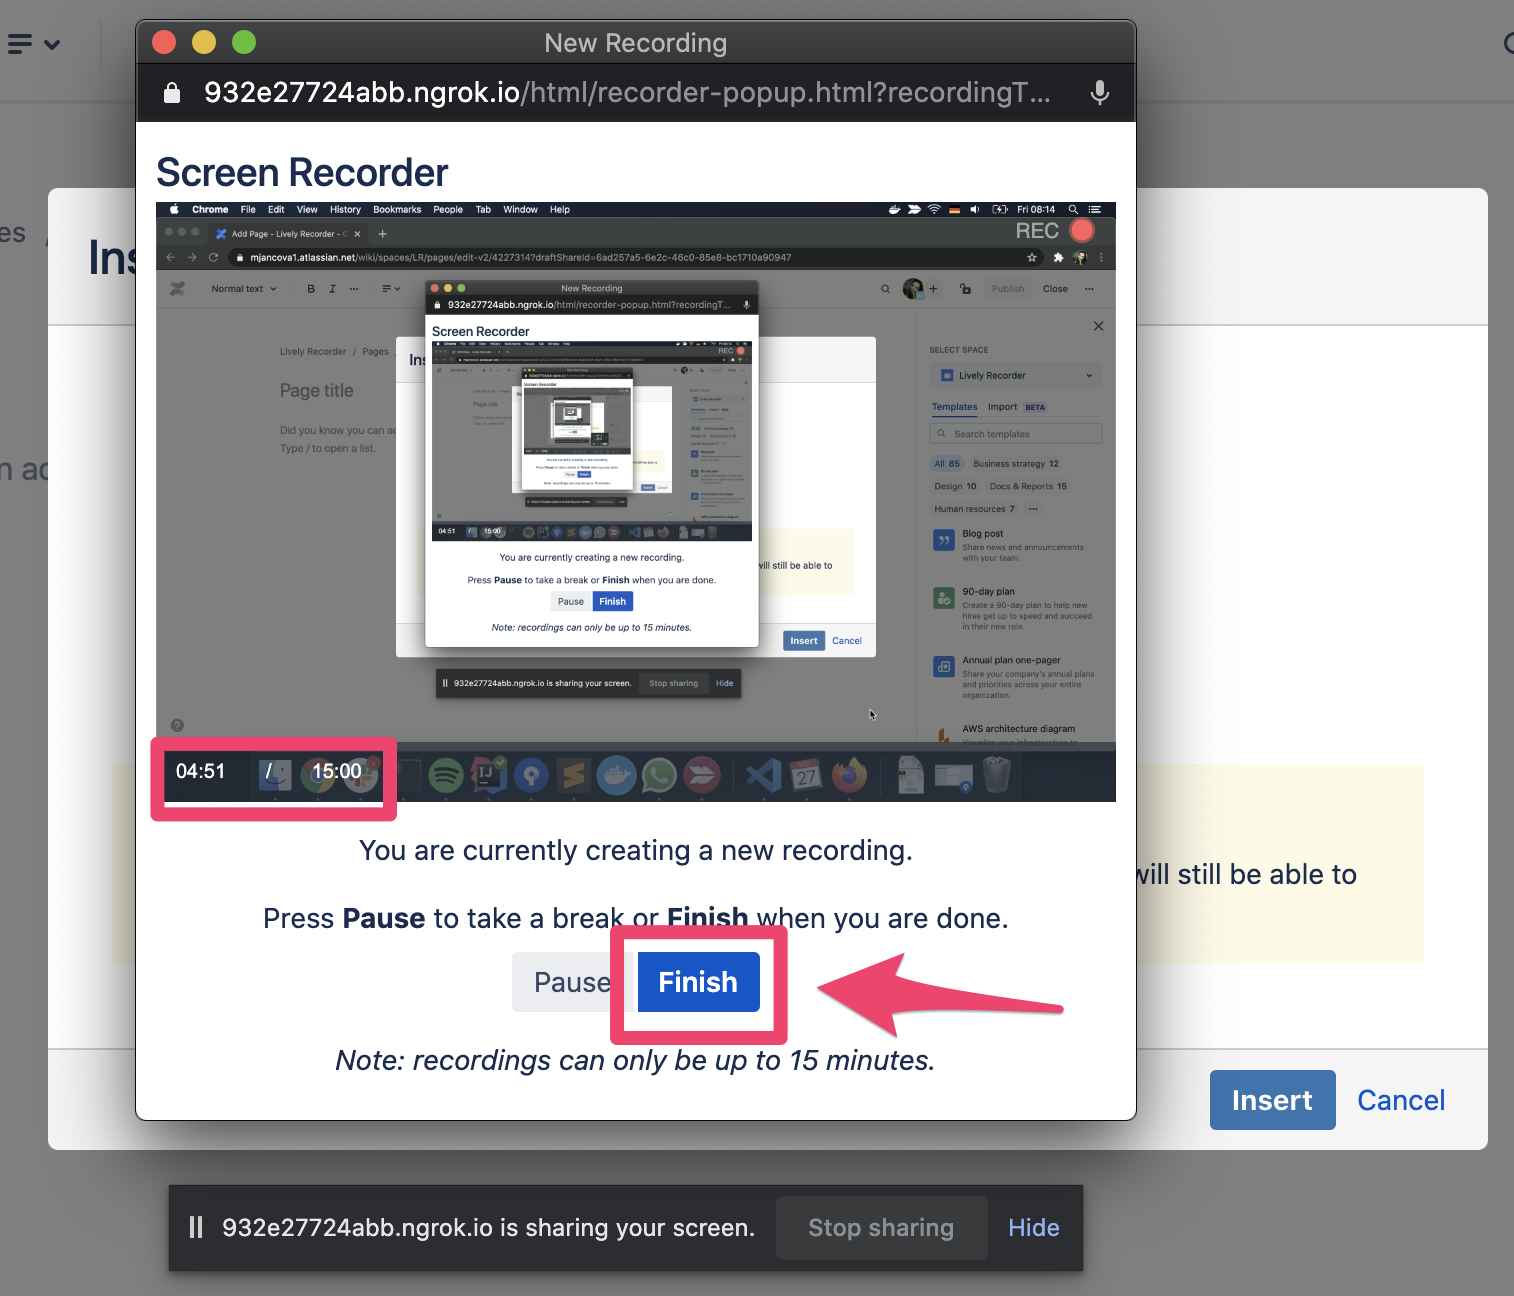
In the bottom left corner of the recording preview, you can see the length of your recording. The maximum length is 15 minutes. After you are done, simply click on the ‘Finish’ button.
At last, you can choose a name for your recording. The selected name is then used as the name of the recording file. All recordings have a .webm extension. Moreover, you can optionally choose a description, which is shown as a recording comment. The description can have a maximum of 255 characters.
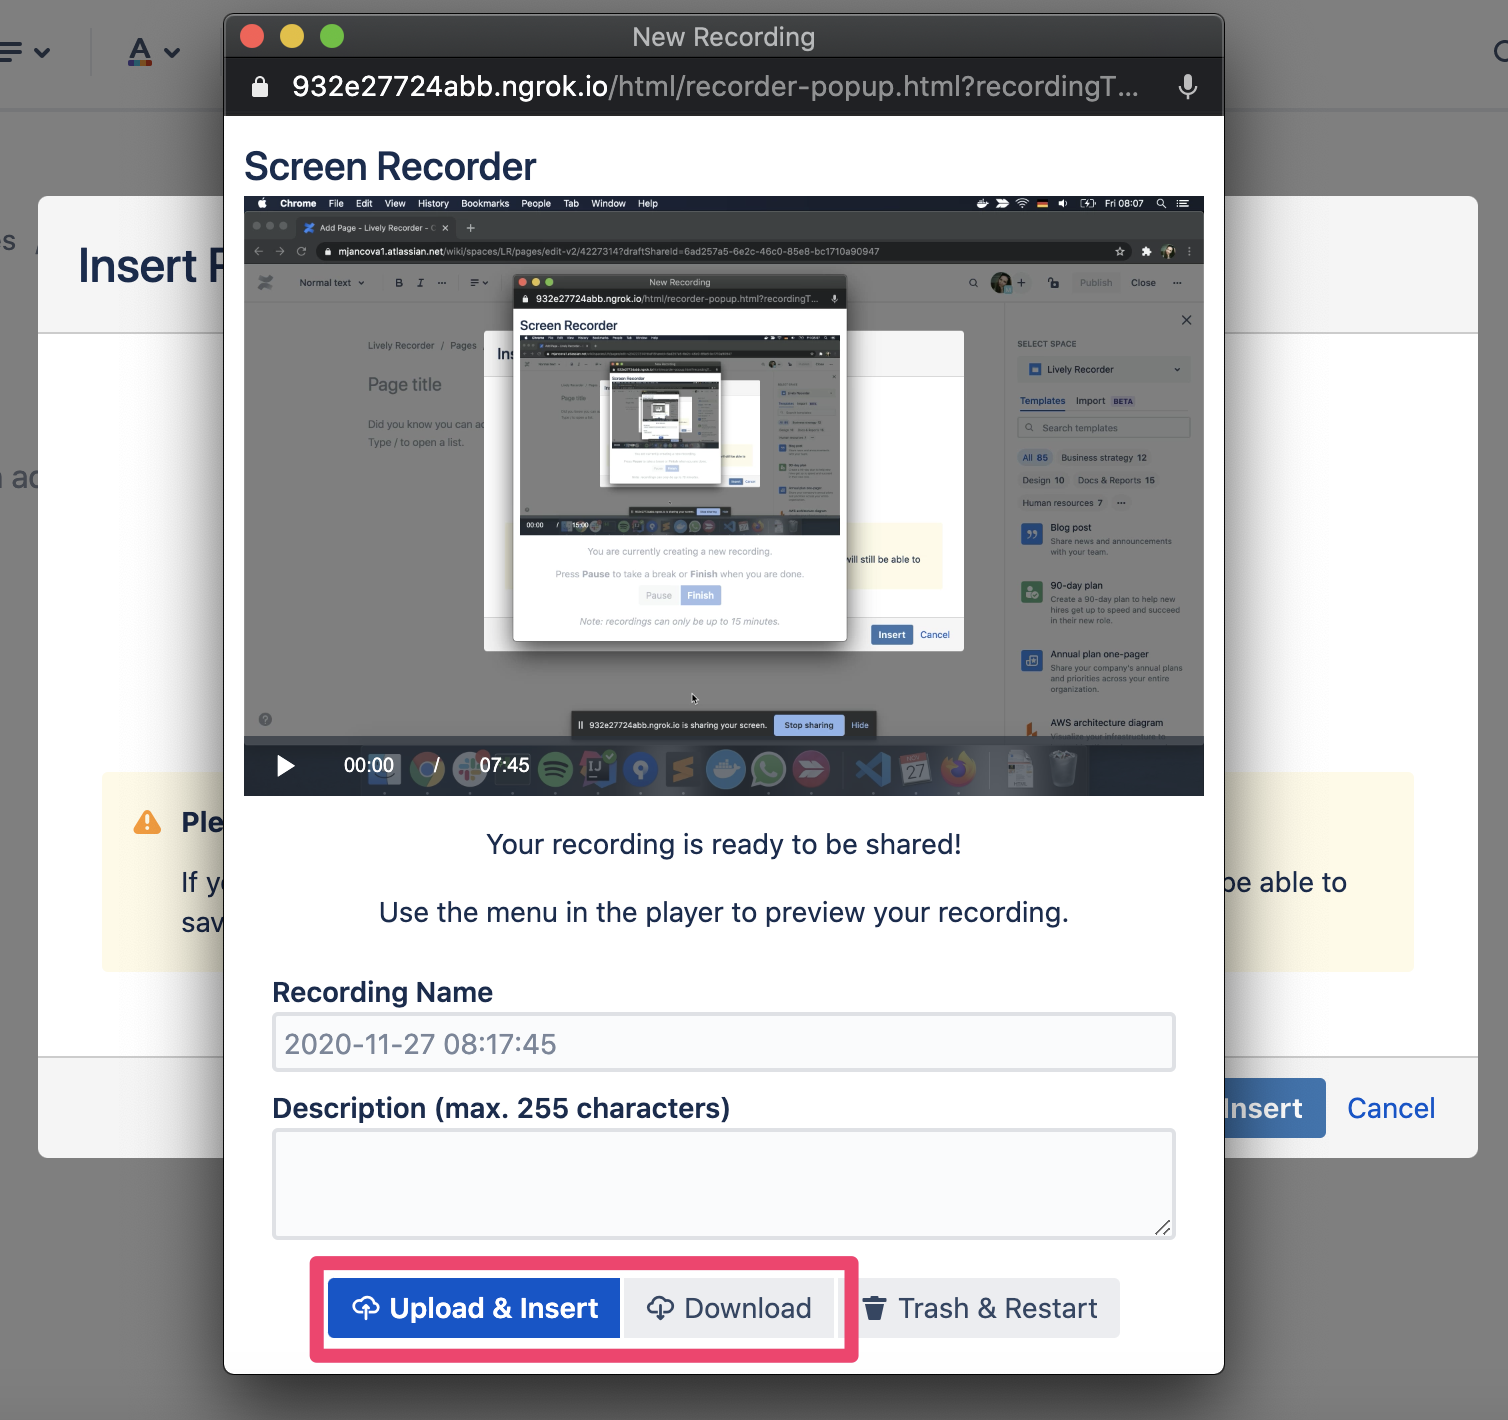
And the recording is ready now! You can either download it to your computer or upload it. If you want to upload the recording, the following popup appears:
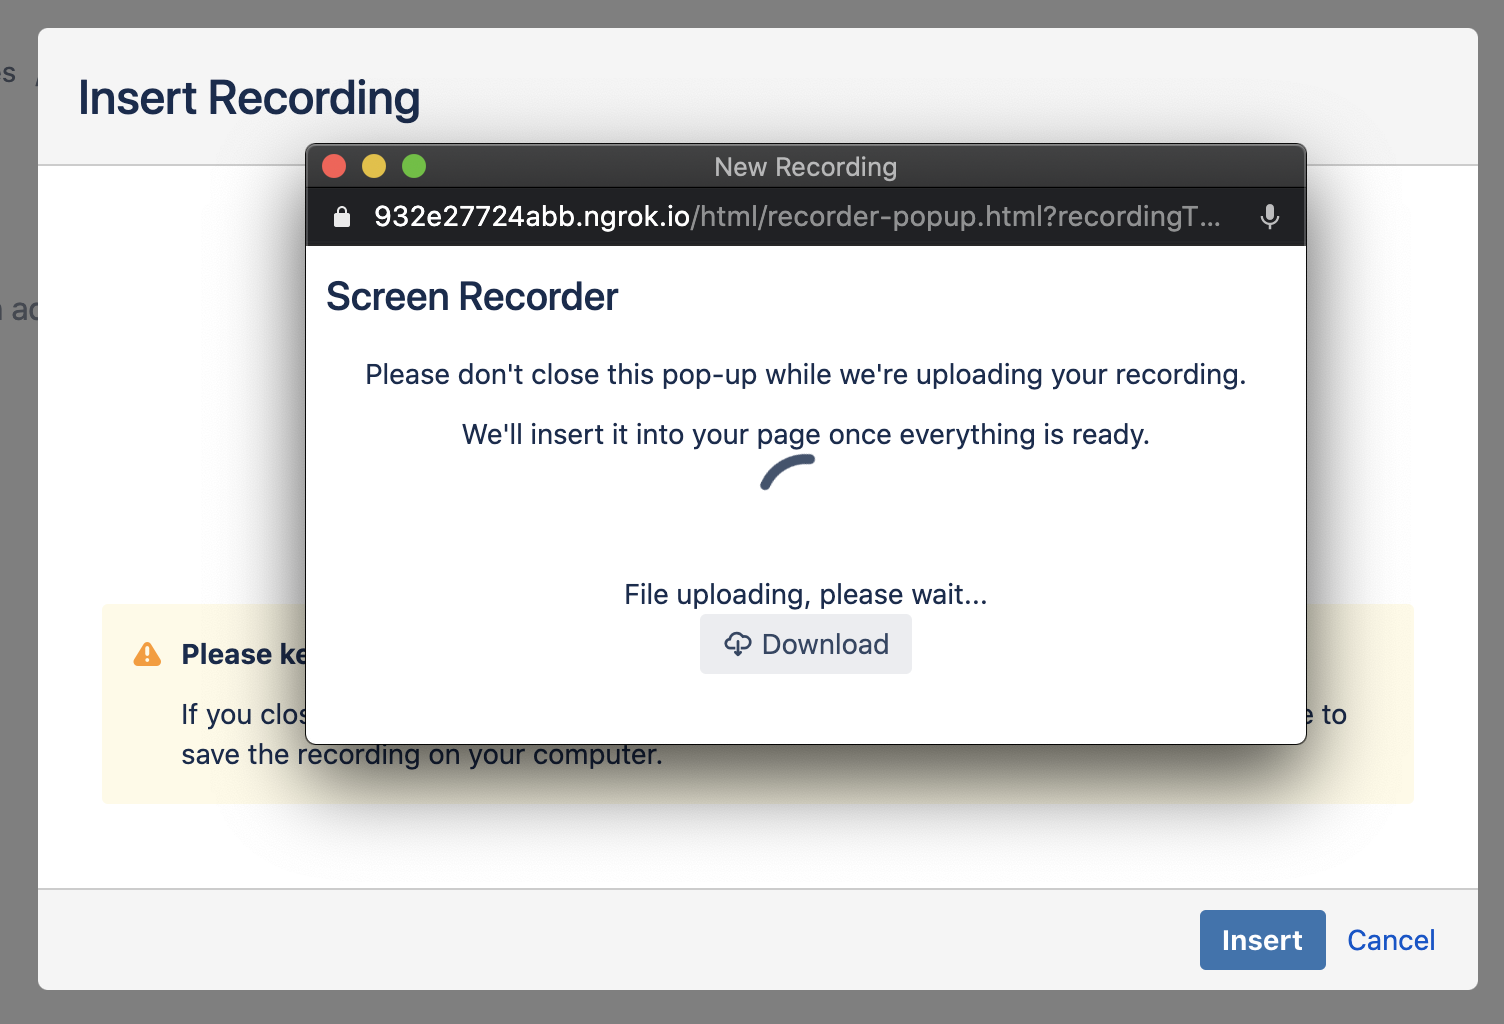
Now, it might take a while based on the size of your recording. Please, keep all windows open while your recording is being uploaded. Once the upload is finished, the popup is automatically closed. Your video is automatically inserted as the page content.
🔒 Recordings are stored as attachments on your Confluence pages, meaning your data never leaves Confluence.
Also, you can find the recording as a page attachment.

All recordings are automatically tagged with lively-recording and screen-recording labels so you can easily search for them!