Adding a "Show more details" button to each row
Certain Queries return a lot more data than can be reasonably visualized with a simple table.
For example, when using the JQL REST API and searching for issues, we get back dozens of fields for every issue found.
We might actually be interested in most of the fields, but we can't just have a column for each one or we would end up with a huge and unreadable table.
A better approach could be to render only the most important fields as columns and add a "more details" button to each row that opens a dialog when clicked:

For this example will use a similar setup as in the Jira JQL REST API example, but of course we need to write our own Template and Converter.
Datasource
Datasource type | REST Application Link |
|---|---|
Application Link | Your Company Jira |
Datasource Test URL | /rest/api/2/search |
The application link preserves permissions for the user executing the query across instances.
If you want users to be able to execute queries / searches and see issues they would normally not have access to, you should use a Basic REST datasource instead.
Query
Query URL |
CODE
|
|---|
This Query performs a JQL search and returns all issues for a given project key.
The project key (:project) is a parameter that can be supplied to the Query by users via the macro browser.
Converter
In our Converter we need to pick out the fields from the original response that we want to display in the table. These fields will end up in the columns object.
We also need to pick out the fields that we want to show up in our dialog, so we put them in the moreDetails object.
function convert(json) {
  var parsed = JSON.parse(json);

  var result = parsed.issues.map(function(issue) {
    var fields = issue.fields;

    return {
      // Fields we want to display as columns in the table
      columns: {
        key: issue.key,
        summary: fields.summary,
        issuetype: fields.issuetype.name,
        status: fields.status.name
      },

      // Fields we want to display in the "more details" dialog
      moreDetails: {
        reporter: fields.reporter.displayName,
        assignee: fields.assignee.displayName
      }
    };
  });

  return result;
}
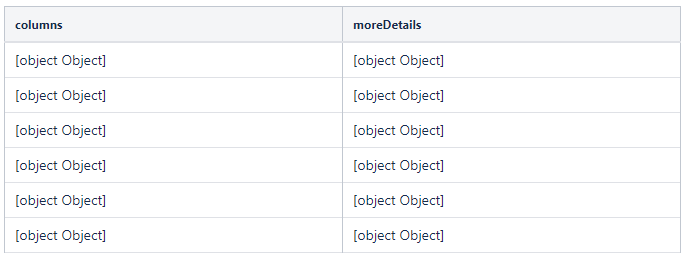
When using the default Template, we should now see something like this:

To unpack these objects and render them appropiately we now need to use a custom Template.
Template
There are a few caveats that we need to think about when writing our template. Here's a short explanation of what we did in our example template:
Line 1-3: Specify the URL to our Jira instance so we can create links to the issues later on.
Line 5: Specify an ID attribute for our <table> so we can find it more easily in our JavaScript.
Lines 8-13: Specify column headers ourselves as PocketQuery can't automatically interfere them from the result anymore. We also need to add a header for the column where we want our buttons to appear.
Lines: 19-20: Unpack our columns and moreDetails objects from the row object.
Line 22: Render the fields of the moreDetails object as data-attributes so we can access them later in JavaScript when needed. (This will put them into the HTML tag like this: <tr data-foo="bar" data-baz="boz">)
Lines 23-31: Render the fields of the columns object into table cells and create links to the issues in the first column.
Lines 33-35: Render the "Show more details" button.
Lines 41-58: Render the skeleton HTML of the dialog.
Lines 65-98: This is the script that binds the logic to our buttons and shows/hides the dialog when needed.
## Important: the map keys must be valid data-fields, so no spaces are allowed.
#macro( datatags $map )
  #foreach ($mapEntry in $map.entrySet()) data-$mapEntry.key="$mapEntry.value" #end
#end

## Enter the URL to your Jira here so PocketQuery can render links to issues
## Important: the URL needs to have a trailing slash!
#set($jiraBaseUrl = "http://your-jira.com/")


<table id="pq-table-with-more-details-btn" class="aui confluenceTable pocketquery-table">
  <thead>
    <tr>
      ## Specify column headers manually
      <th class="confluenceTh">Issue</th>
      <th class="confluenceTh">Summary</th>
      <th class="confluenceTh">Type</th>
      <th class="confluenceTh">Status</th>
      <th class="confluenceTh">More Details</th>
    </tr>
  </thead>

  <tbody>
    #foreach ($row in $result)
      #set($columns = $row.get("columns"))
      #set($moreDetails = $row.get("moreDetails"))

      <tr #datatags($moreDetails) >
        #foreach ($column in $columns)
          <td class="confluenceTd">
            #if($velocityCount == 1)
              <a href="${jiraBaseUrl}browse/${column}">$!column</a>
            #else
              $!column
            #end
          </td>
        #end

        <td class="confluenceTd">
          <button class="aui-button more-details-btn">Show more details</button>
        </td>
      </tr>
    #end
  </tbody>
</table>

<!-- This is the HTML for the more details dialog. -->

<section id="pq-more-details-dialog" class="aui-dialog2 aui-dialog2-medium aui-layer" role="dialog" aria-hidden="true">
  <header class="aui-dialog2-header">
    <h2 class="aui-dialog2-header-main title"></h2>
  </header>
  <div class="aui-dialog2-content">
    <table class="aui confluenceTable">
      <tbody class="content">
      </tbody>
    <table>
  </div>
  <footer class="aui-dialog2-footer">
    <div class="aui-dialog2-footer-actions">
      <button class="aui-button aui-button-primary close-dialog-btn">Close</button>
    </div>
  </footer>
</section>

<!--
    This script binds the click-handlers that open and close the dialog.
    In the click handler for opening the dialog, it also renders the information for the given issue.
-->

<script>
  AJS.toInit(function(){
    $('#pq-table-with-more-details-btn').on('click', '.more-details-btn', function(e) {
        e.preventDefault();

        // Read information about current row
        var button = $(e.target);
        var row = button.closest('tr');
        var issue = row.find('td').first().text();
        var moreDetails = row.data();
        var content = $('#pq-more-details-dialog .content');

        // Put information into the dialog
        $('#pq-more-details-dialog .title').text('More details for ' + issue);

        content.children().remove();
        for (var field in moreDetails) {
            if (Object.prototype.hasOwnProperty.call(moreDetails, field)) {
                var row = $('<tr><th class="confluenceTh"></th><td class="confluenceTd"></td></tr>');
                row.find('th').text(field);
                row.find('td').text(moreDetails[field]);
                content.append(row);
            }
        }

        AJS.dialog2('#pq-more-details-dialog').show();
    });

    $('#pq-more-details-dialog').on('click', '.close-dialog-btn', function (e) {
        e.preventDefault();
        AJS.dialog2('#pq-more-details-dialog').hide();
    });
  });
</script>
You did it!
Great, you now know how to use a dialog to display information that would be too much to show directly in the table.
But what to do if you want to show data in the dialog that is not included in the result of your first Query? Easy: You can simply execute another Query in the dialog!
For an example on how that can be done please see this page: Advanced: Making a "more details" Dialog execute its own Query
