This guide provides a step-by-step process to display Mailchimp data in your Confluence using the Mailchimp API with REST Basic Auth.
At the end, you can use the query to display metrics for your Mailchimp campaign.
Preview
|
Title |
Total Deliveries |
Open Rate |
Click Rate |
Bounce Rate |
Unsubscribe Rate |
Total Opens |
Total Clicks |
Last Opened |
Last Clicked |
|---|---|---|---|---|---|---|---|---|---|
|
Newsletter March |
2419 |
45.8% |
3.5% |
3.7% |
1.5% |
1207 |
140 |
Mar 23, 2025 |
Mar 19, 2025 |
|
Newsletter April |
2643 |
52.9% |
4.1% |
0.8% |
1.8% |
1470 |
350 |
Apr 25, 2025 |
Apr 18, 2025 |
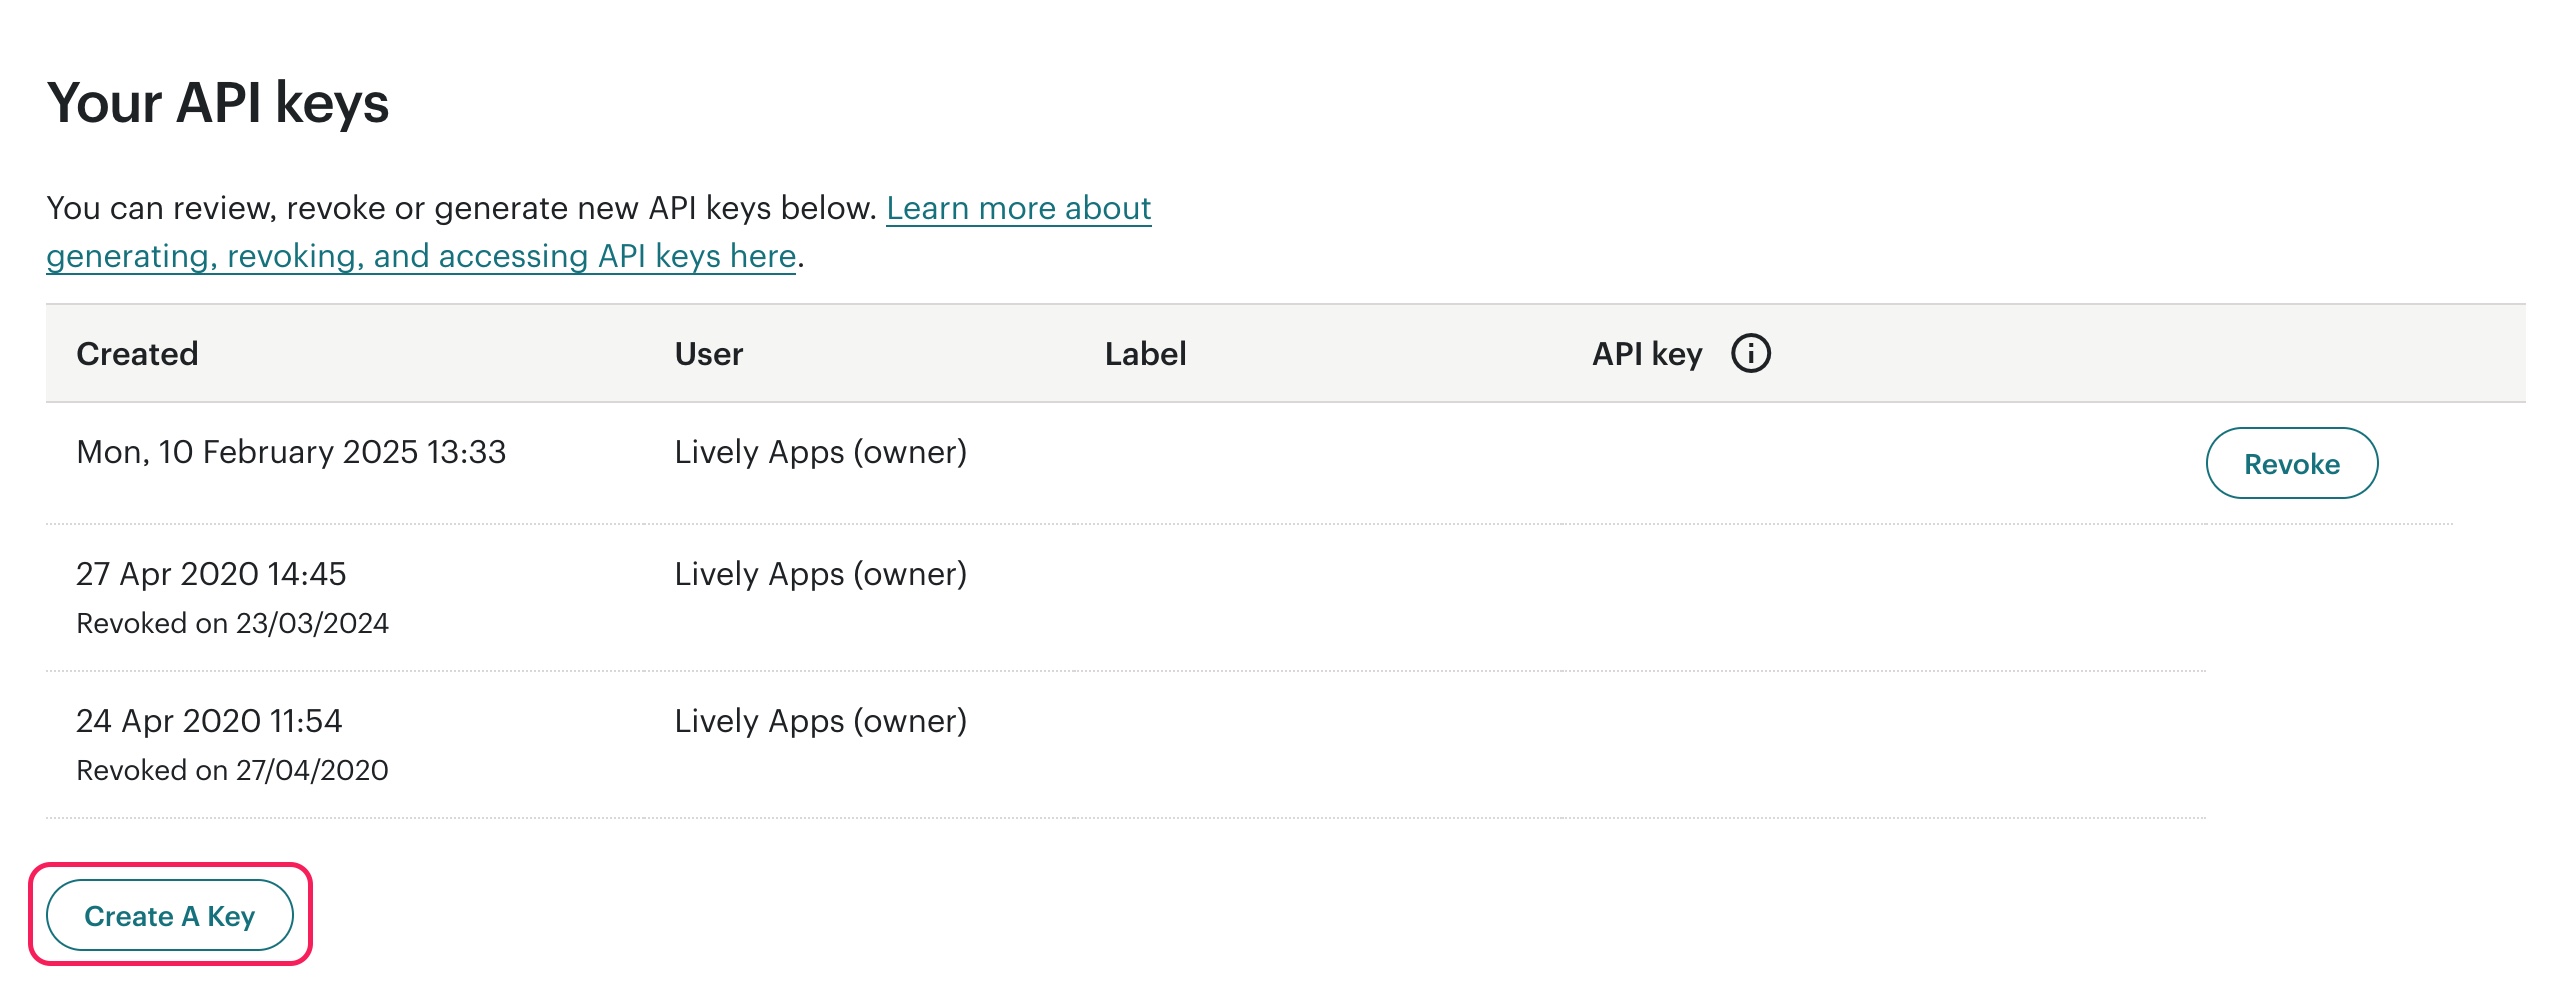
Step 1: Create Mailchimp API Key
-
Create a new API Key or use an existing one
Step 2: Create a Datasource in PocketQuery
|
Field |
Value |
|---|---|
|
Name |
|
|
Type |
|
|
Base URL |
|
|
Password |
your API Key you created in the previous step |
The base url for the API is https://<dc>.api.mailchimp.com/3.0/. The <dc> part of the URL corresponds to the data center for your account.
There are a few ways to find your data center. It’s the first part of the URL you see in the API keys section of your account. If the URL is https://us6.mailchimp.com/account/api/, then the data center subdomain is us6, so the Base URL is https://us6.api.mailchimp.com/3.0/.
See Mailchimp Developer Documentation for more information.
To test whether the connection is working, you can enter /ping in the Test path field and then use the Test connection function to check the connection.
Step 3: Create a Converter in PocketQuery
|
Field |
Value |
|---|---|
|
Name |
|
|
Content |
|
Step 4: Create a Query in PocketQuery
|
Field |
Value |
|---|---|
|
Name |
|
|
Datasource |
|
|
Converter |
|
|
REST URL |
|
You can find detailed documentation of the Mailchimp API here.