This guide provides a step-by-step process to access your Jira Cloud data using REST OAuth 2. The official documentation can be found here.
Step1: Create OAuth2 integration
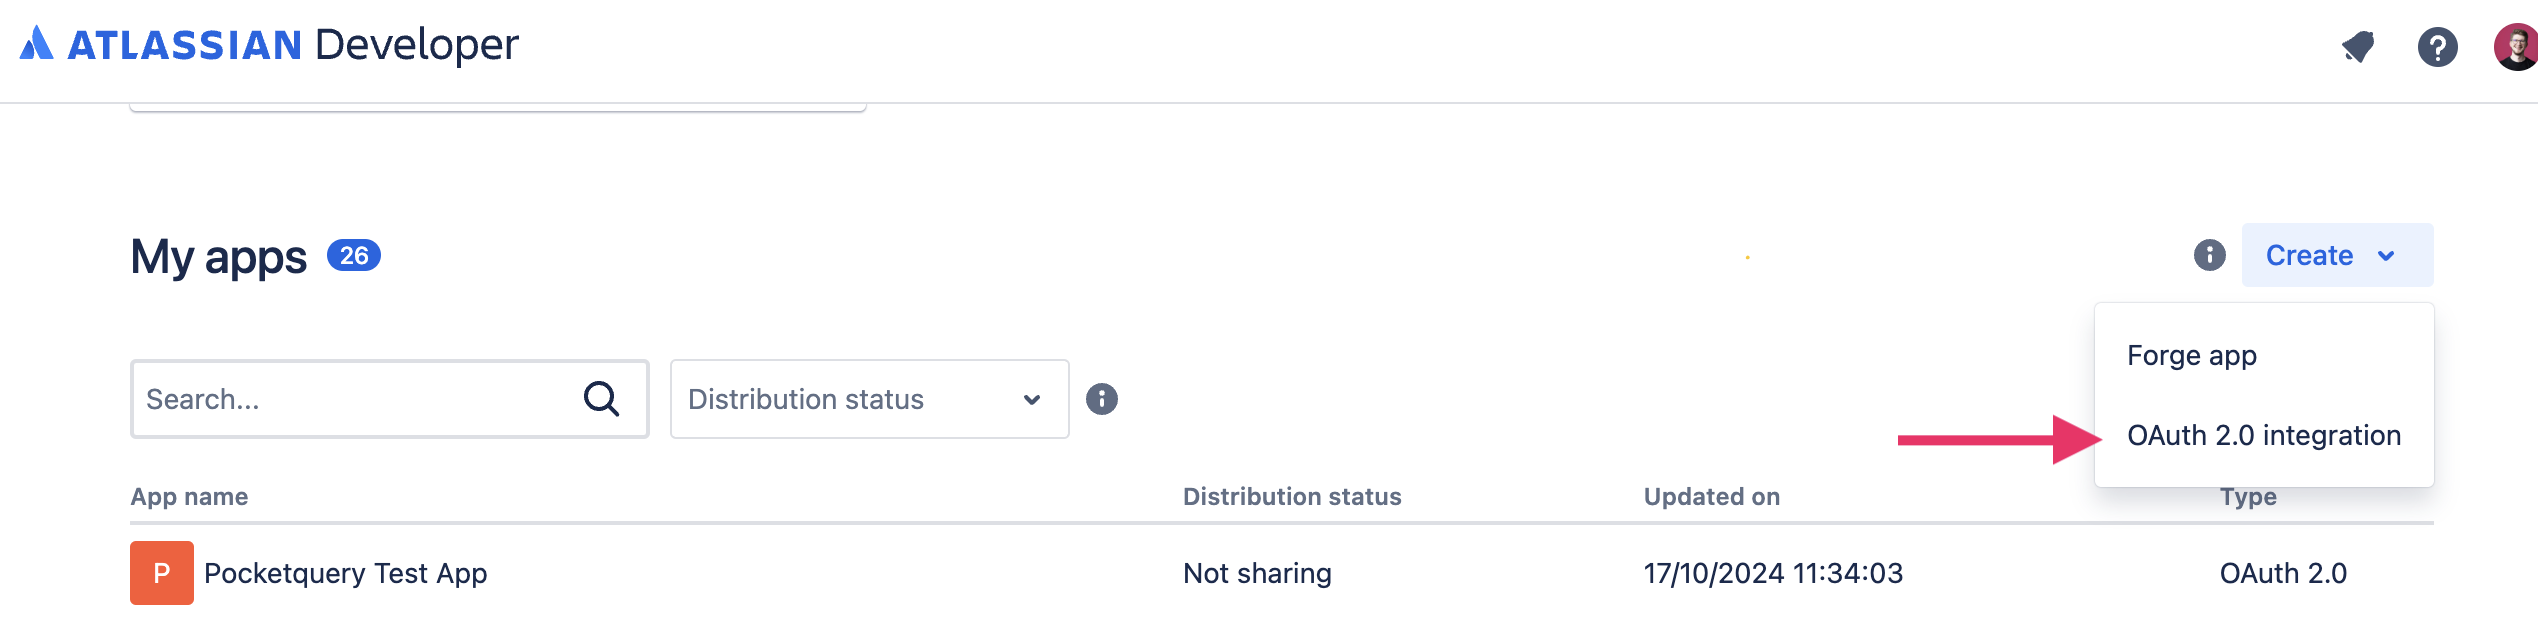
Create an Application
-
Go to the Atlassian Developer Console
-
Create a new application and give it a name:
-
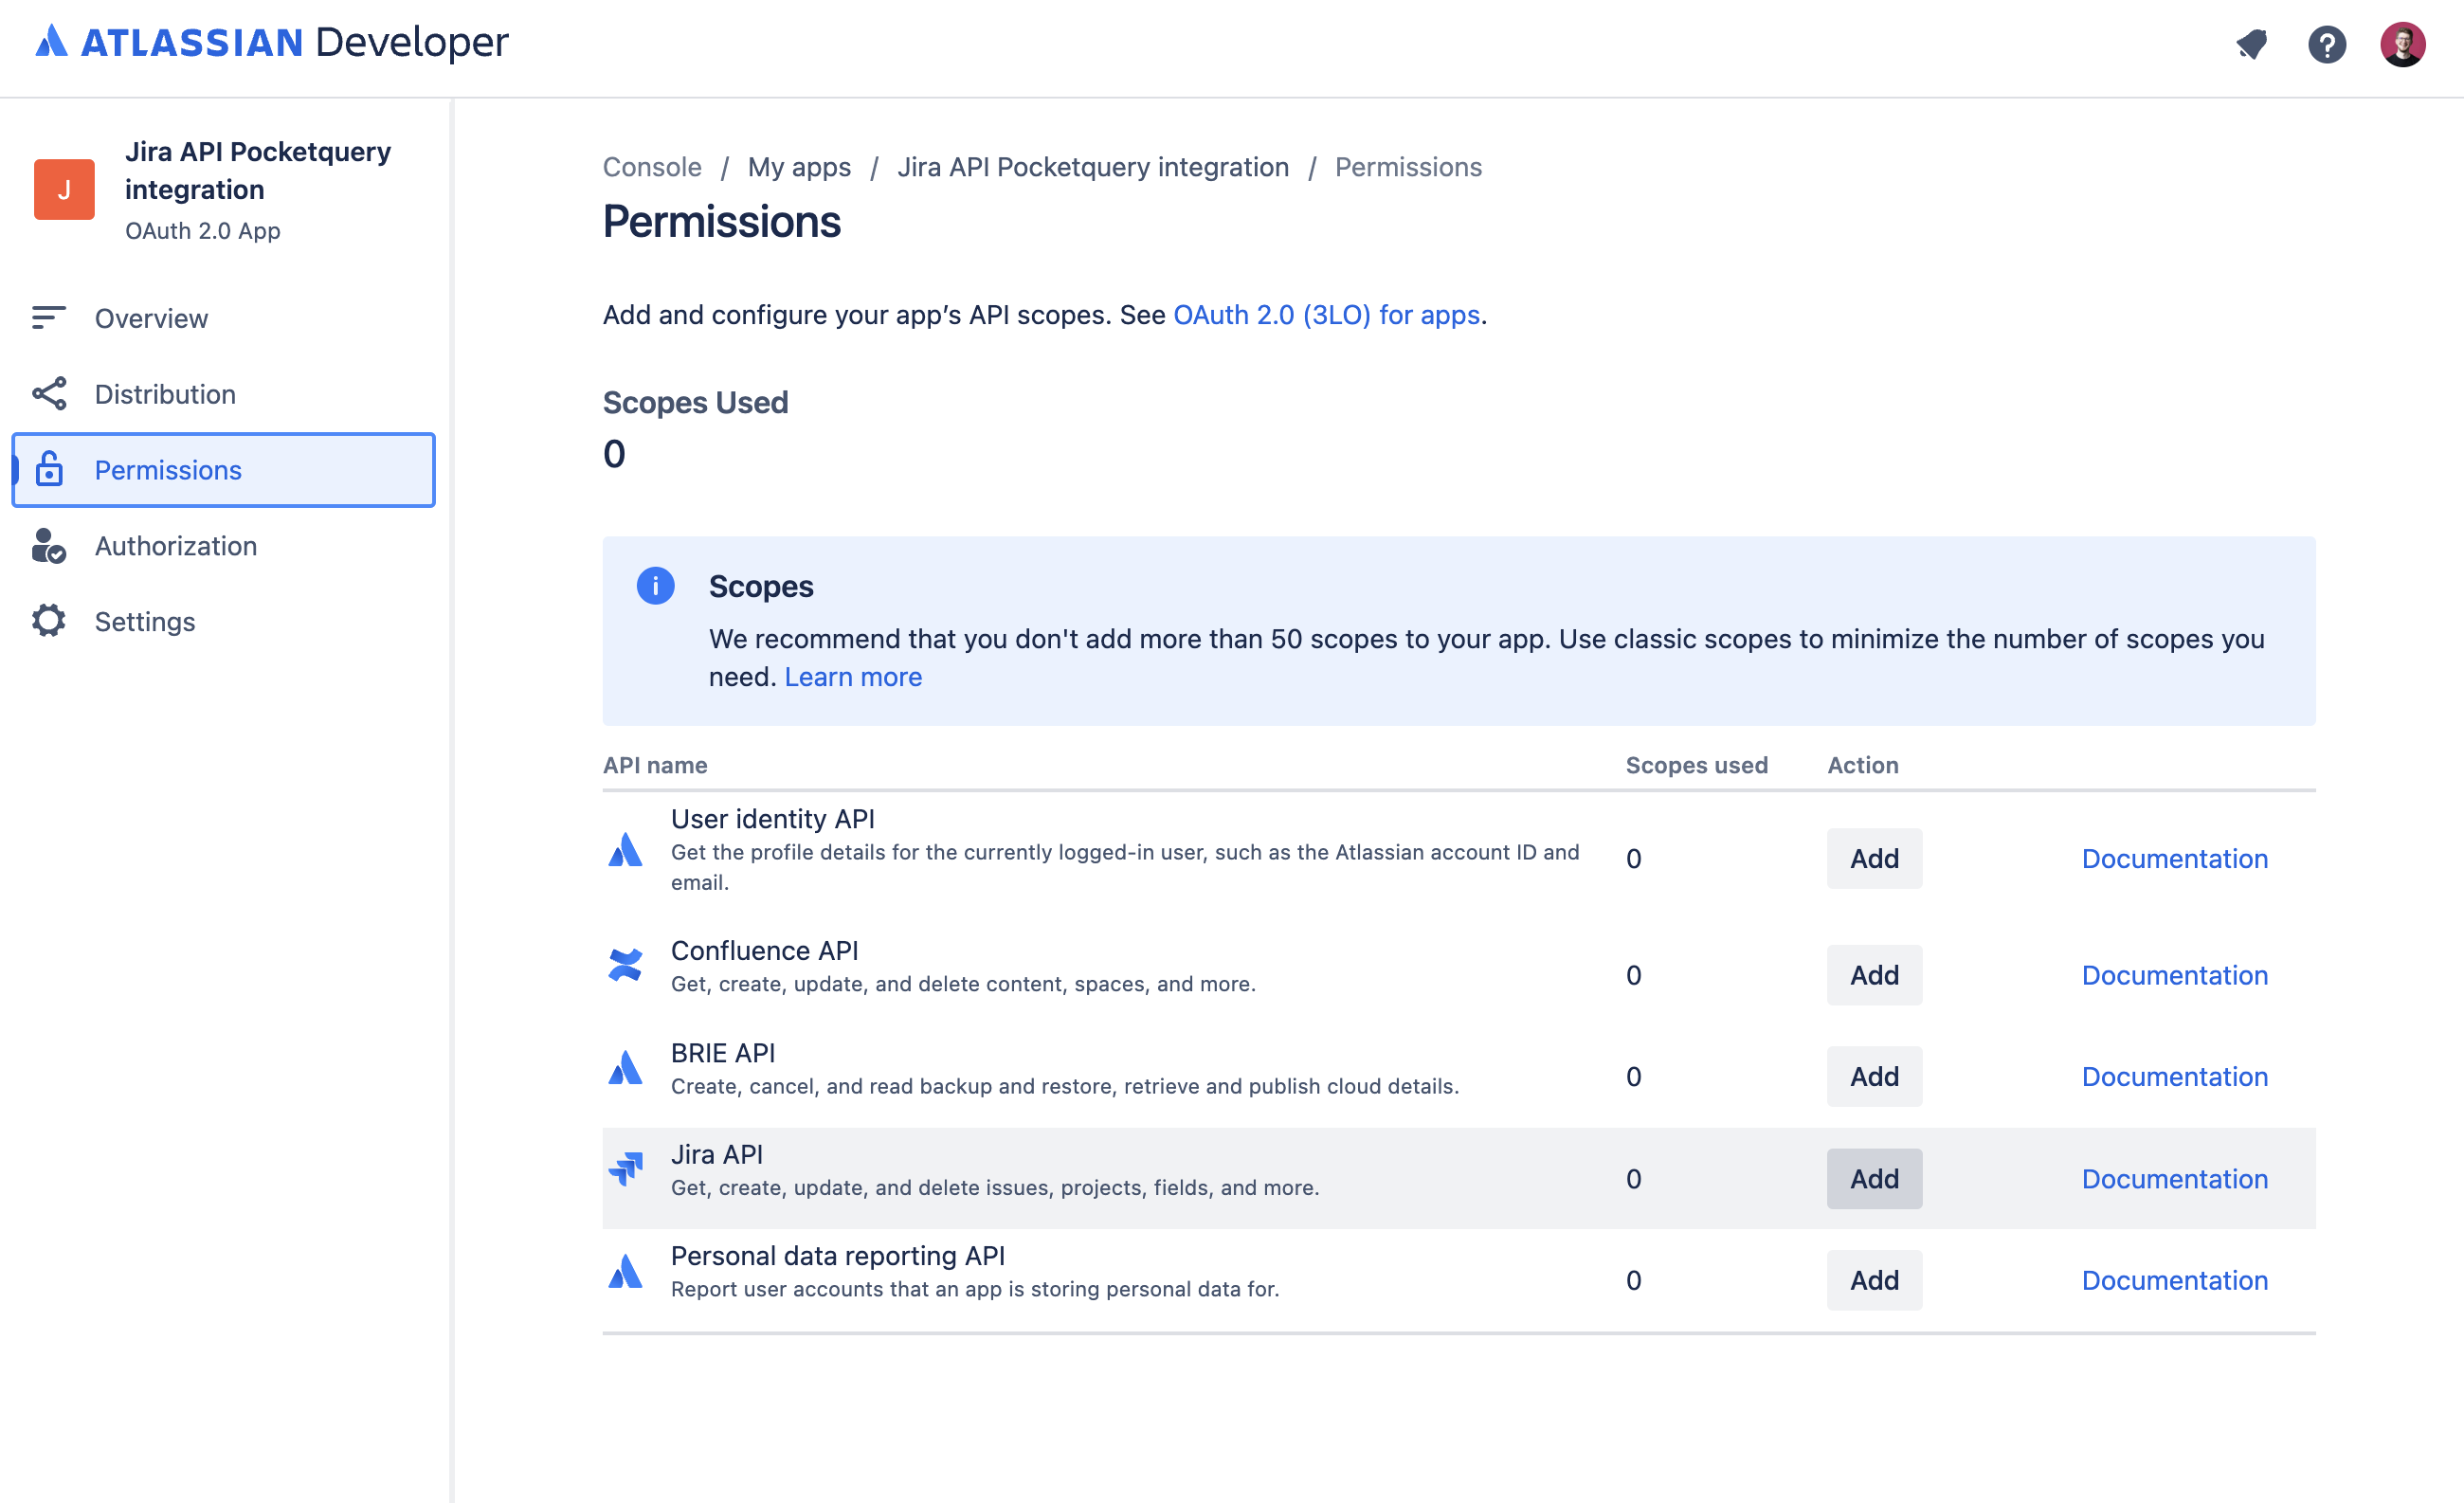
Add necessary scopes and authorization by clicking Add for the Jira API and then Configure:
-
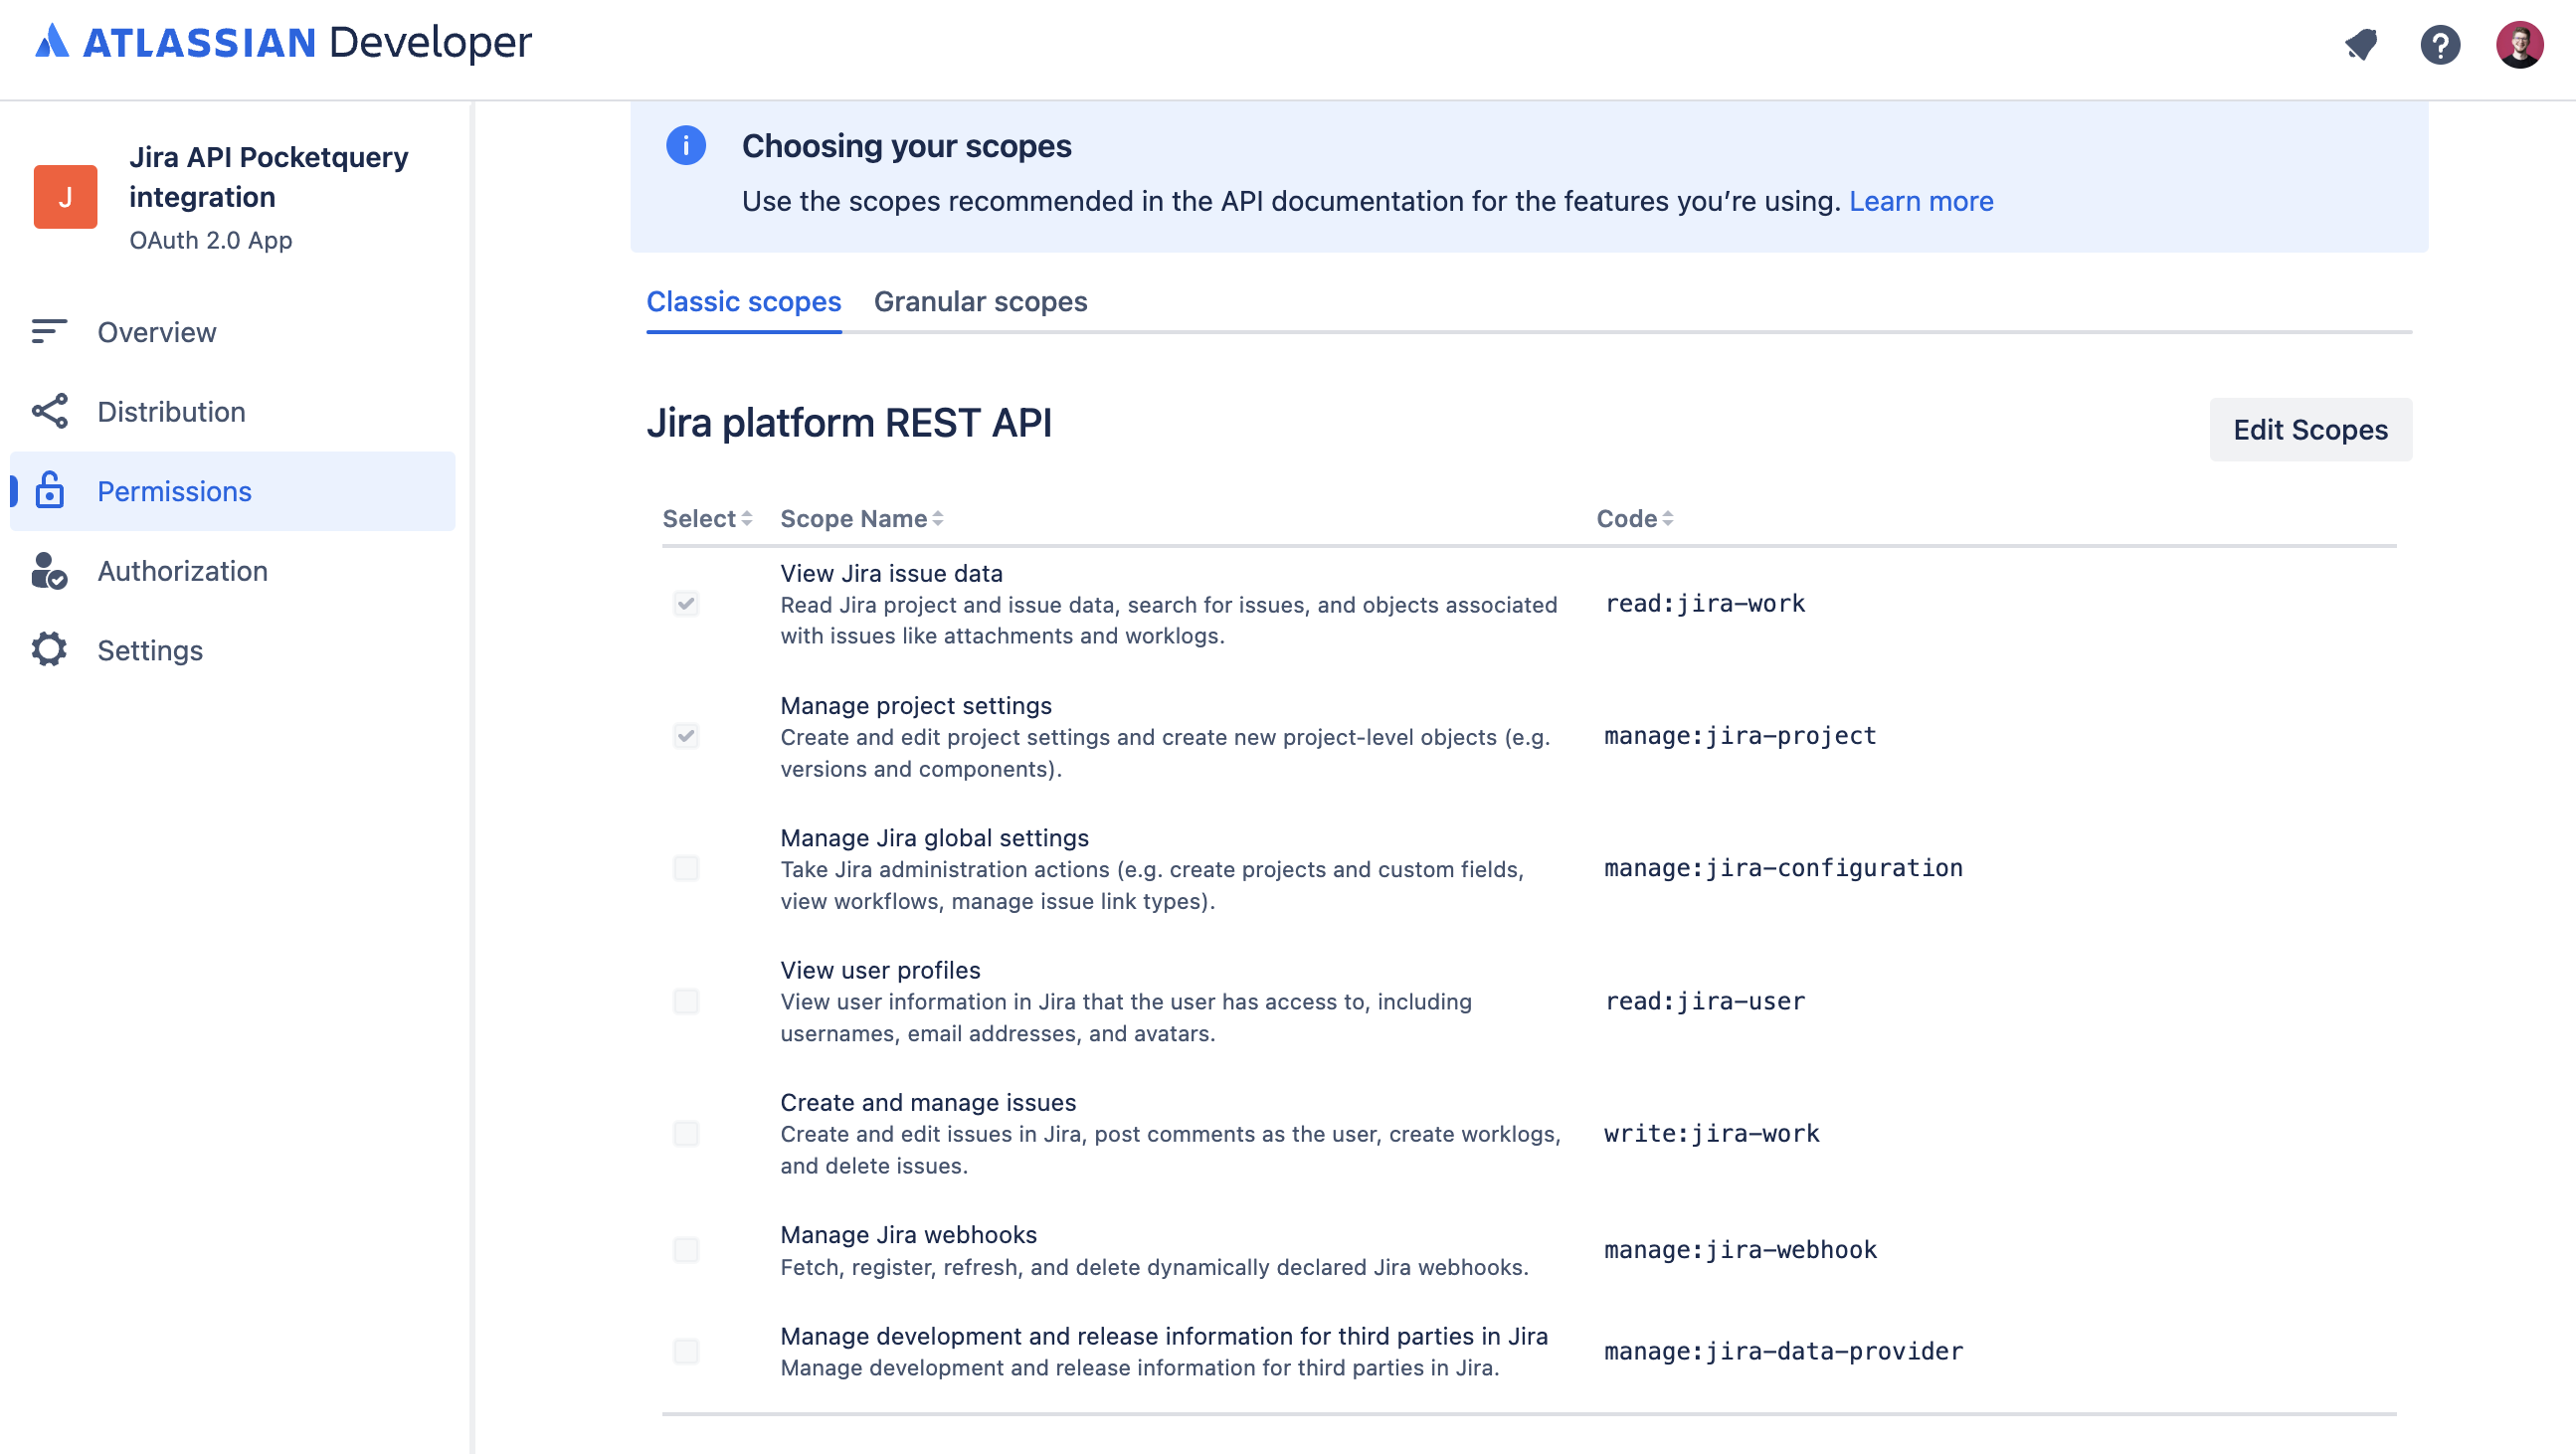
For this example, you could select the View Jira issue data scope:
Authorization Setup
-
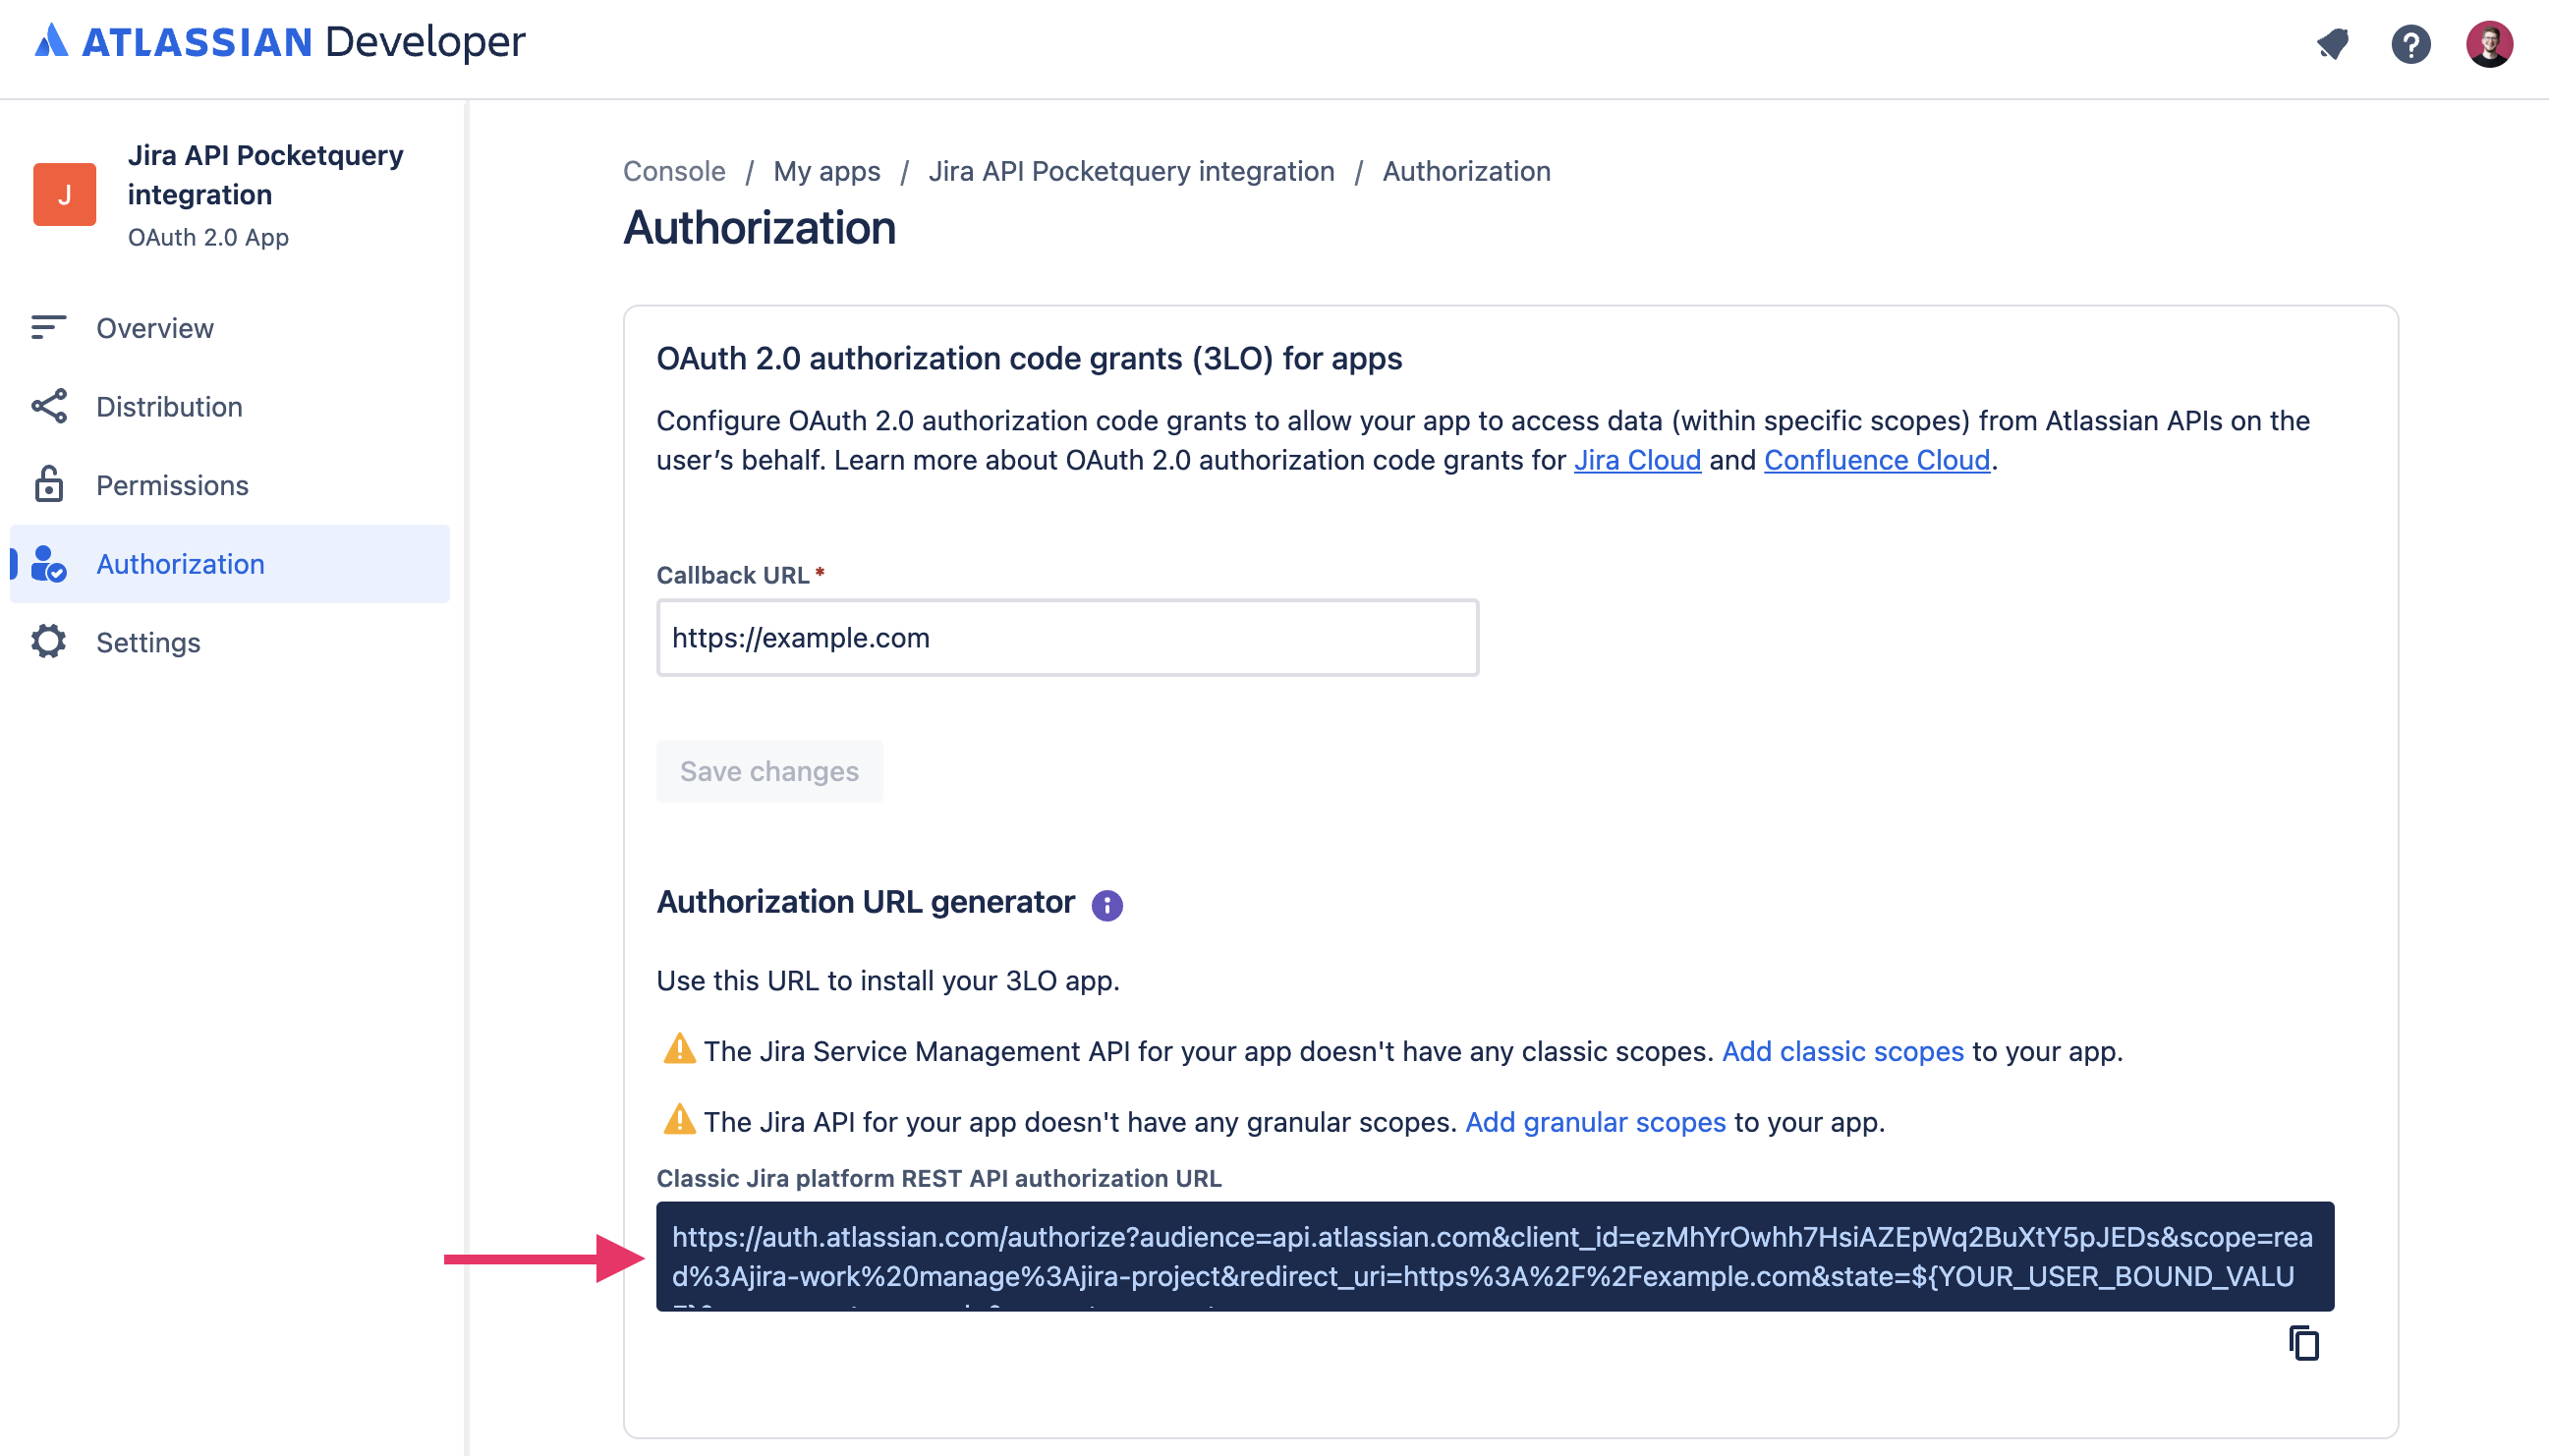
Go to Authorization and click on Add for OAuth 2.0 (3LO):

-
Provide a callback URL (e.g.,
http://example.com) for authorization purposes.
You can useexample.combecause we just need to copy the generated code after authorization for our page.
-
Copy the generated authorization URL and paste it into a text editor for modification:
Step2: Obtain authorization code grants
-
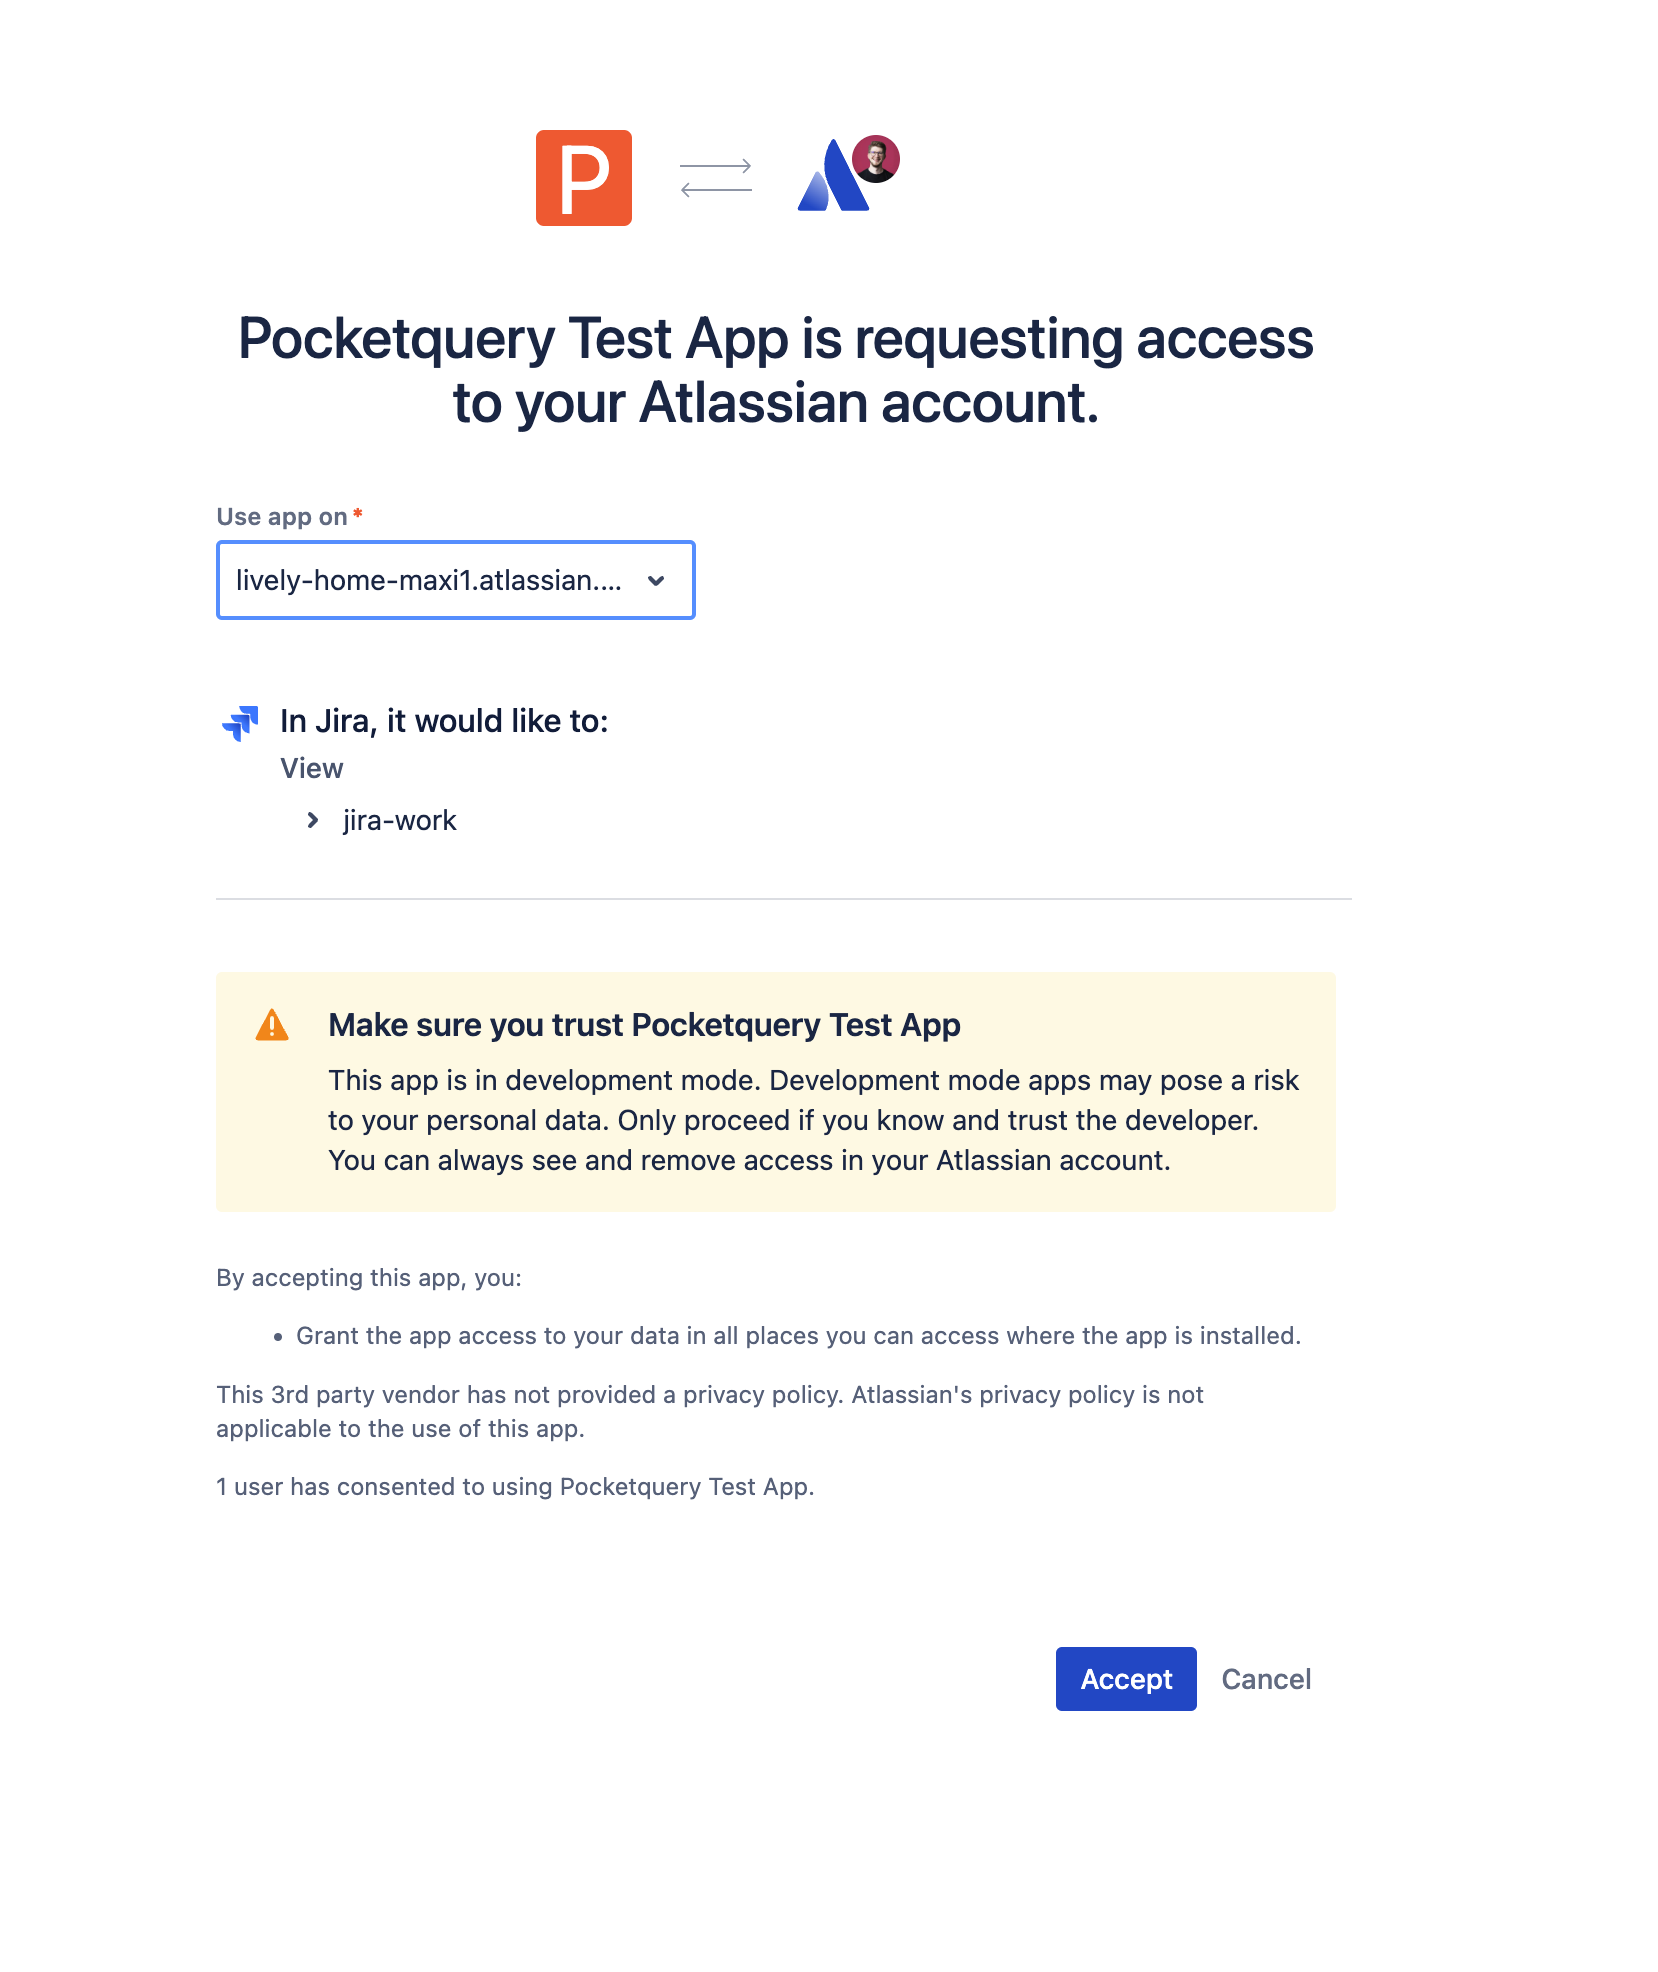
Modify the authorization URL by adding the
offline_accessscope. Example:https://auth.atlassian.com/authorize?audience=api.atlassian.com&client_id=[client_id]&scope=read%3Ajira-work manage%3Ajira-project%20offline_access&redirect_uri=https%3A%2F%2Fexample.com&state=${YOUR_USER_BOUND_VALUE}&response_type=code&prompt=consent -
Access the modified URL, select your page, and grant authorization:
-
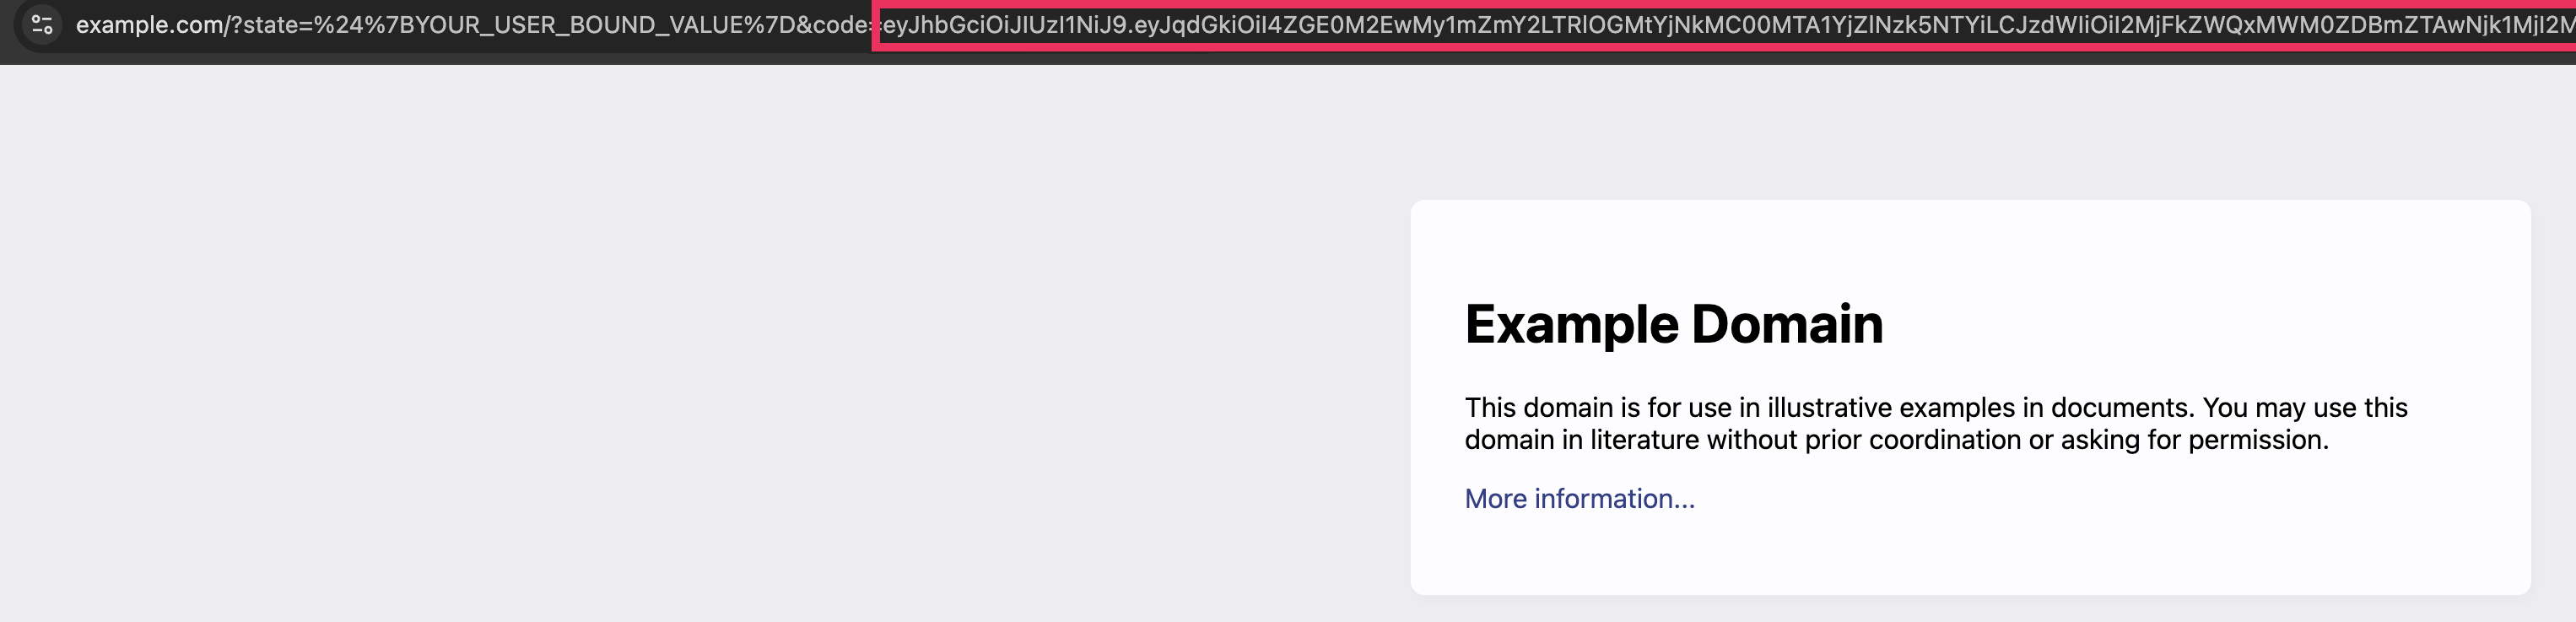
Copy the authorization code from the redirected URL, added as callback URL in an earlier step:
Step 3: Obtain access token and refresh token
-
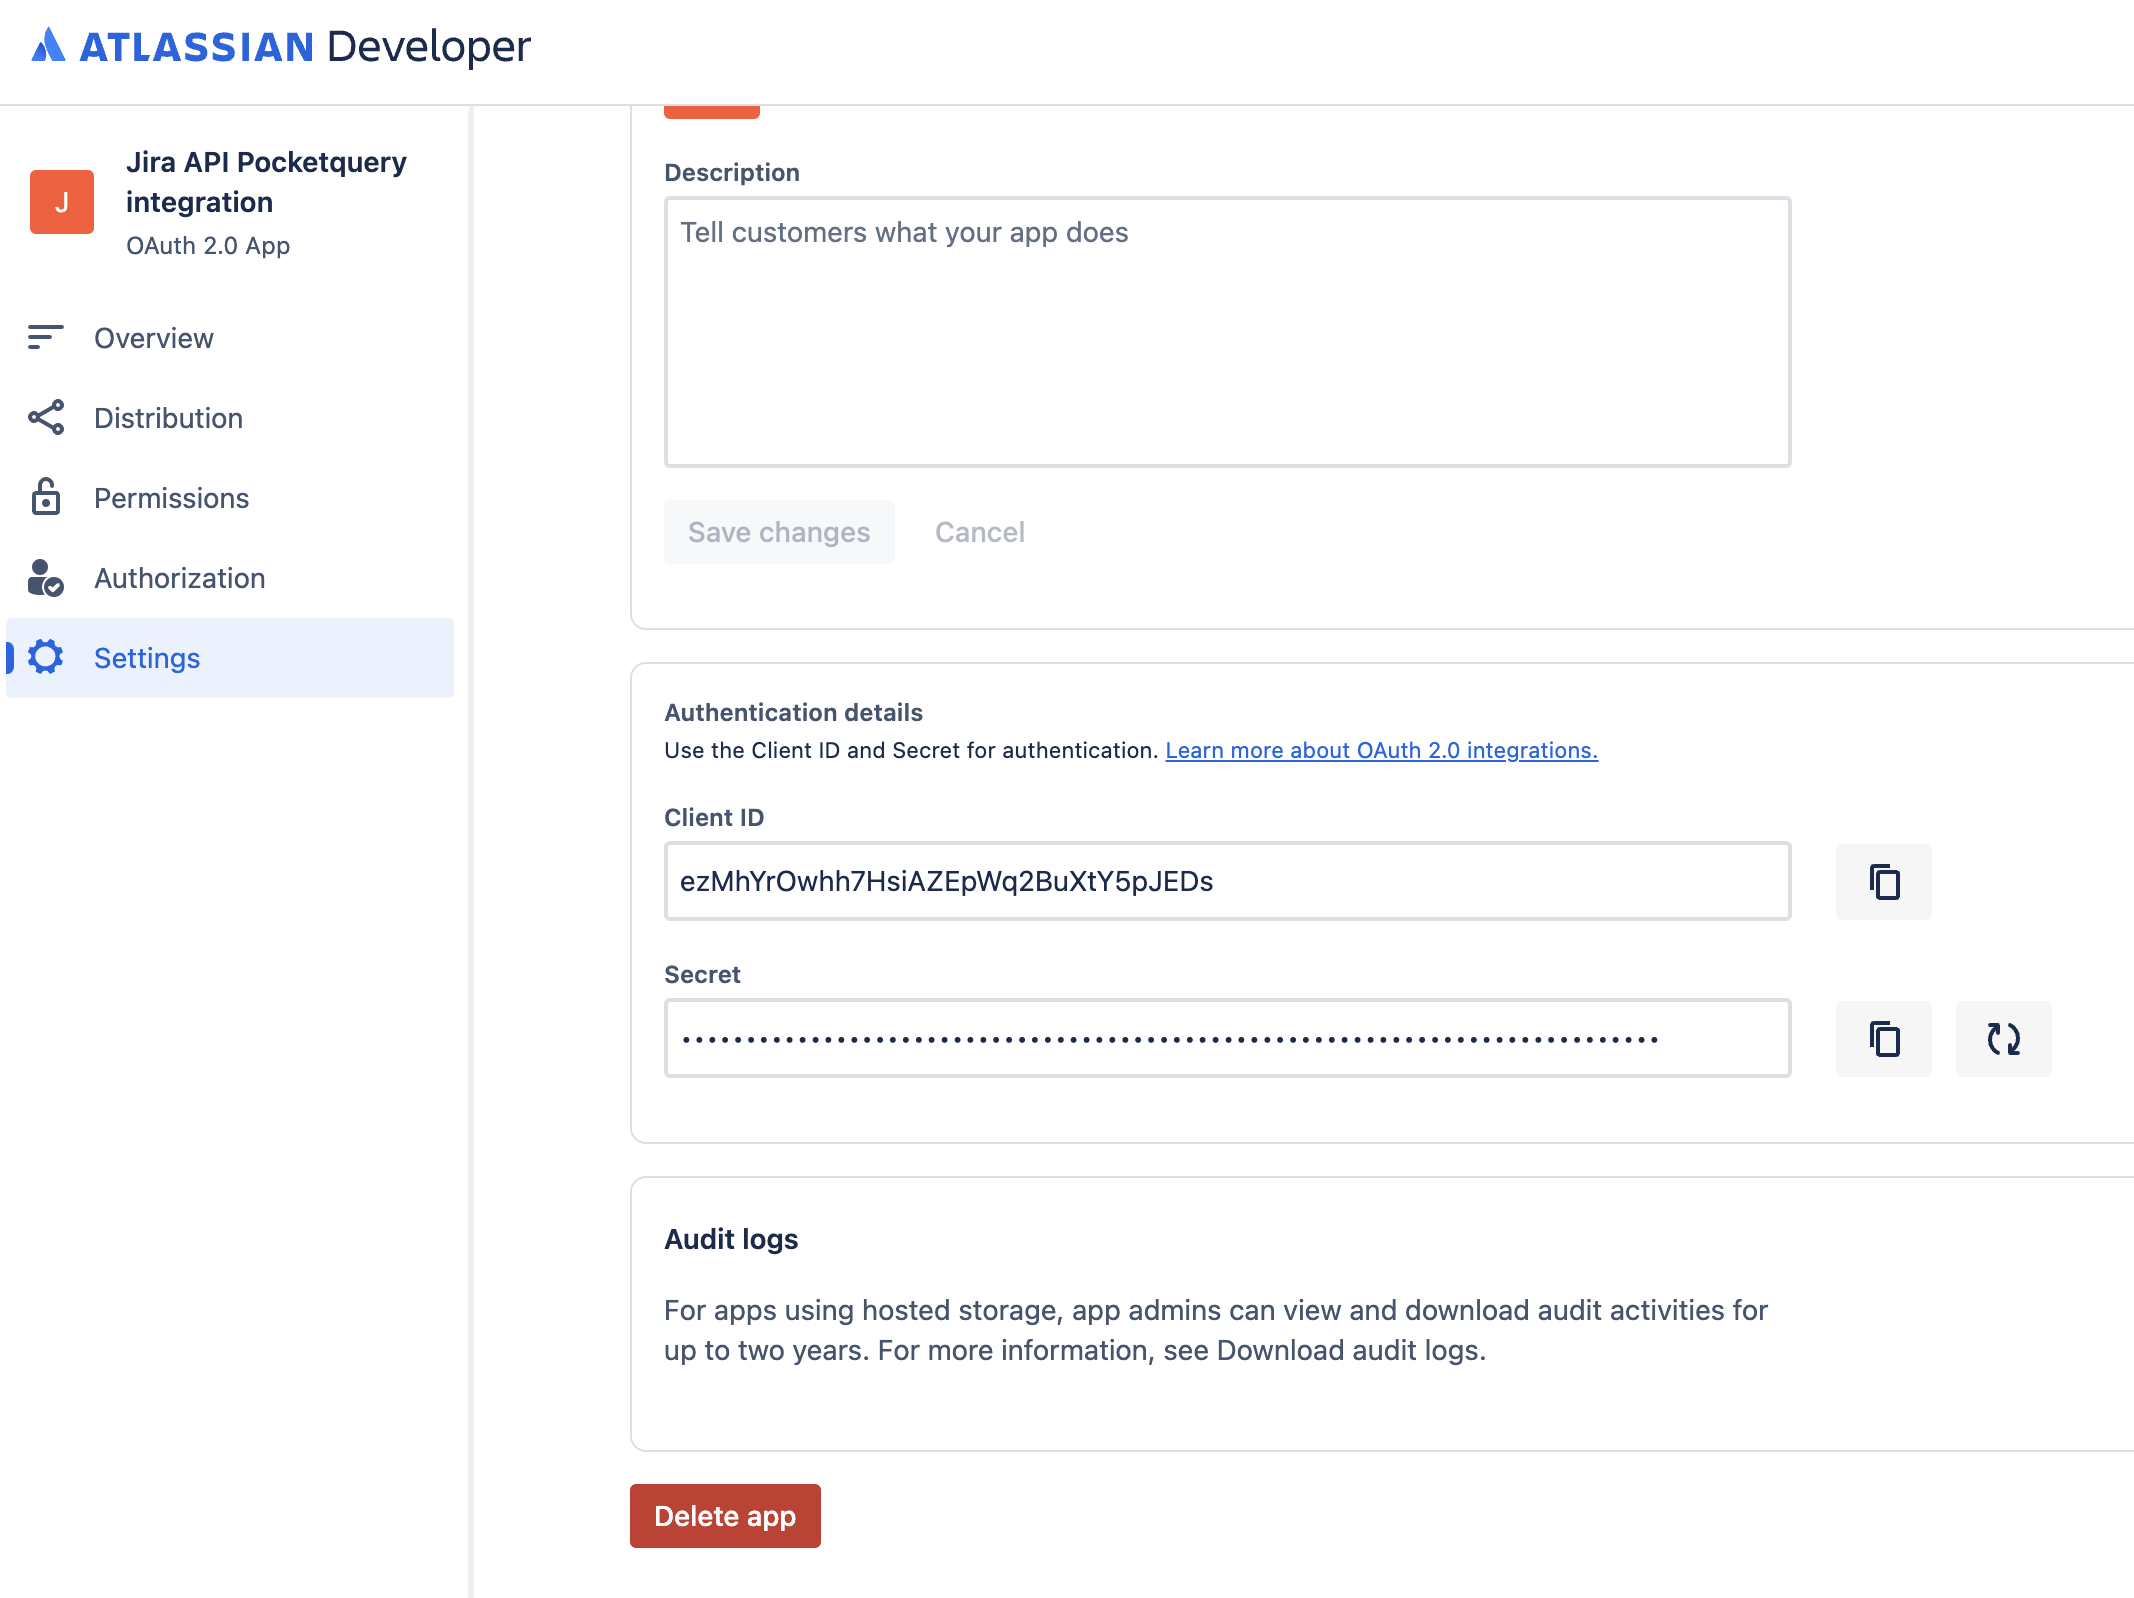
The final step in obtaining all the necessary information is to manually retrieve the Access Token and the Refresh Token. To do this, enter your Client ID, Client Secret and Authorization Code in the following command:
curl --request POST \
  --url 'https://auth.atlassian.com/oauth/token' \
  --header 'Content-Type: application/json' \
  --data '{"grant_type": "authorization_code","client_id": "yourclientid","client_secret": "yourclientsecret","code": "the previously obtained auth code","redirect_uri": "https://example.com"}'
-
The Client Secret can be found here:
-
Execute the command in a terminal window. The response will look like this:
{
  "access_token": "...",
  "expires_in": 3600,
  "token_type": "Bearer",
  "refresh_token": "...",
  "scope": "manage:jira-project read:jira-work offline_access"
}
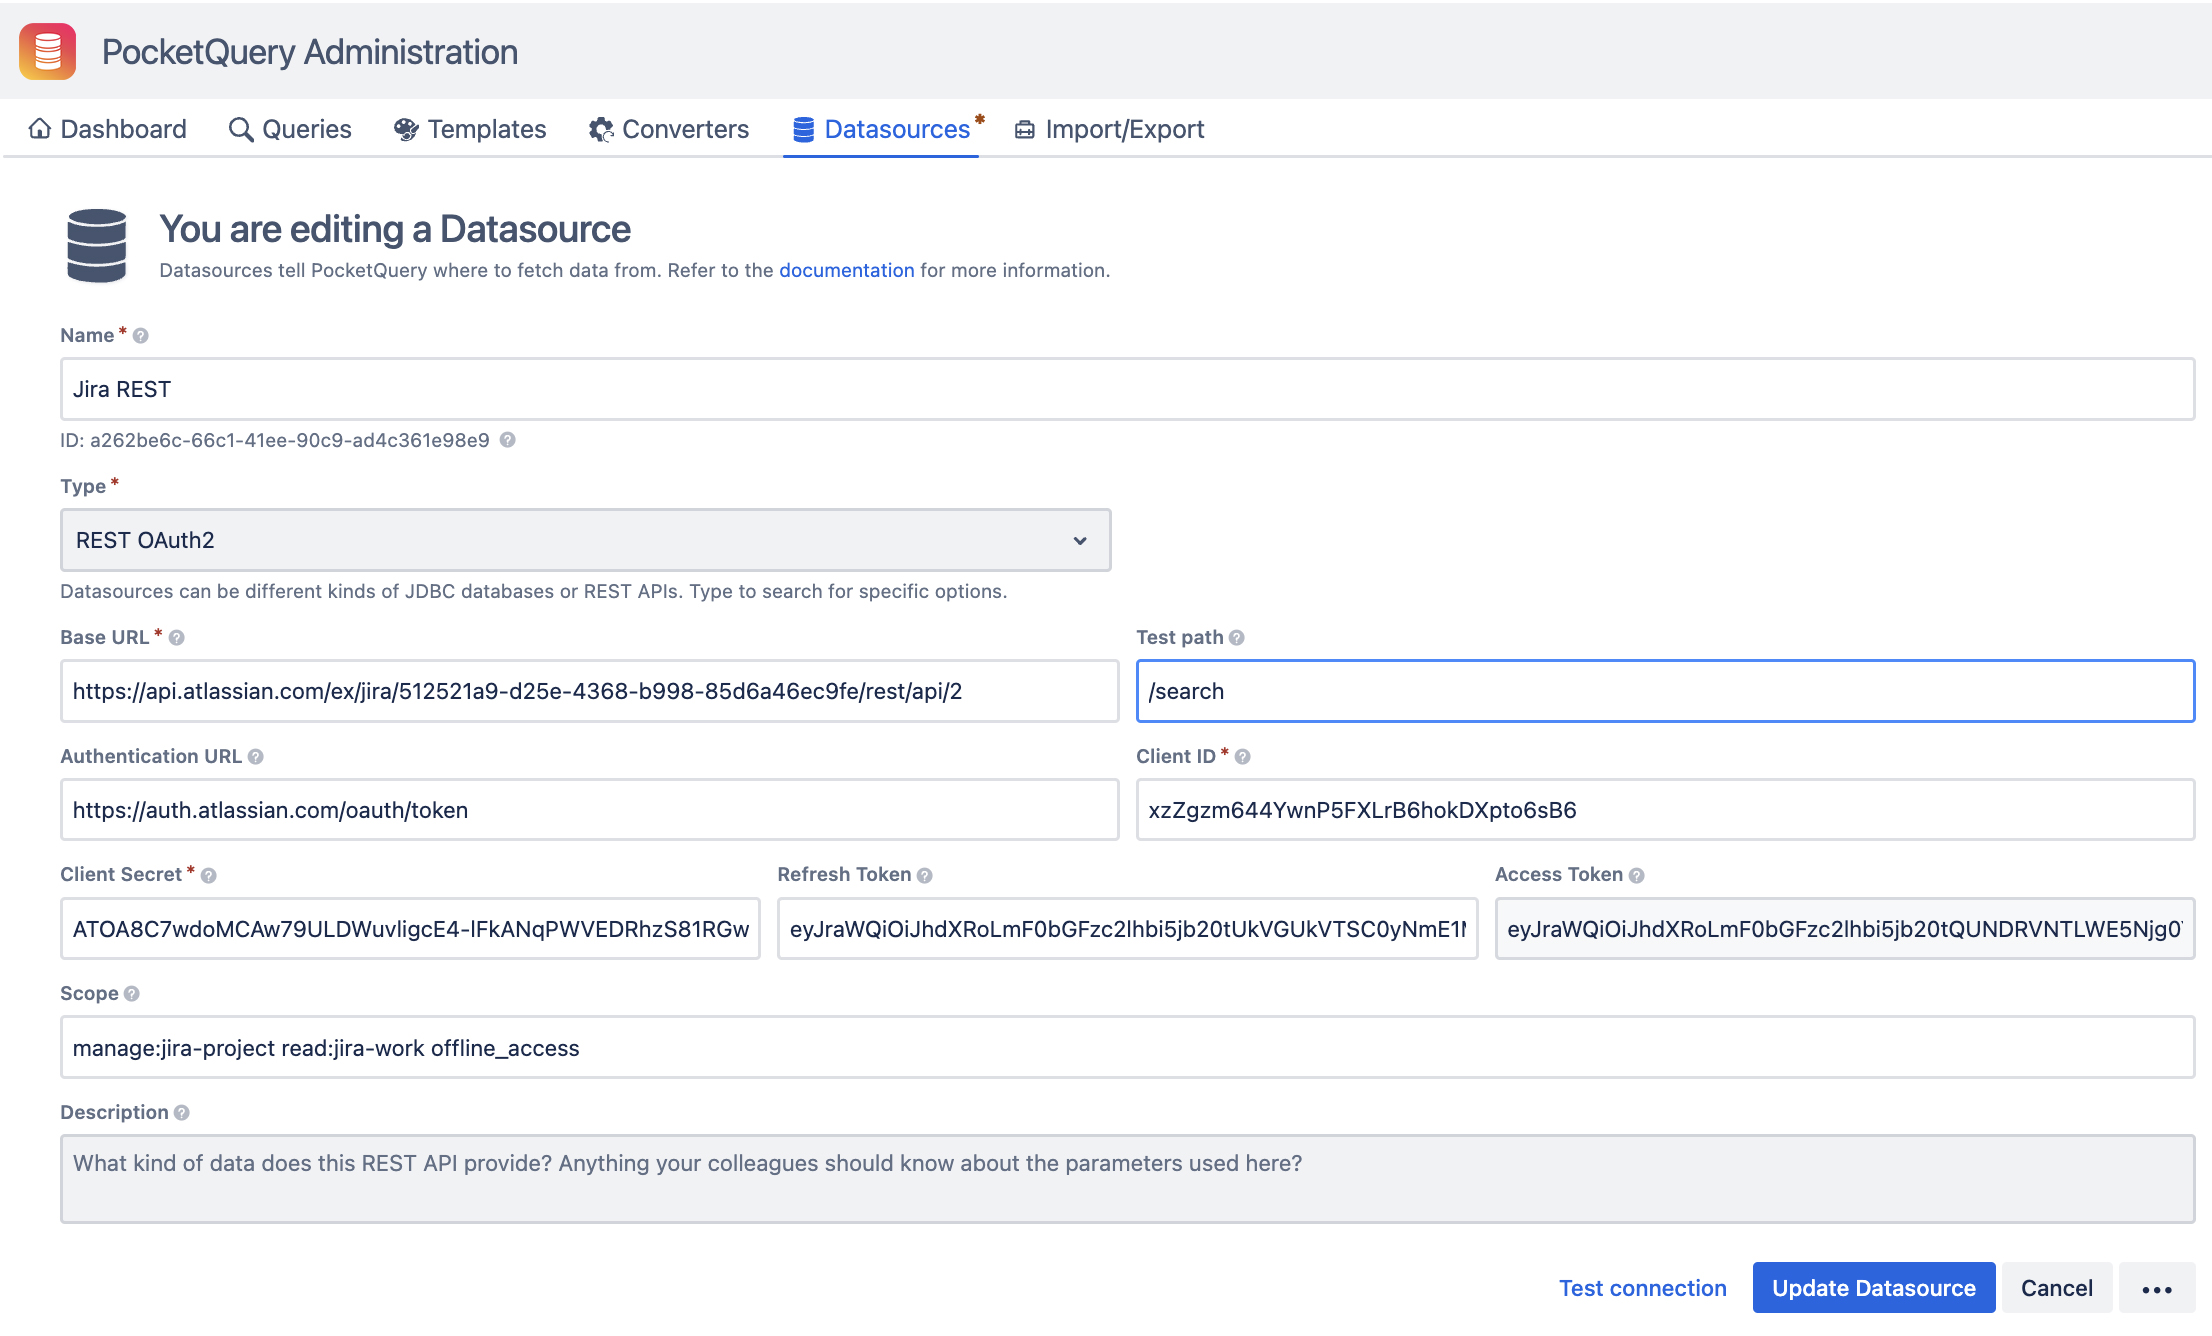
Step 4: Create Datasource
To add the Datasource, you need to bring together all the information from the previous steps:
-
Base URL
https://api.atlassian.com/ex/jira/[SITE_ID]/rest/api/2
Find your SITE_ID athttps://your-site-url.atlassian.net/_edge/tenant_info -
Test path
/search -
Authentication URL
https://auth.atlassian.com/oauth/token -
Client ID Available on your application's settings page.
-
Client Secret Available on your application's settings page.
-
Refresh Token From the previous step's response.
-
Access Token From the previous step's response.
-
Scope From the previous step's response.
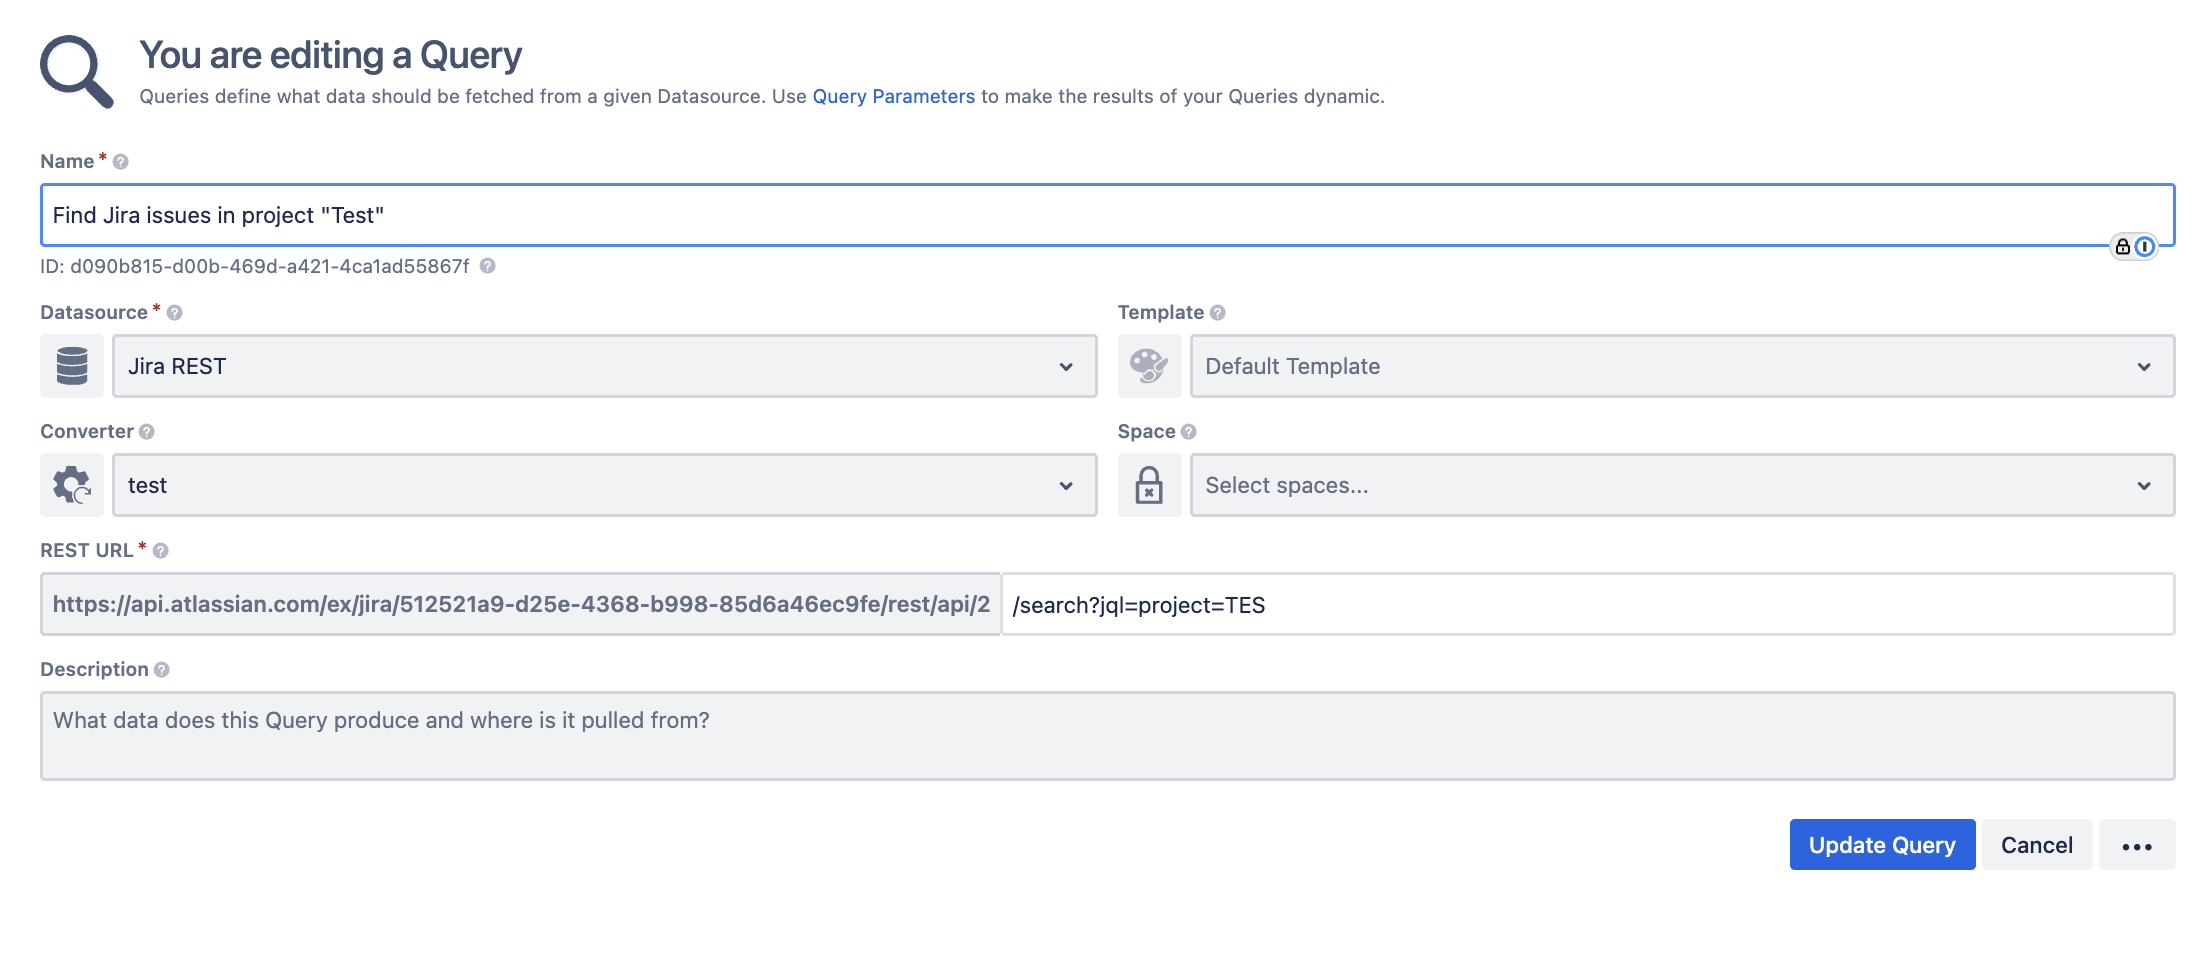
Step 5: Create a Query and a Converter
-
Query: Define your query to retrieve Jira issues:
-
Converter: Use the following JavaScript function to convert JSON data:
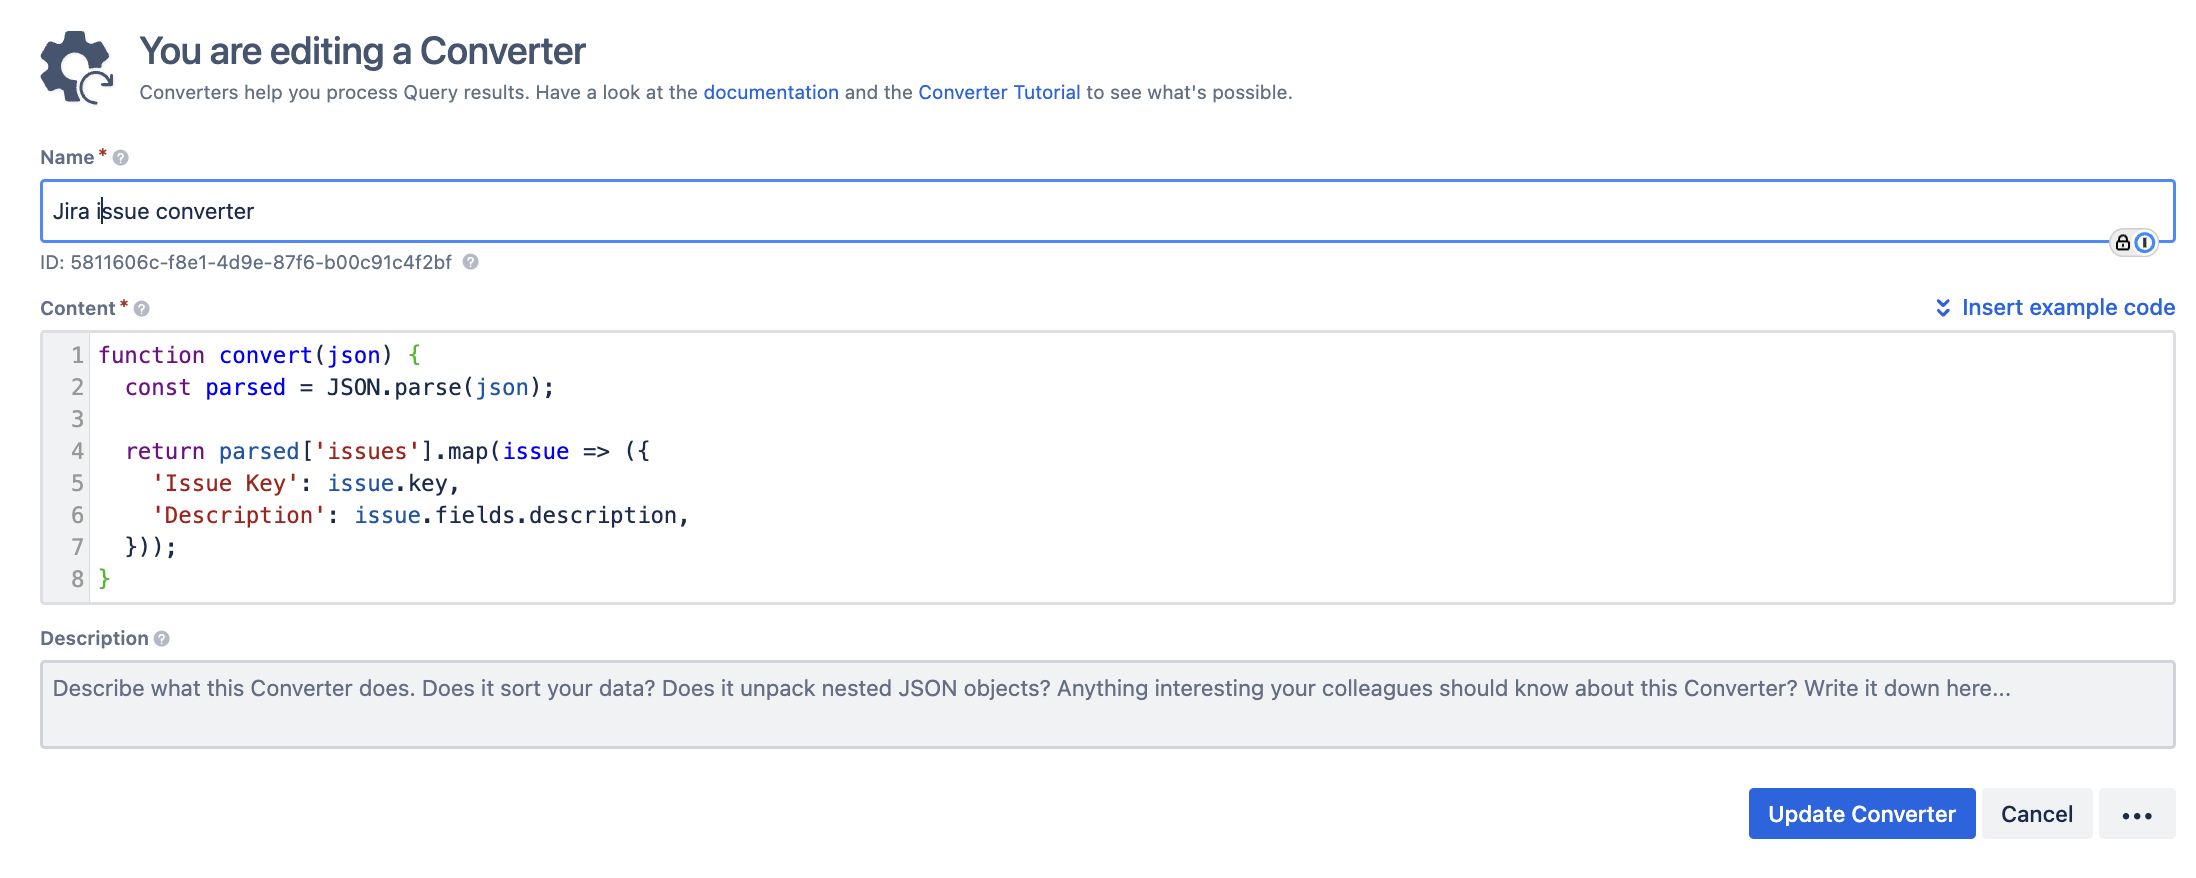
function convert(json) {
  const parsed = JSON.parse(json);

  return parsed['issues'].map(issue => ({
    'Issue Key': issue.key,
    'Description': issue.fields.description,
  }));
}
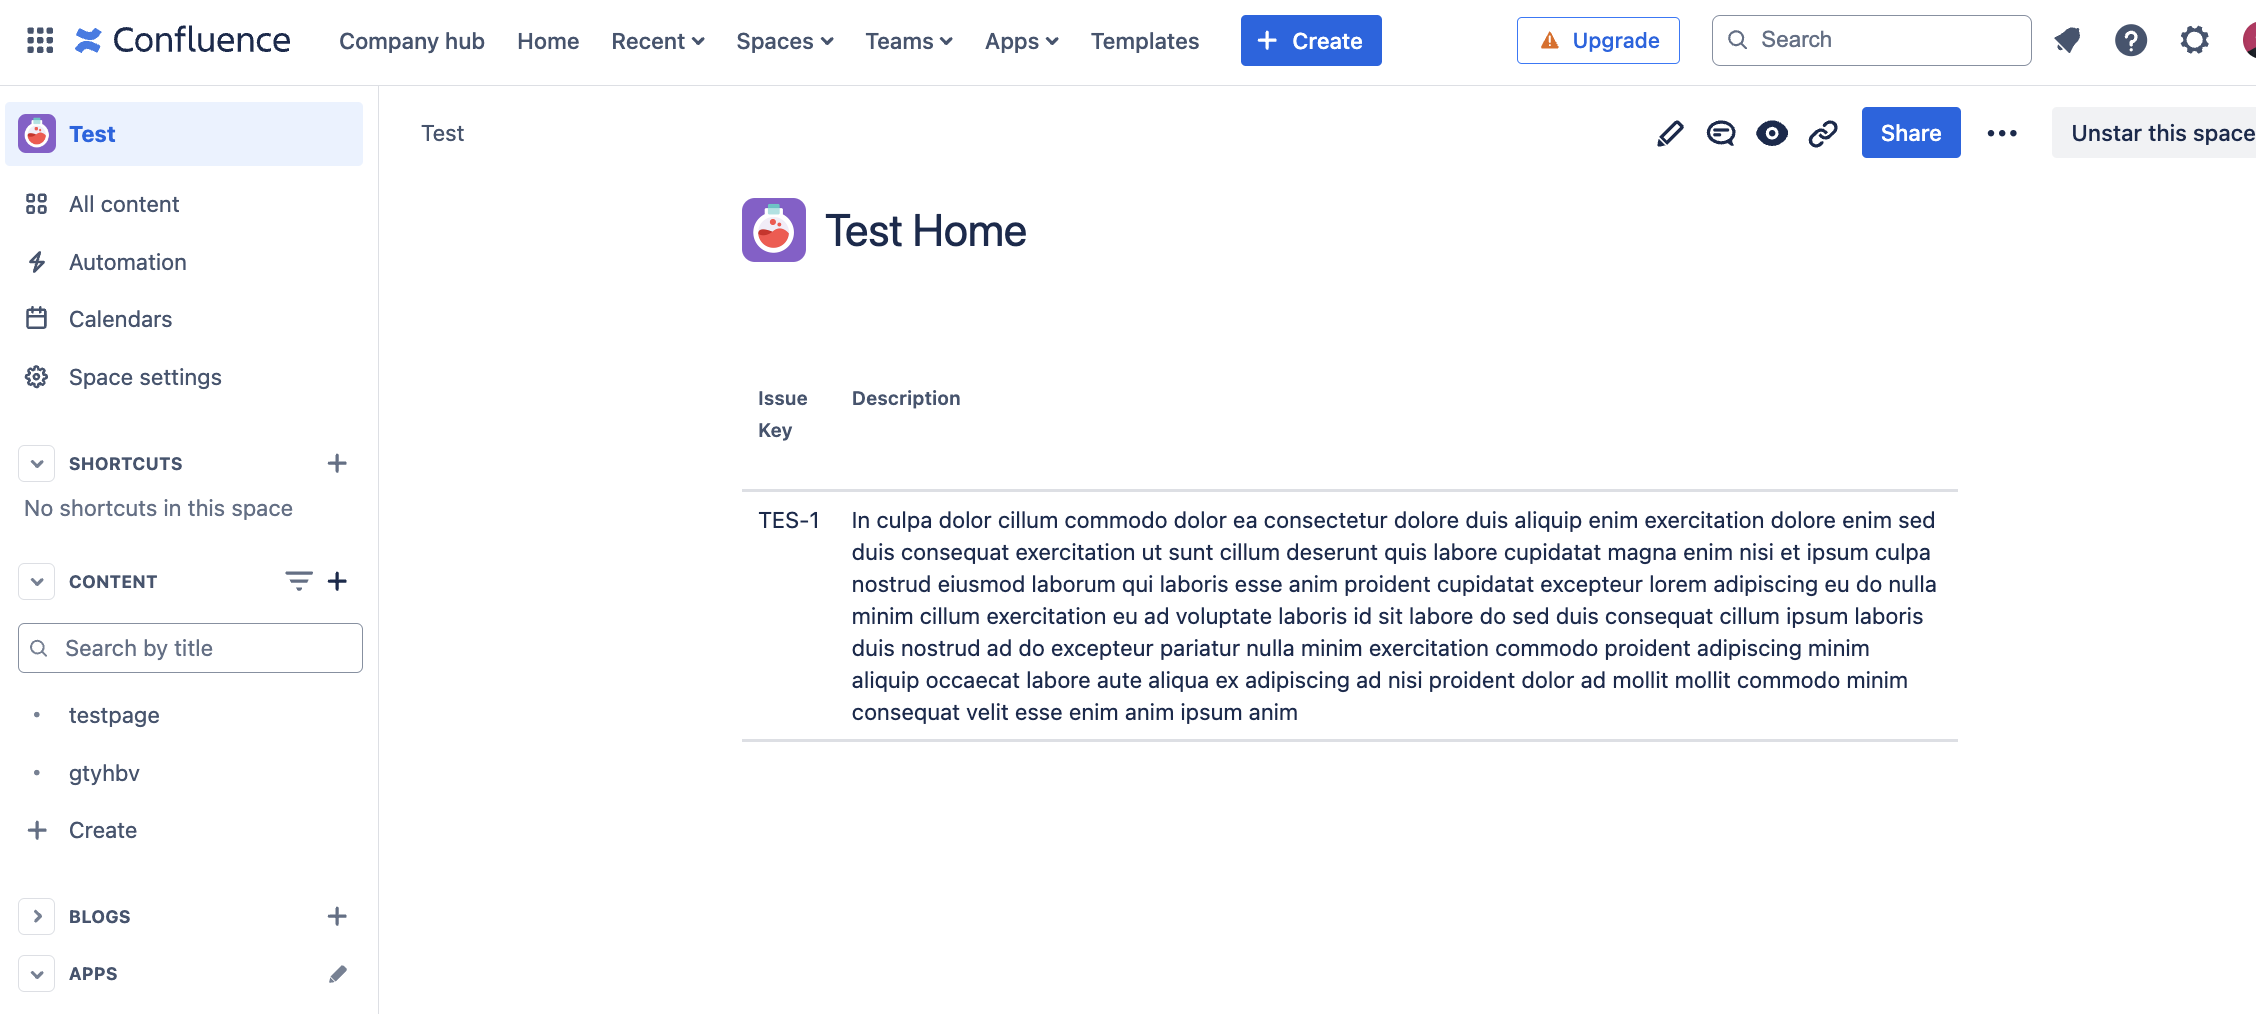
Ready!
That’s it! You can now use the query to view your Jira issues: