Awesome! You are ready to try Page Branching. Follow these steps to create and merge your first branch on Confluence Cloud.
1. Pick a page to branch
Open any Confluence page in a space where Page Branching is enabled. You need permission to create and edit pages in that space (see Administrator Guide for details).
2. Create the branch
-
Make sure you are in view mode (not the editor).
-
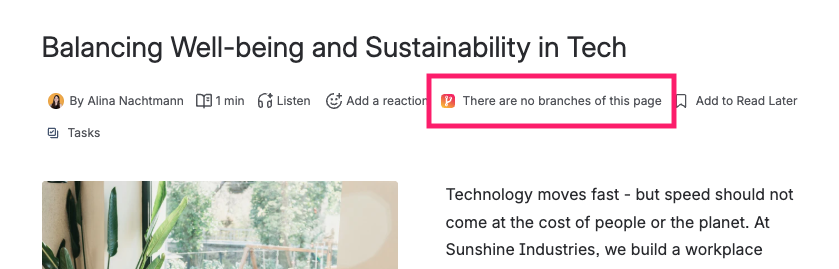
Below the page title, open the Page Branching modal:
-
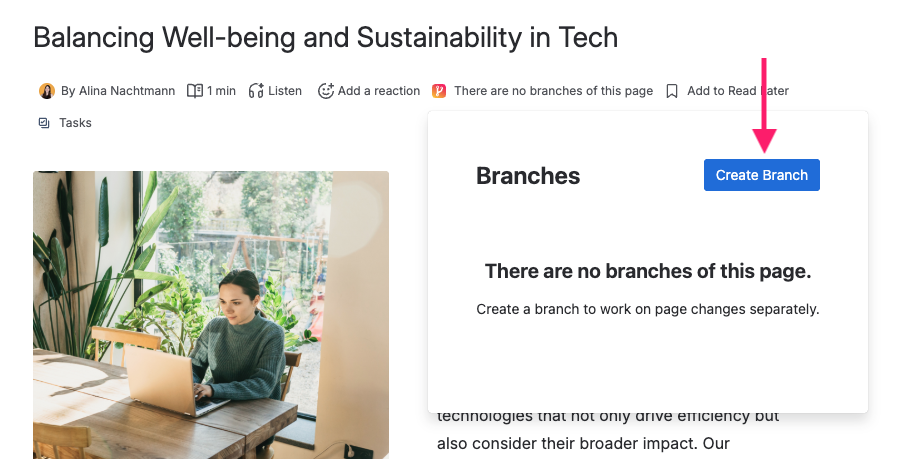
Click Create branch:
-
Enter a clear branch name (for example
draft-q2-update) and confirm: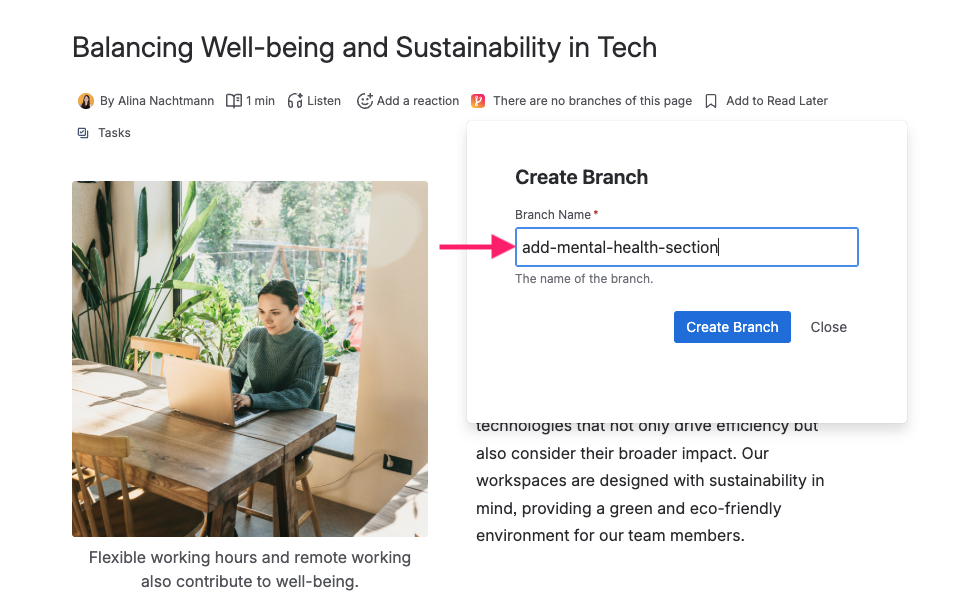
Confluence opens your new branch page. It starts as a copy of the original page body. Edit the branch freely – the original page stays unchanged.
3. Edit the branch
Click Edit and change the branch content. When you save, only the branch is updated.
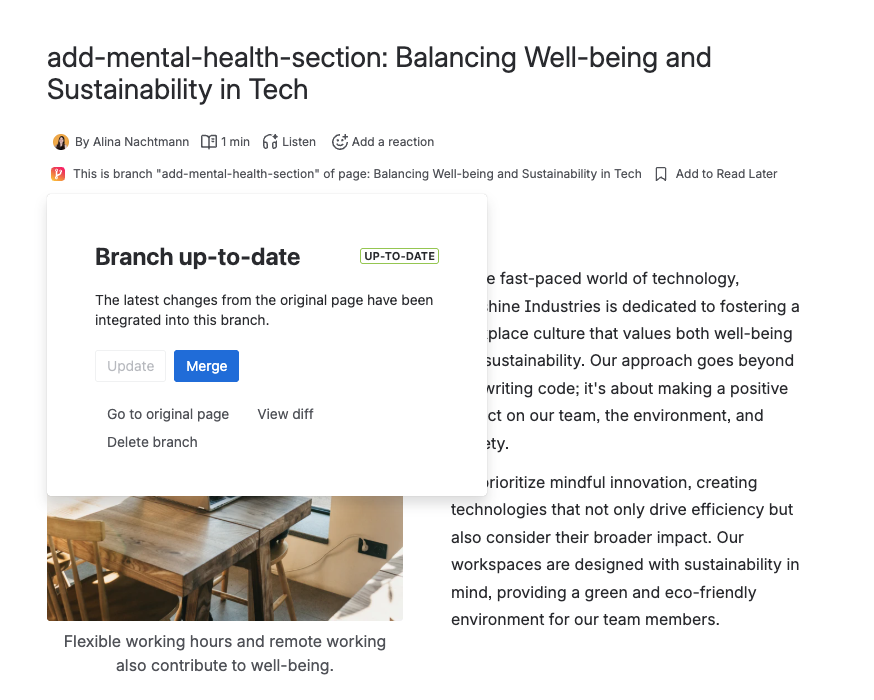
Check the Page Branching modal on the branch page: it shows whether your branch is up to date with the original. If someone edits the original while you work on the branch, use Update (sync) from the byline before merging.
4. Merge back to the original
-
From the branch modal, click Merge.
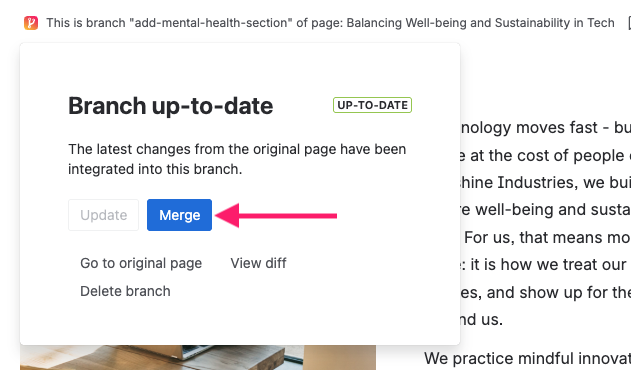
-
Review the confirmation and complete the merge.
Your changes are applied to the original page. Depending on space settings, the branch is archived under Branches or deleted after merge. You did it! 🎉
5. What if merge is blocked?
If the original page and the branch both changed the same content, Page Branching may report a merge conflict. Don’t worry – see Merge Conflicts for how to update the branch and merge successfully.
Next steps
-
User Guide – all branching actions in detail
-
Comparing branches – see what changed before you merge
-
Merge Conflicts – understand and resolve merge conflicts