
Awesome — Diary is installed and you are ready to try it. Follow these steps to insert a Diary and write your first entry.
1. Insert the Diary macro
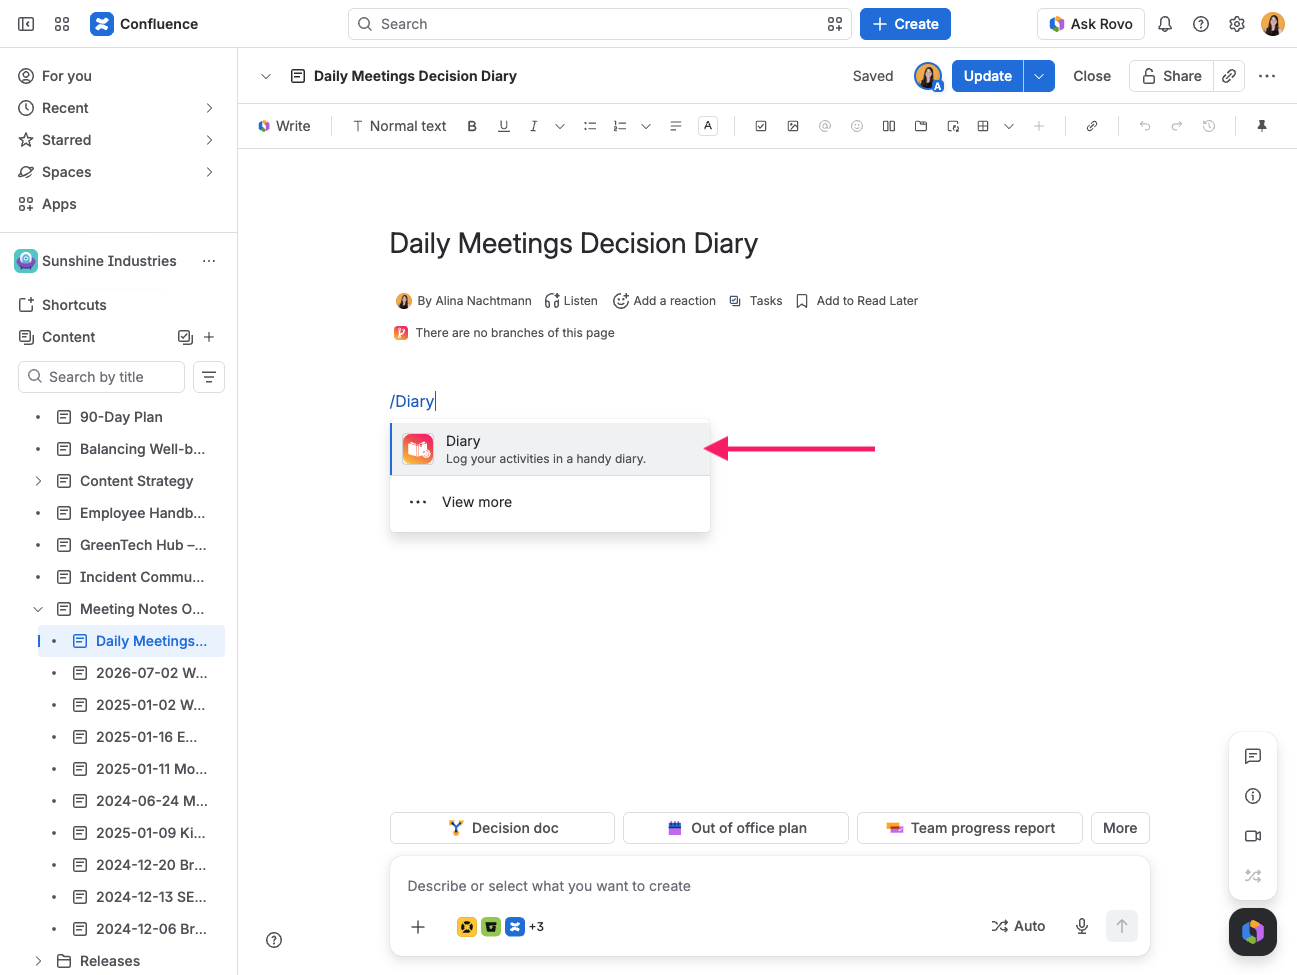
Open any page you can edit and click Edit. Type /Diary and pick Diary from the list, or insert it from the macro browser.
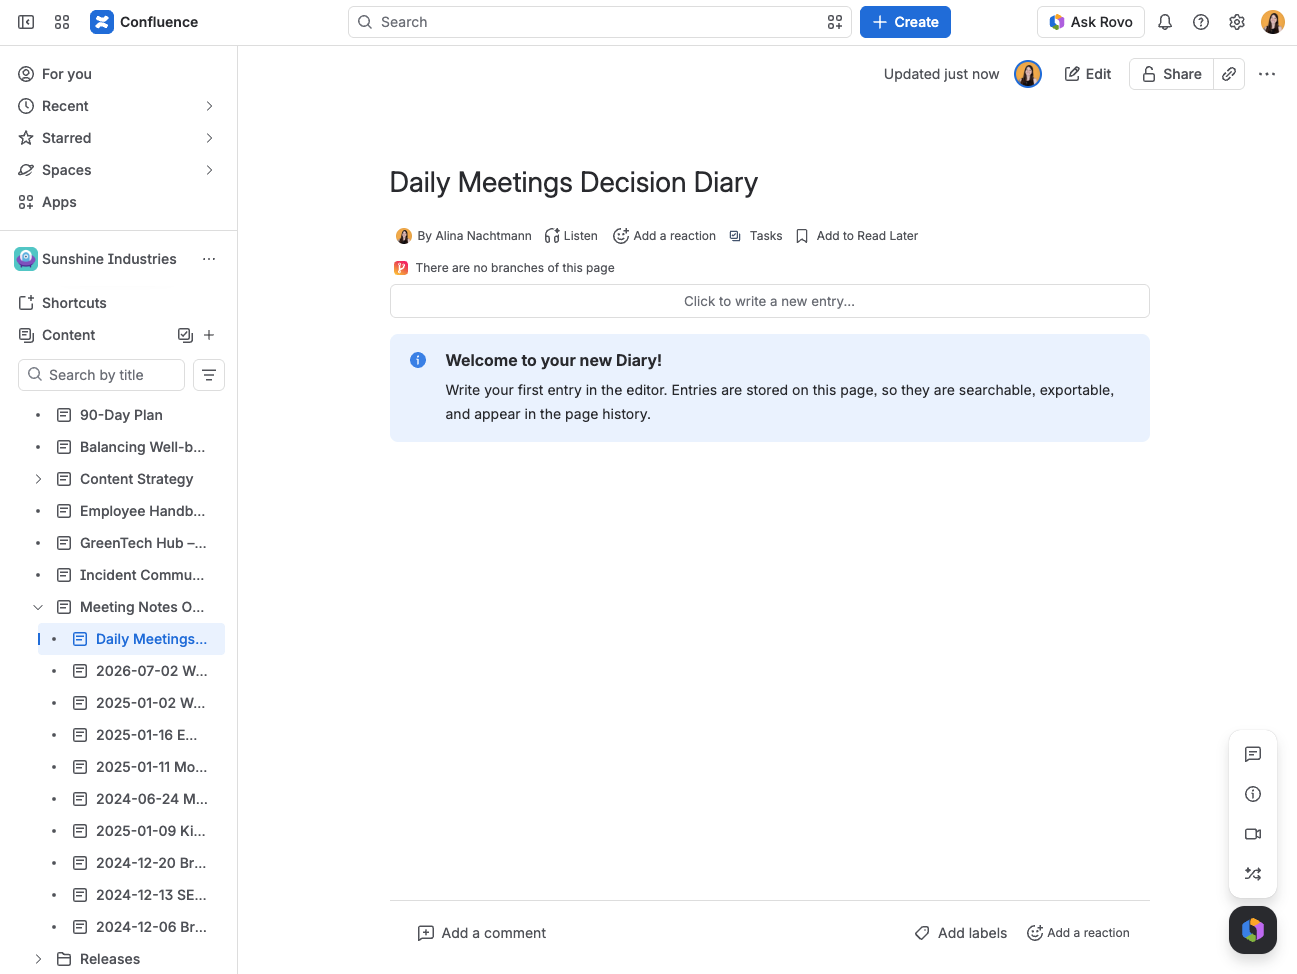
Publish the page. You will see a freshly created Diary with no entries and a short welcome message.
2. Write the entry
Make sure you are in view mode - this is the point of Diary, so you never need the page editor to maintain your Diary.
-
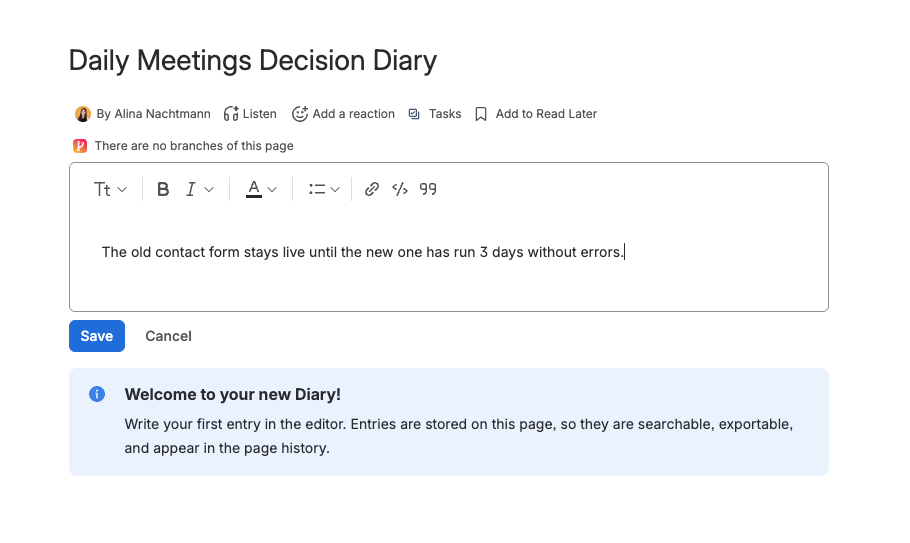
Click Click to write a new entry… above the diary.
-
Click once more inside the editor that opens, and start typing.
-
Click Save.
Your entry appears immediately, stamped with today's date, the current time, and your name. You never left the page. 🎉
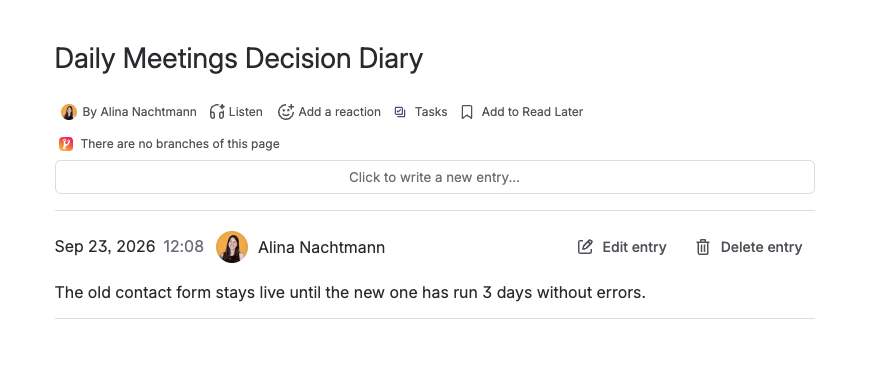
Diary takes the date and time from your browser's clock, so an entry written late at night carries your local date rather than a server's.
3. Fix a typo
Every entry you may change carries an Edit entry and a Delete entry button. Click Edit entry, change the words, and click Save - again without leaving view mode.
Deleting asks you to confirm first. Nothing is lost for good either way: every change is a new page version, so you can always revert the page.
4. Make it yours
In page edit mode, click the Diary macro and choose the configuration (pencil) button to change how it behaves. The two settings worth trying first:
-
Diary style - switch from Simple to Bubble to see each entry boxed beside its author's avatar.
-
Order Of Entries - newest first (the default) or oldest first, depending on whether your Diary reads like a changelog or a journal.
All ten settings are described in Macro Settings.
Next steps
-
Inserting the Diary Macro - the macro in detail
-
Creating, Editing, and Deleting Entries - every entry action, in full
-
Macro Settings - all ten settings