PocketQuery allows you to connect directly to Salesforce’s REST API and query your CRM data with a wide range of objects, such as Contacts, Accounts, Opportunities, and Leads. You can use PocketQuery to fetch, filter, and explore this data just like any other data source.
This part just walks you through adding the data source. For the complete tutorial on showing Salesforce contacts in Confluence, check out: Salesforce Contacts [REST OAuth2]
Step 1 : Create a Developer Edition account
Create a Developer account in Salesforce if you haven't already: https://www.salesforce.com/form/developer-signup/?d=pb
Step 2: Set up a External Client App
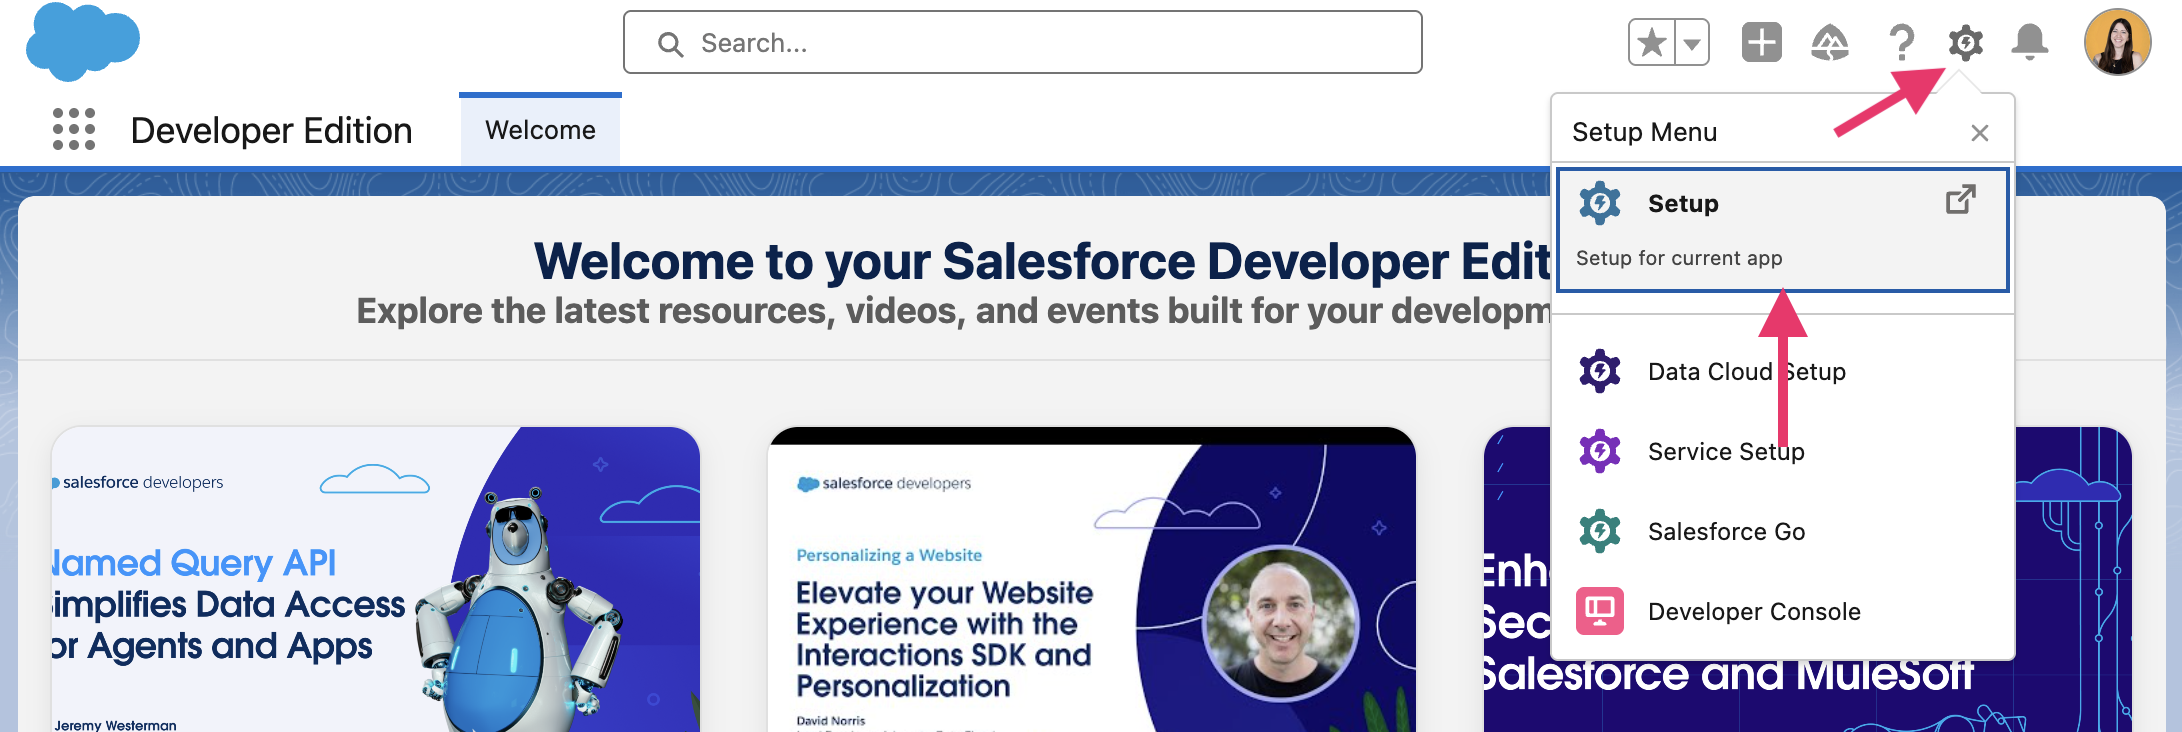
Log in to your Salesforce Developer account and go to Settings > Setup:
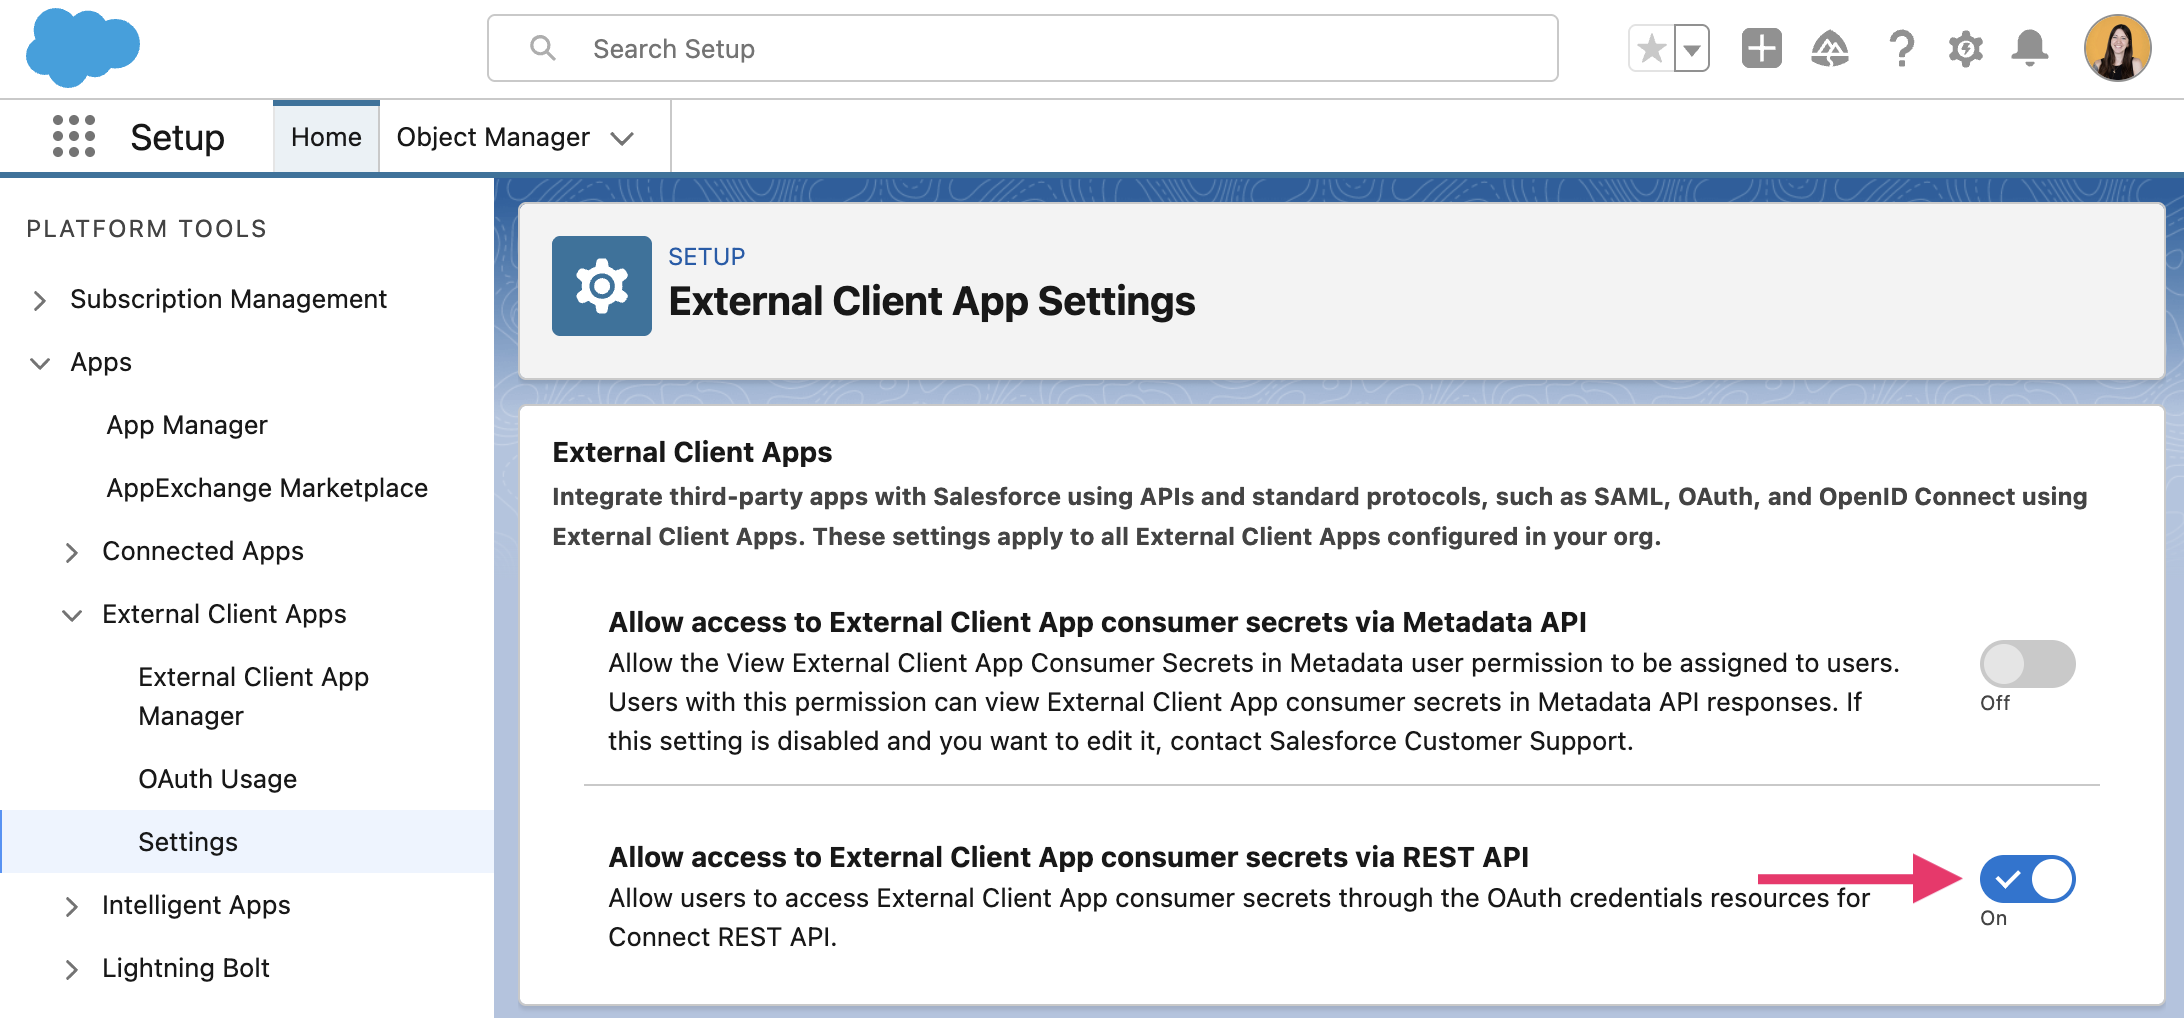
Use the sidebar navigation to scroll down to Apps > External Client Apps > Settings and enable Allow access to External Client App consumer secrets via REST API:
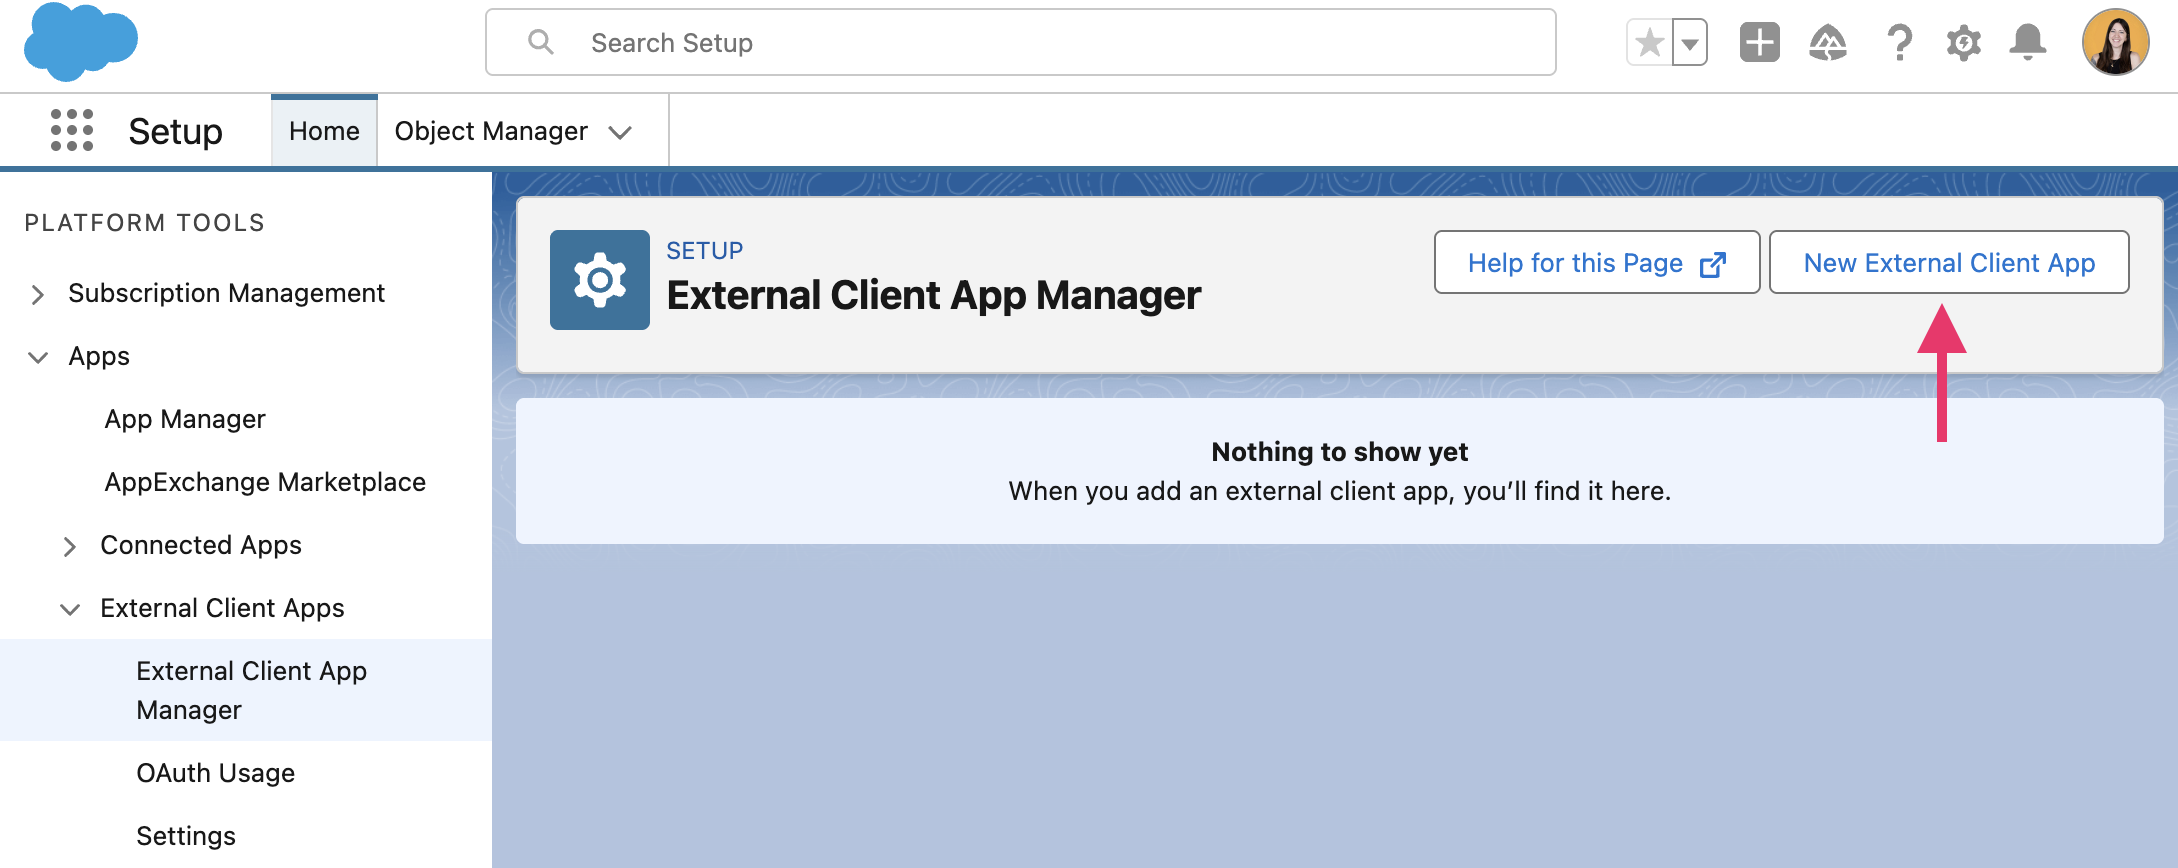
In the sidebar go to Apps > External Client Apps > External Client App Manager and click the New External Client App button:
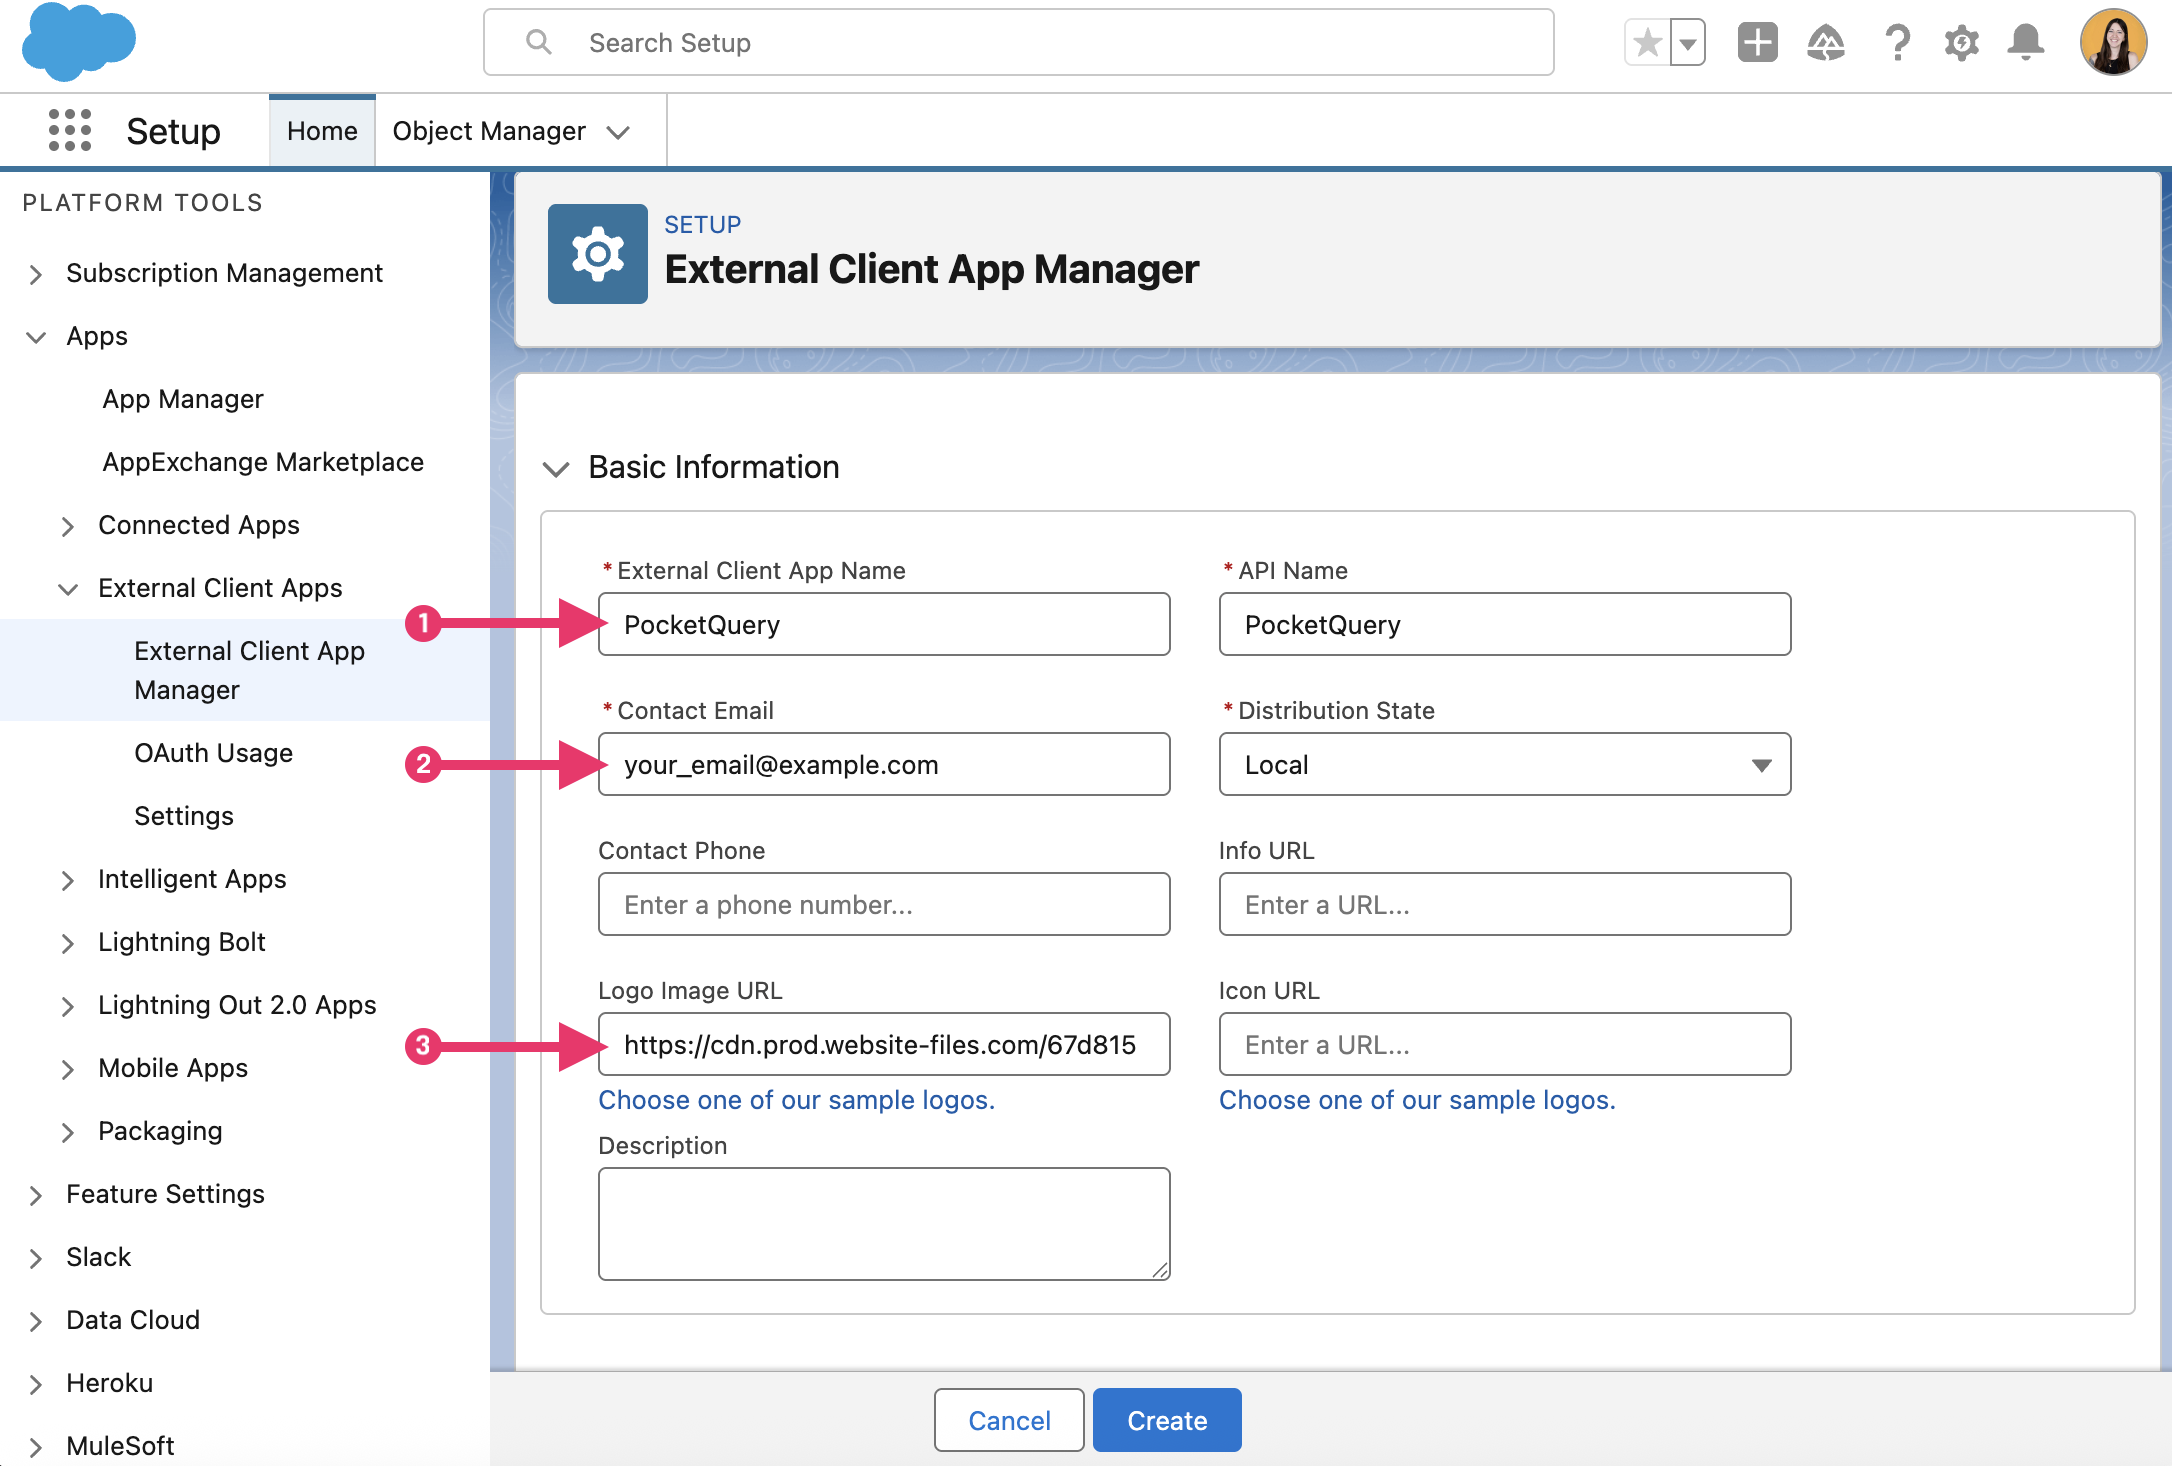
Fill out the form:
|
# |
Field description |
Value |
|---|---|---|
|
1 |
External Client App Name |
|
|
|
API Name |
Filled out automatically |
|
2 |
Contact Email |
Enter your Email |
|
|
Distribution State |
Keep “Local” |
|
3 |
Logo Image URL (optional) |
Use this link if you’d like the PocketQuery logo to be displayed |
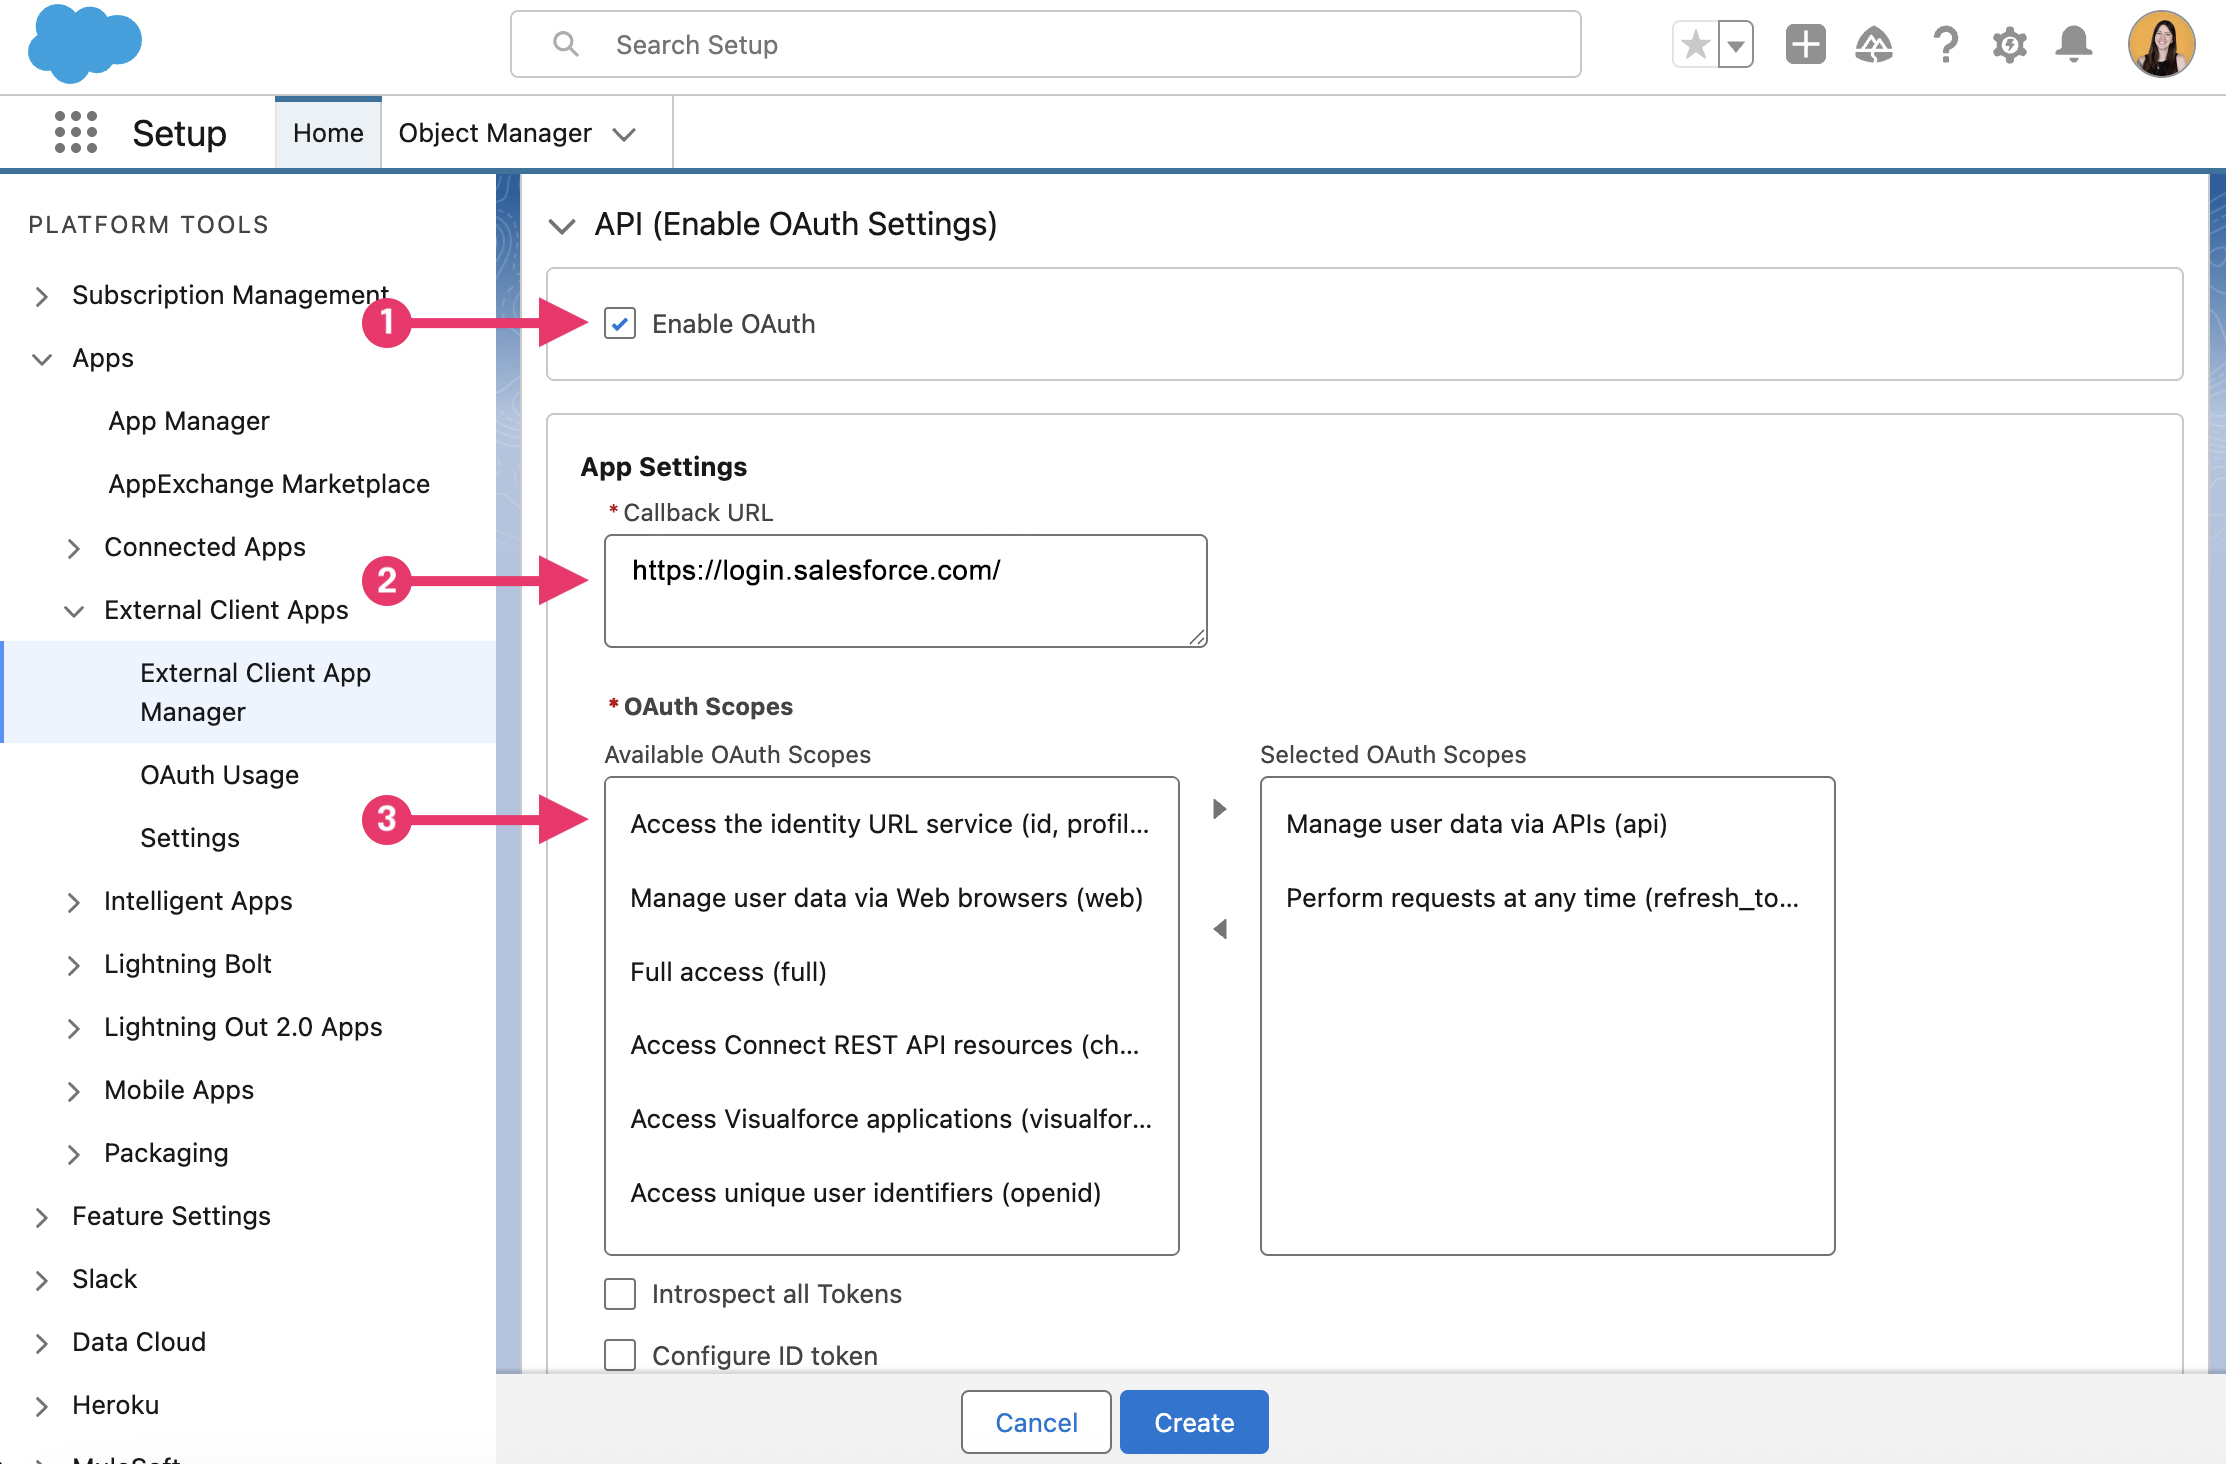
Scroll down to API (Enable OAuth Settings) and configure the following settings:
|
# |
Field description |
Value |
|---|---|---|
|
1 |
Enable OAuth |
Tick checkbox |
|
2 |
Callback URL |
https://login.salesforce.com/ |
|
3 |
OAuth Scopes |
Choose:
|
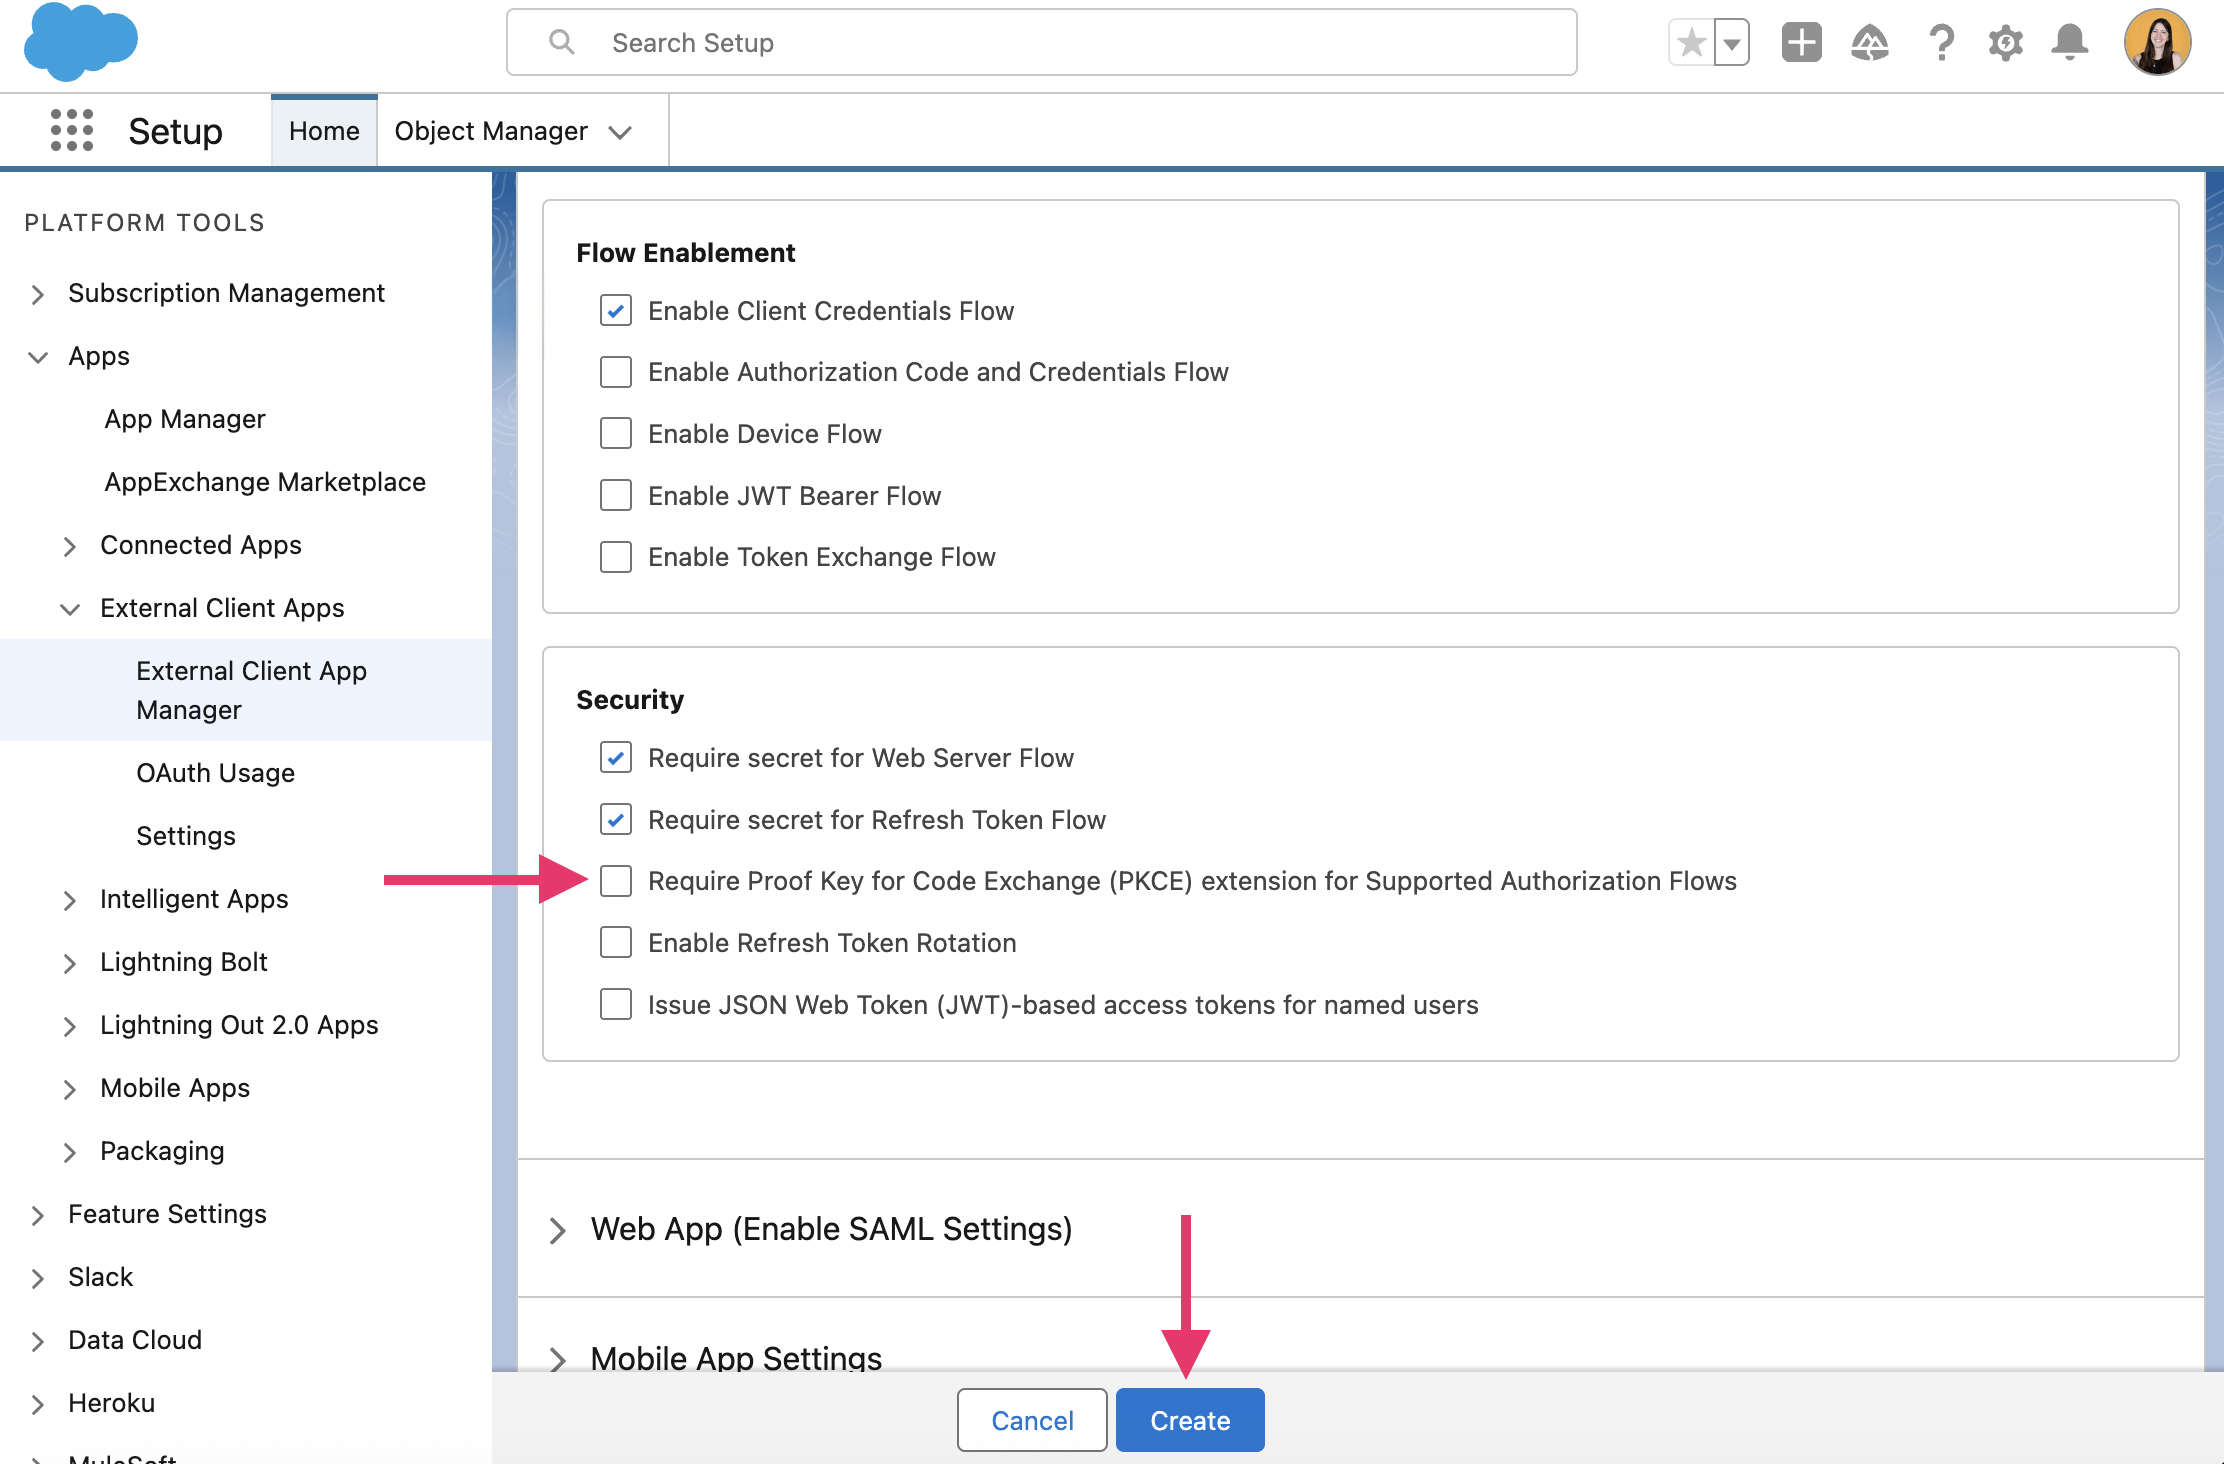
Scroll down once more and untick Require Proof Key and click Create:
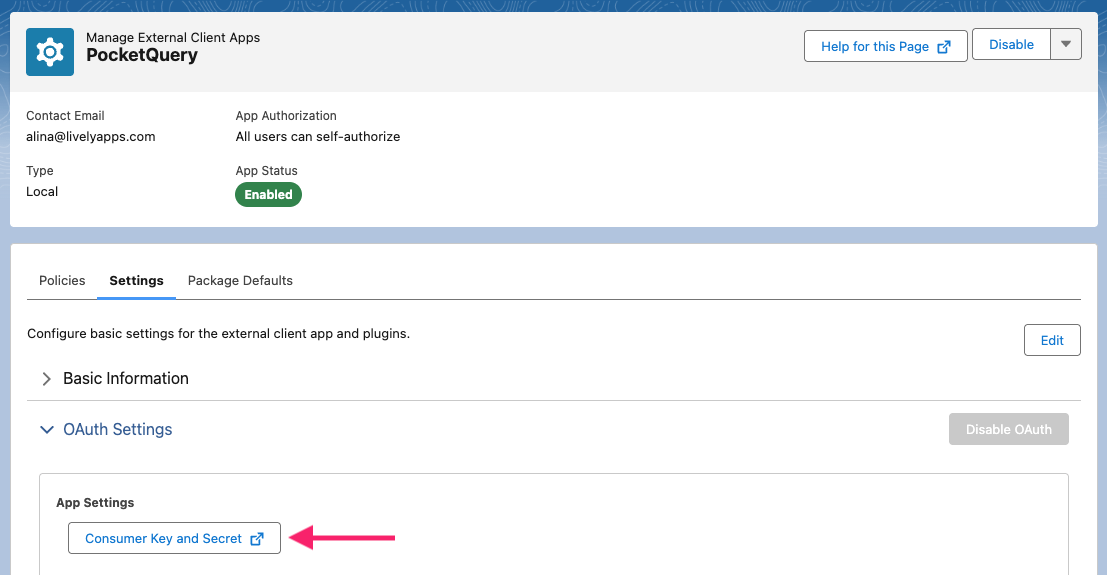
You will then be redirected to the overview of your newly created app. Click the Consumer Key and Secret button to receive your credentials. You will need them in Step 3.
Step 3: Create a Refresh Token
In this example, we’ll use Postman to obtain a Refresh Token, but you can use any OAuth 2.0 Authorization Code flow you prefer.
In Postman:
-
Open a new request → Authorization tab.
-
Type =
OAuth 2.0 -
Click Get New Access Token.
-
Make sure the fields are:
|
Field |
Value |
|---|---|
|
Auth URL |
|
|
Access Token URL |
|
|
Client ID |
Your Salesforce Client ID/Consumer Key generated in Step 2 |
|
Client Secret |
Your Salesforce Client Secret generated in Step 2 |
|
Scope |
|
|
Grant Type |
|
|
Callback URL |
|
|
Client Authentication |
“Send as Basic Auth header” or “Send client credentials in body” (either works) |
-
Click Get New Access Token, log in to Salesforce, and click Allow.
After successful authorization, you’ll see a token response like this in Postman - the refresh_token field is what you need.:
{
  "access_token": "00Dxx0000000001!AQkAQ...",
  "refresh_token": "5Aep861FJ0Txxxxxx",
  "instance_url": "https://yourInstance.my.salesforce.com",
  "id": "https://login.salesforce.com/id/00Dxx0000000001/005xx0000012345",
  "token_type": "Bearer",
  "issued_at": "1731000000000",
  "signature": "D3Kp...",
  "scope": "api refresh_token"
}
Step 4: Create a Datasource in PocketQuery
Open PocketQuery Administration → Datasources, and create a new REST datasource:
|
Field |
Value |
|---|---|
|
Name |
|
|
Type |
|
|
Base URL |
Replace <YOUR-URL> with the URL you see in your browser, when creating/editing your External Client App. |
|
Authentication URL |
|
|
Client ID |
Your Salesforce Client ID/Consumer Key generated in Step 2 |
|
Client Secret |
Your Salesforce Client Secret generated in Step 2 |
|
Refresh Token |
Your Refresh Token generated in Step 3 |
You can now test your connection by clicking the Test connection link at the bottom. If everything works as expected, click Create Datasource.
That’s it! Now you can use your Datasource in your Queries.
This part just walks you through adding the data source. For the complete tutorial on showing Salesforce contacts in Confluence, check out: Salesforce Contacts [REST OAuth2]